How to Use Embroidery in the Design Tool
September 29, 2026 · Updated
Start by choosing an embroidery-compatible style from our Catalog to start creating custom embroidered text in the Design Tool. This guide will walk you through each step of the embroidery design process.
To get started:
To create an embroidery design, first select a product that supports Embroidery. You can enter the Design Tool in any of the following ways:
- Filter embroidery-compatible products in the Catalog and click Design directly.
- Open a product detail page, select Embroidery under Technique, and click Design Now.
- Enter the Design Tool using another available technique, then switch to Embroidery from Product → Technique, provided the product supports embroidery.
Note: The Embroidery option will only appear for compatible products.
Step 1: Find an Embroidery Product
From our Catalog:
Click + Add Filter → Decoration Method → Select Embroidery
Then choose a product from the filtered results.
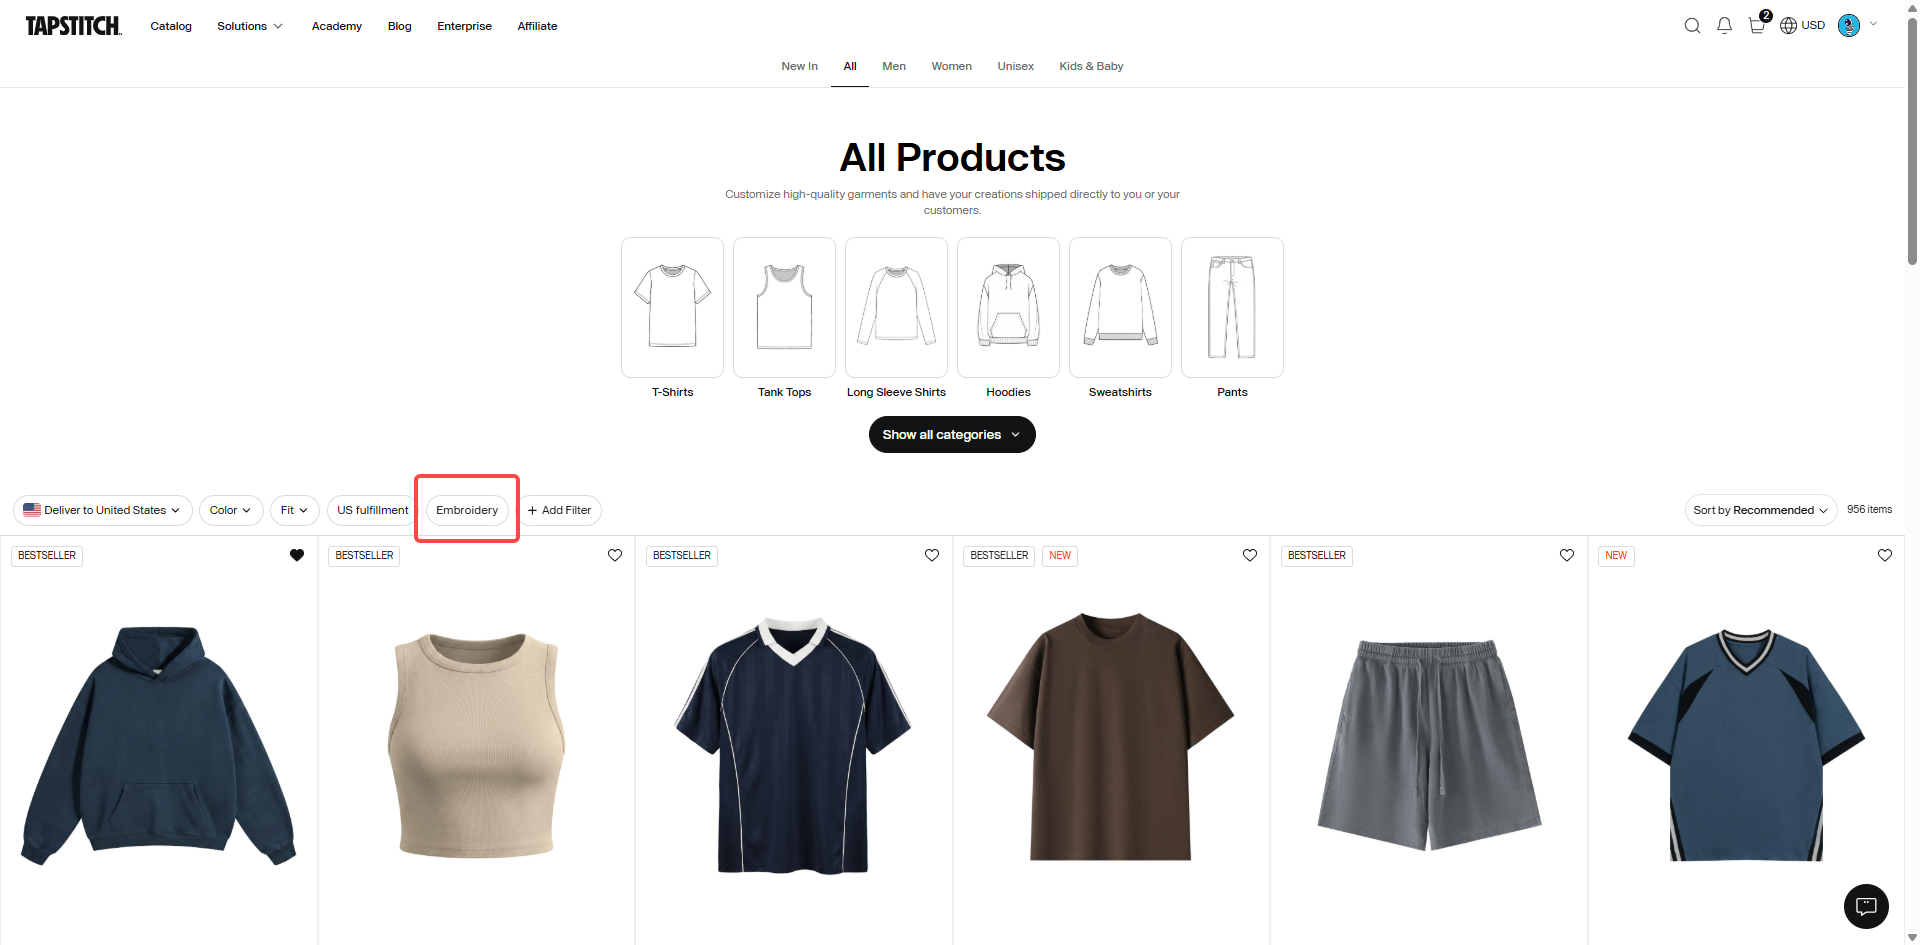
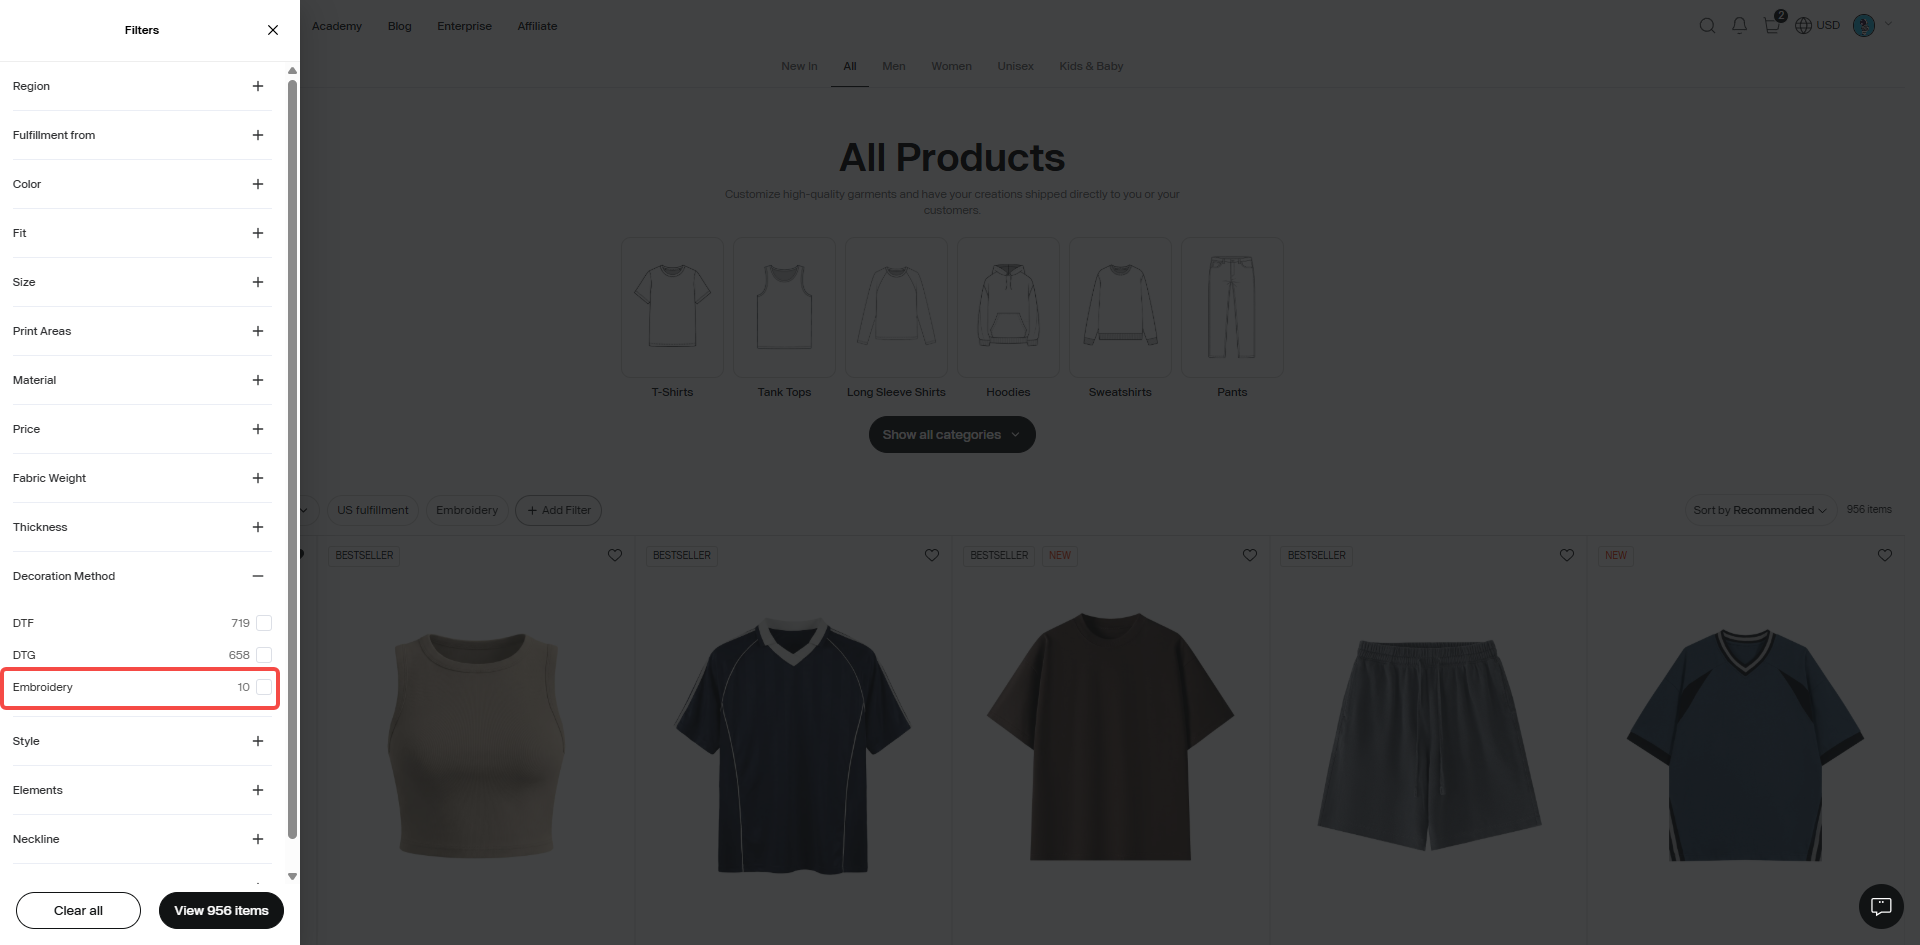
Step 2: Enter or Switch to the Embroidery Technique
Option 1: Start from the Catalog
After filtering for embroidery-compatible products, click Design on the product card. The product will open directly in the embroidery design experience.
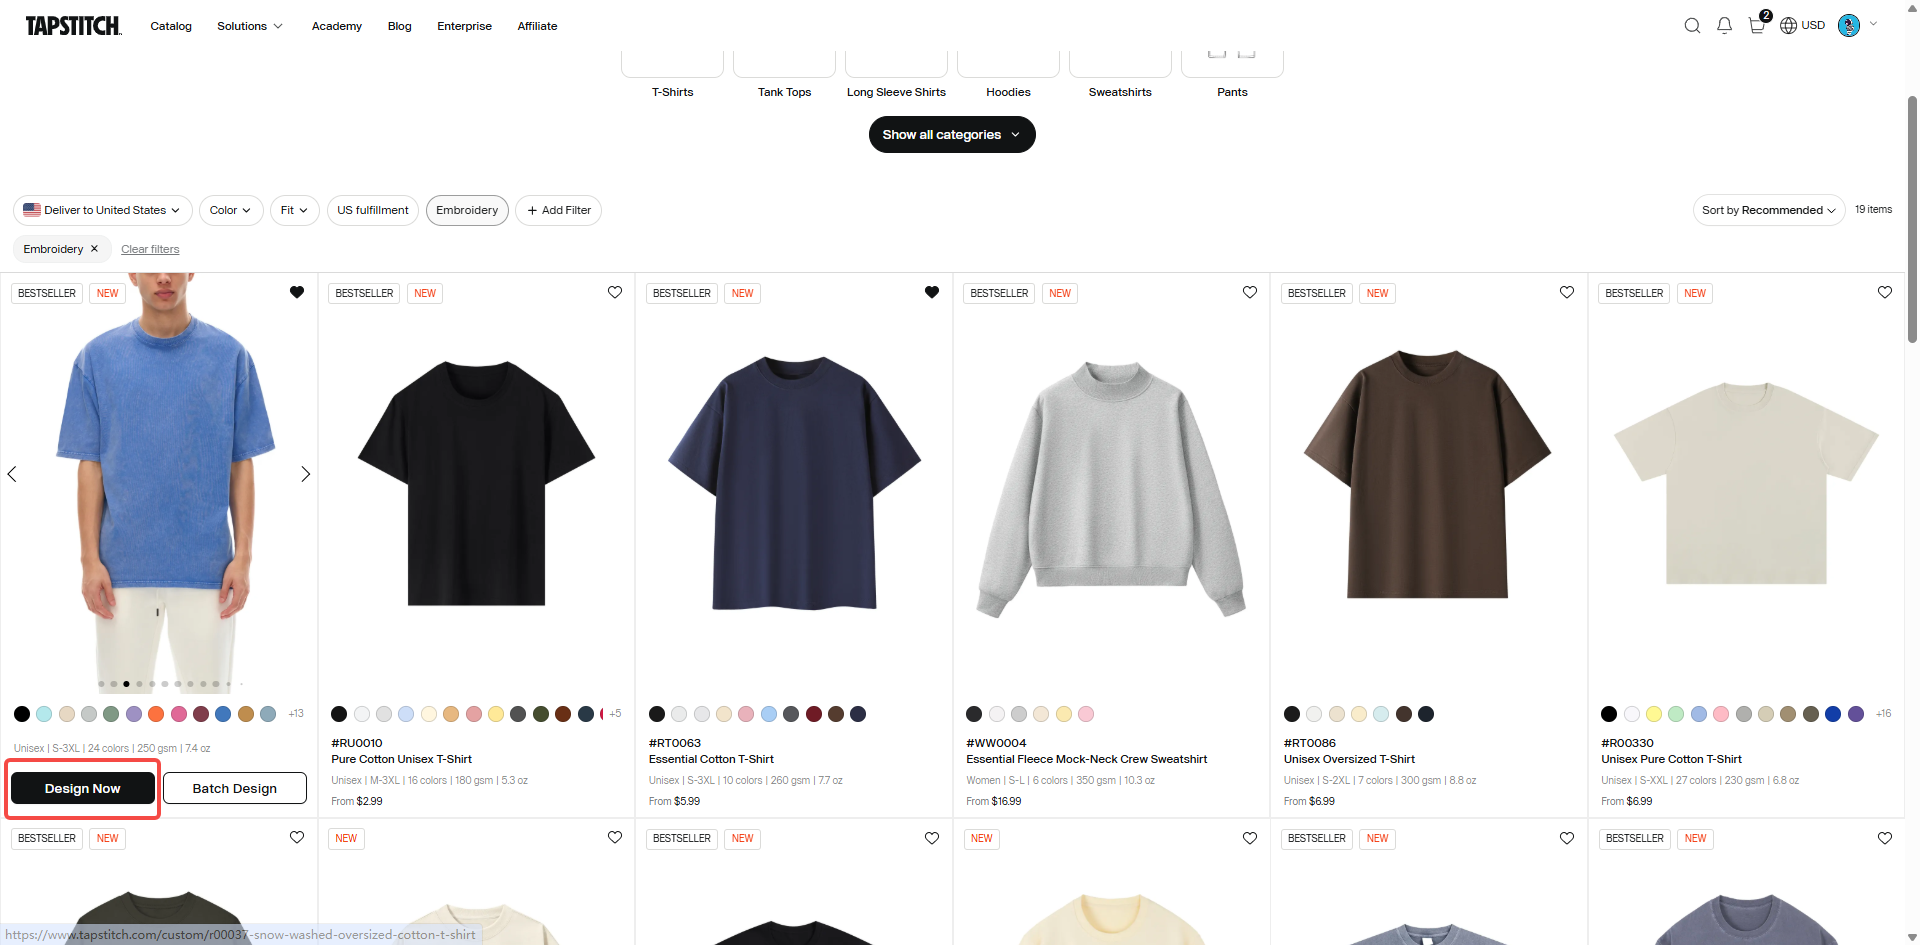
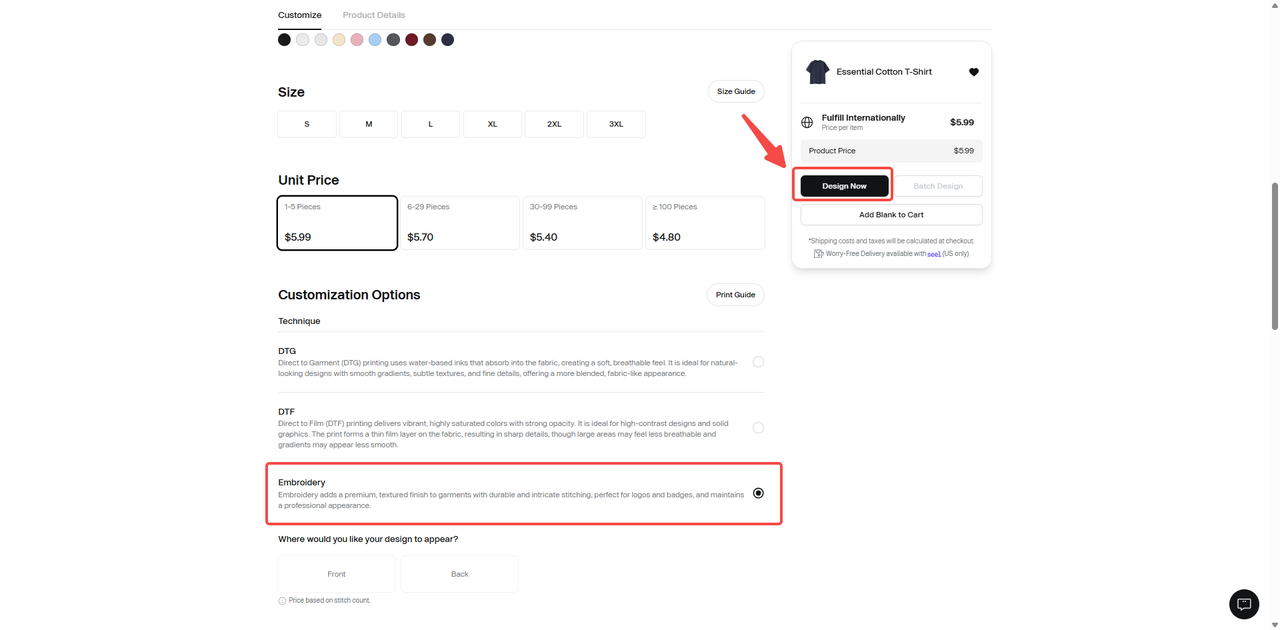
Option 2: Start from the Product Page
On the product page:
1.Select Embroidery under Technique.
2.Click Design Now.
The embroidery editor will open.
Option 3: Switch Techniques in the Design Tool
If you entered the Design Tool using another decoration method, you do not need to return to the product page. For a product that supports embroidery:
- Open Product in the Design Tool.
- Select Technique.
- Switch to Embroidery.
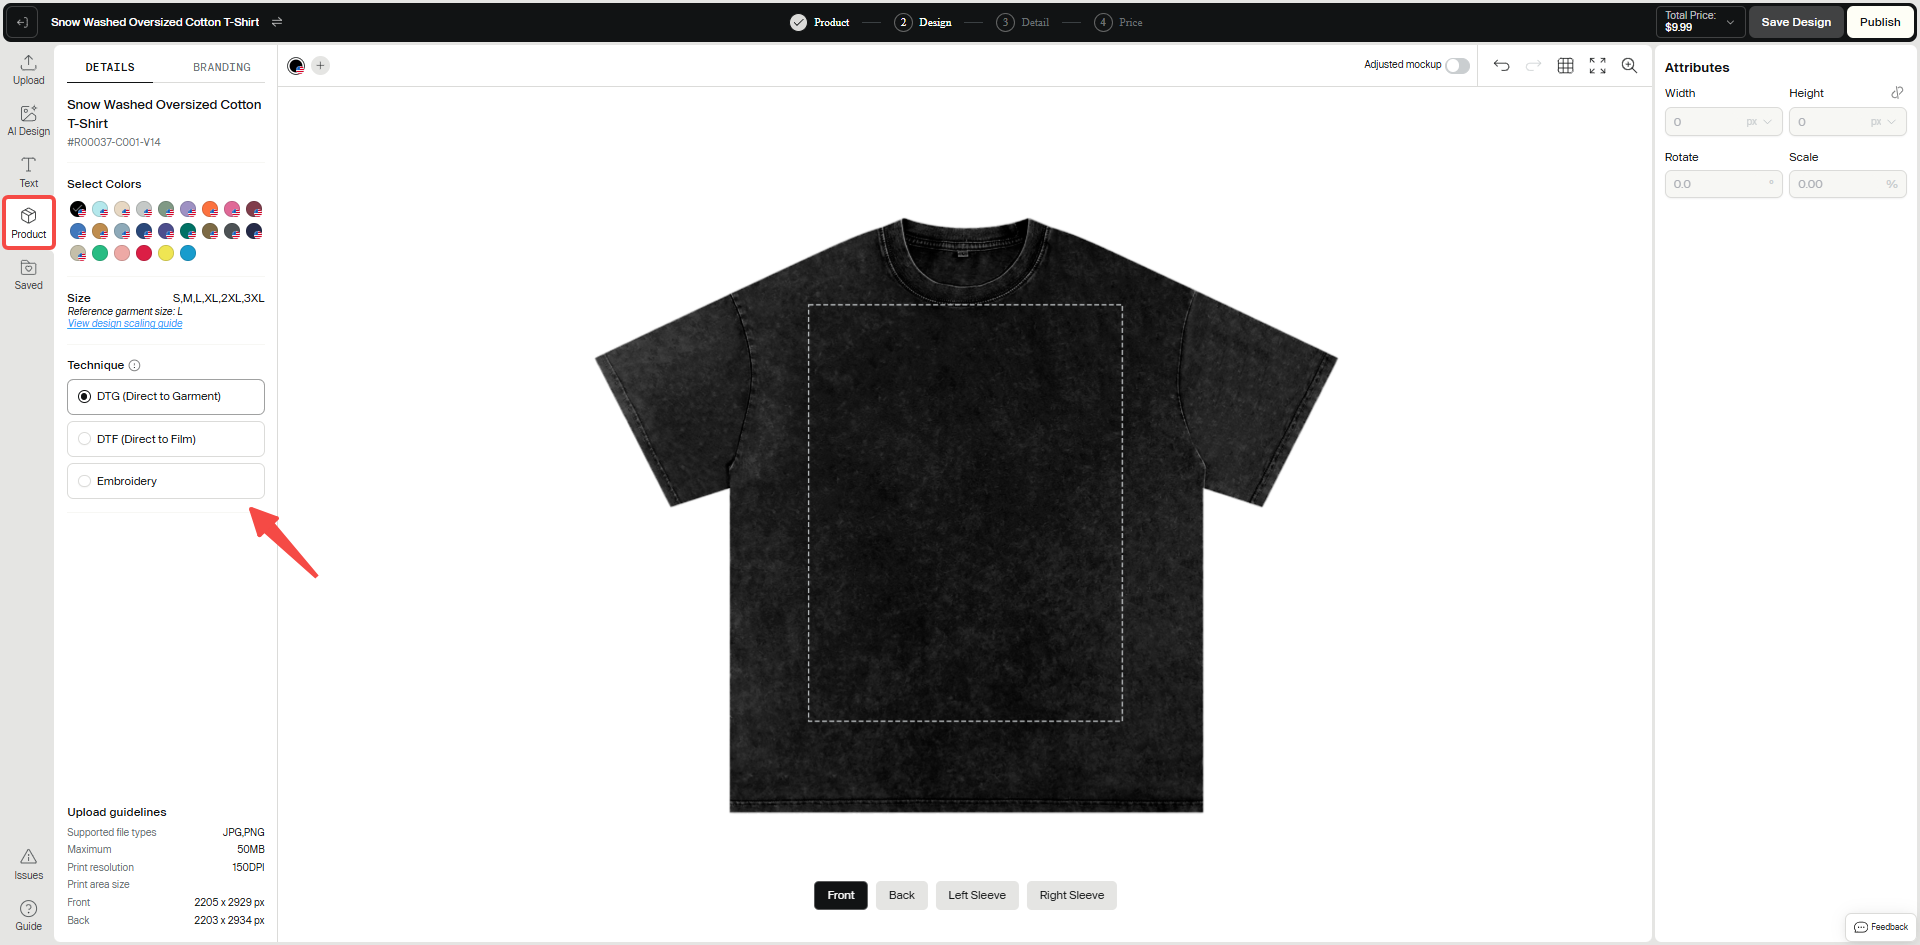
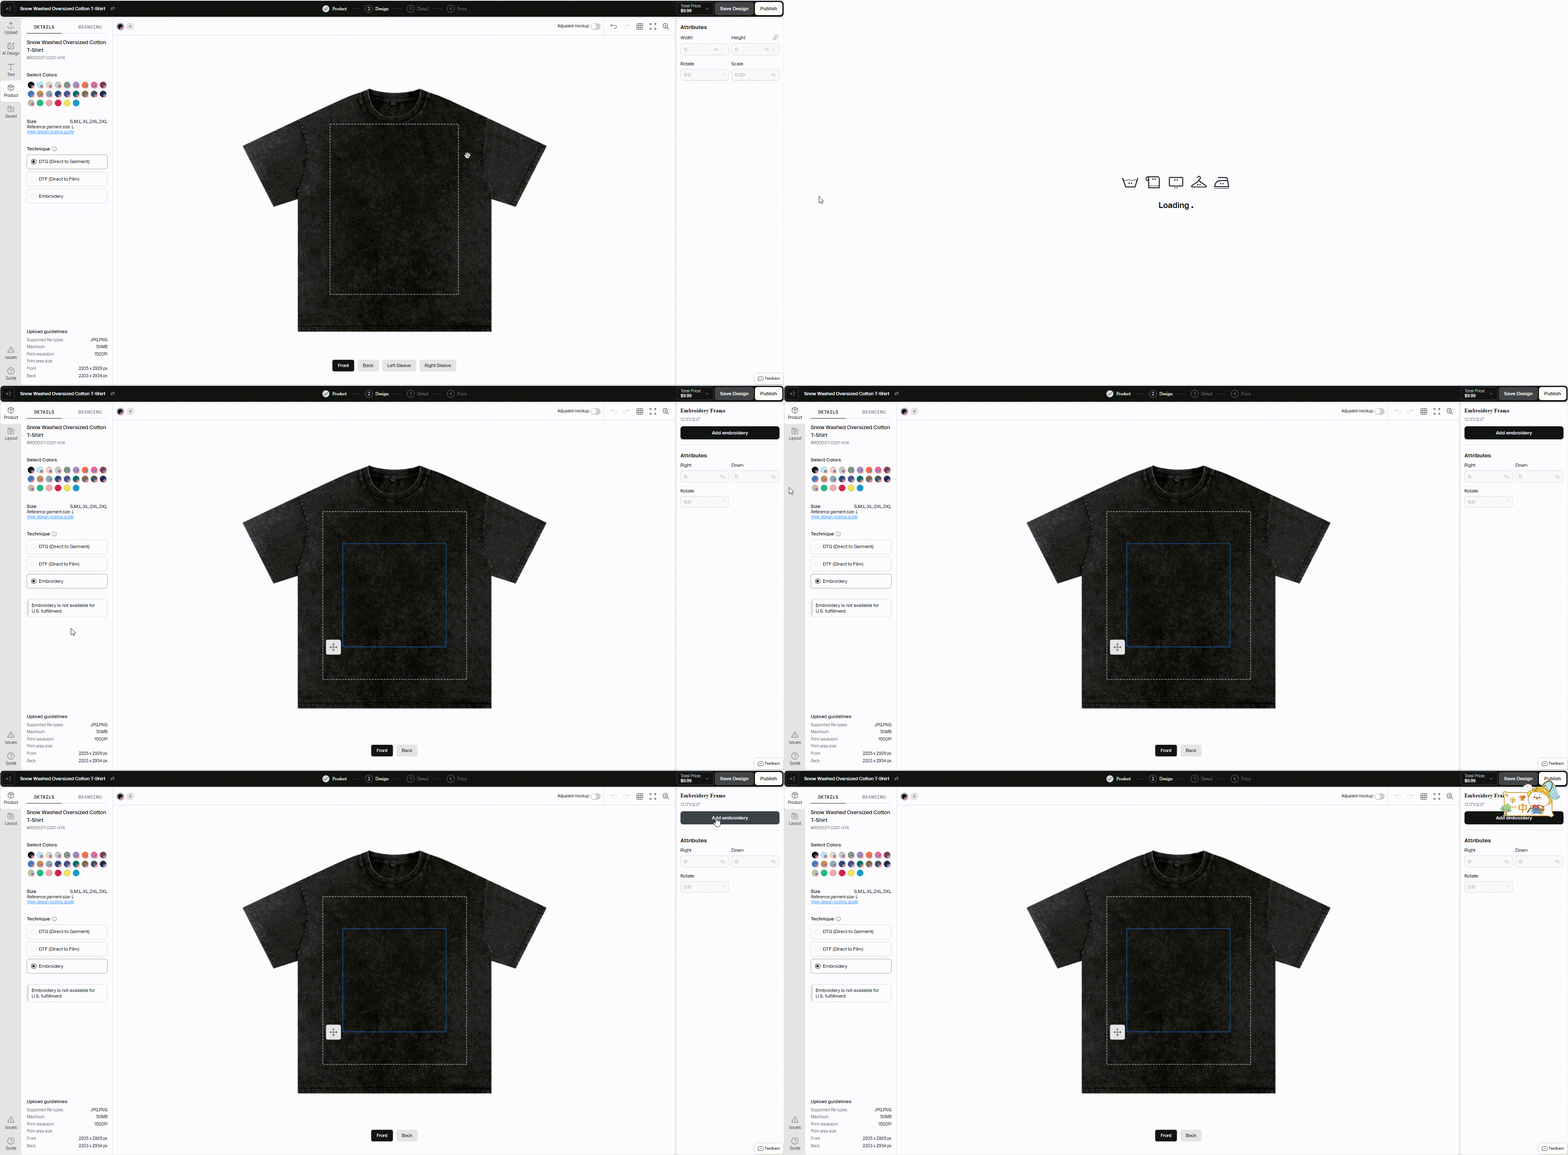
The embroidery tools will then become available.
Note: Switching techniques may affect the existing design content. Review the canvas after switching before continuing.
Step 3: Add Embroidered Text
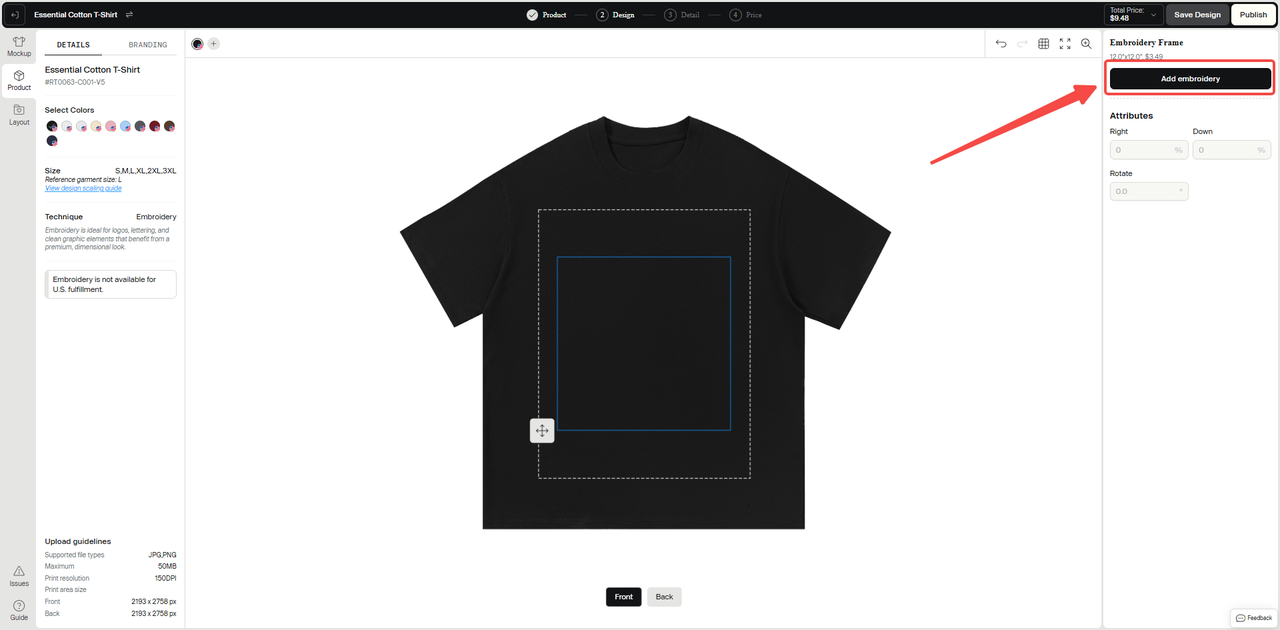
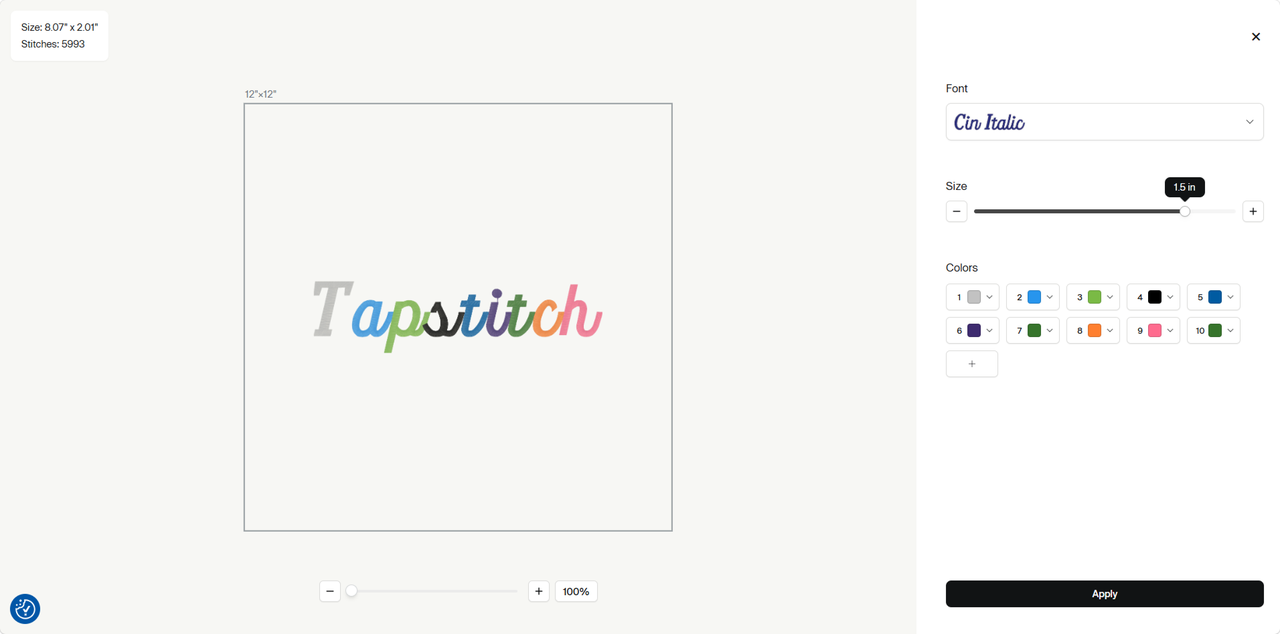
Click Add Embroidery to create a new text layer.
 You can customize the following from the preset options:
- Text
- Font
- Size
- Thread colors
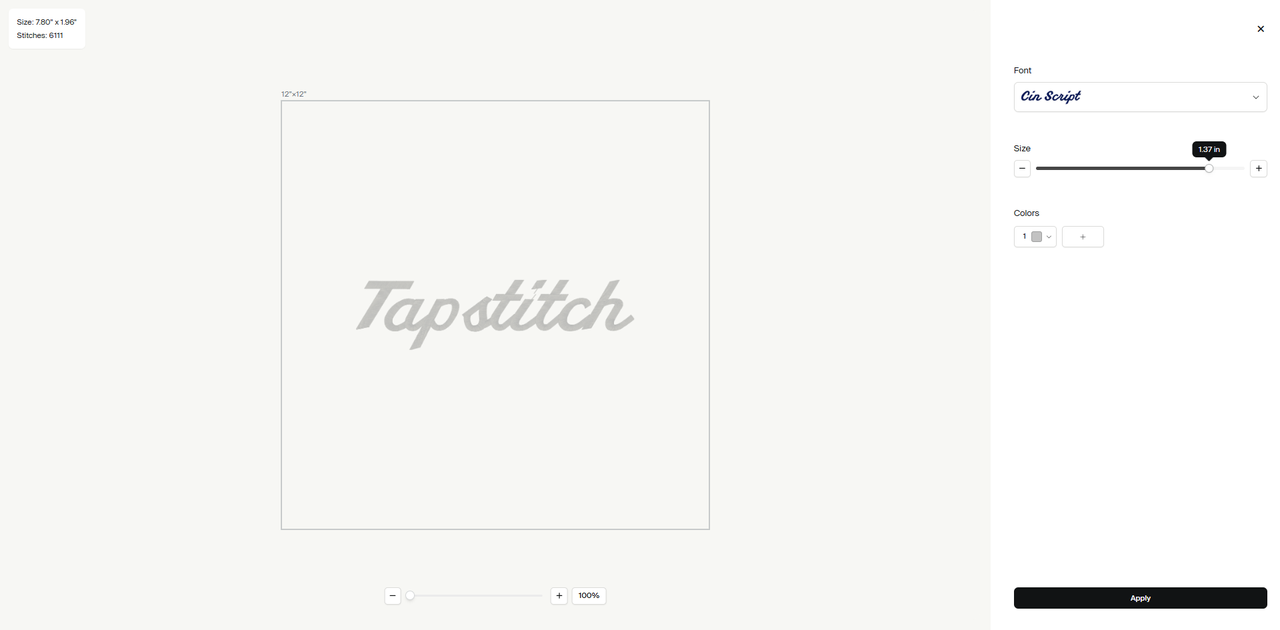
After making your changes, click Update Preview to generate the embroidery design on your garment.
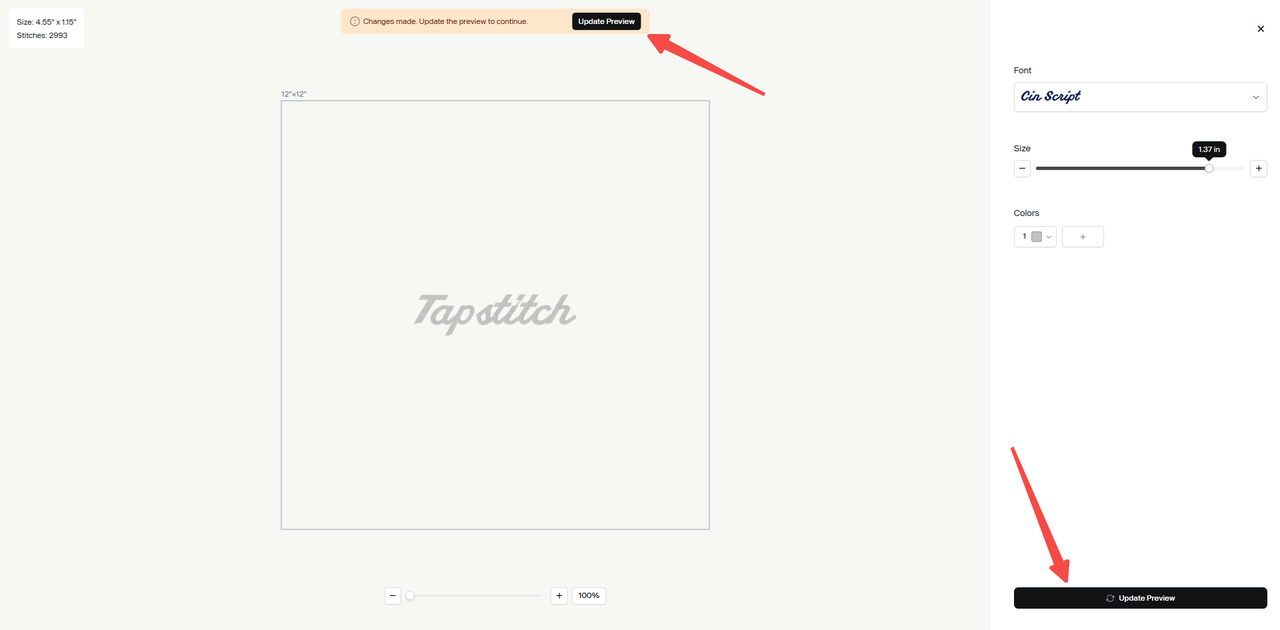
Important: Every time you change the text, font, size, or colors, click Update Preview to regenerate the embroidery design with your changes.
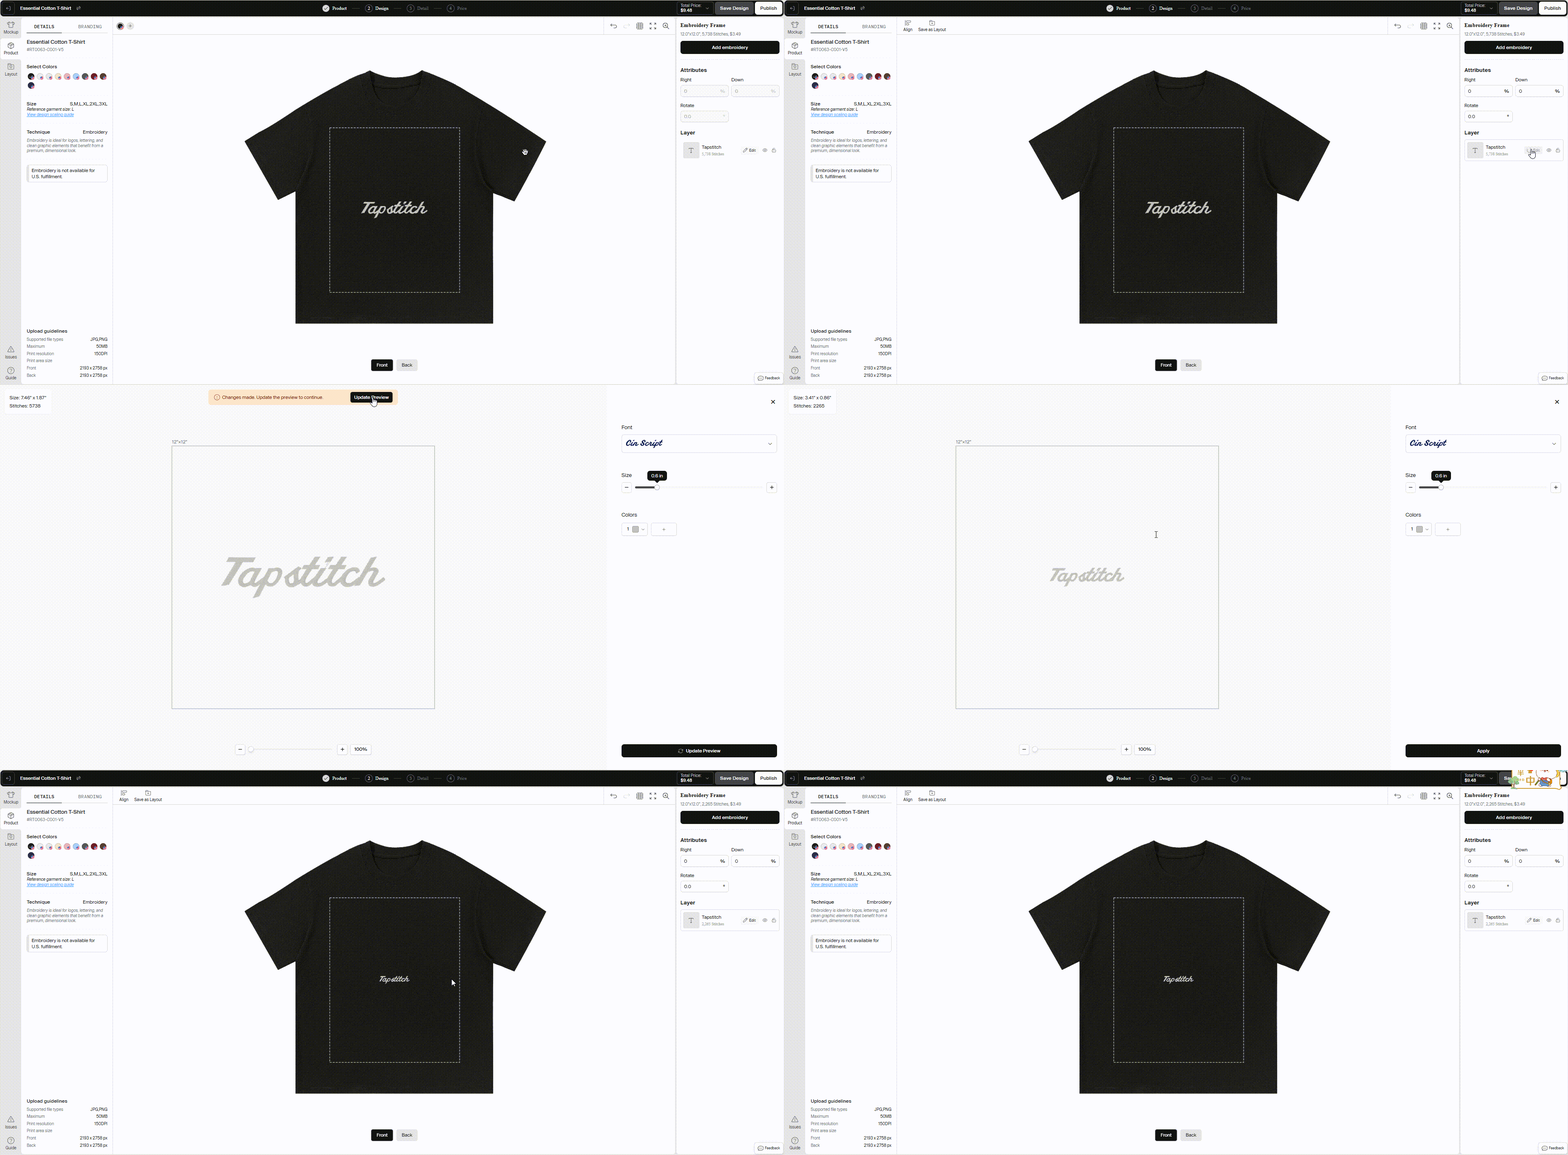
Step 4: Customize Your Design
You can further customize your design by:
Editing existing text
Double-click the embroidery text or select Edit from the layer panel.
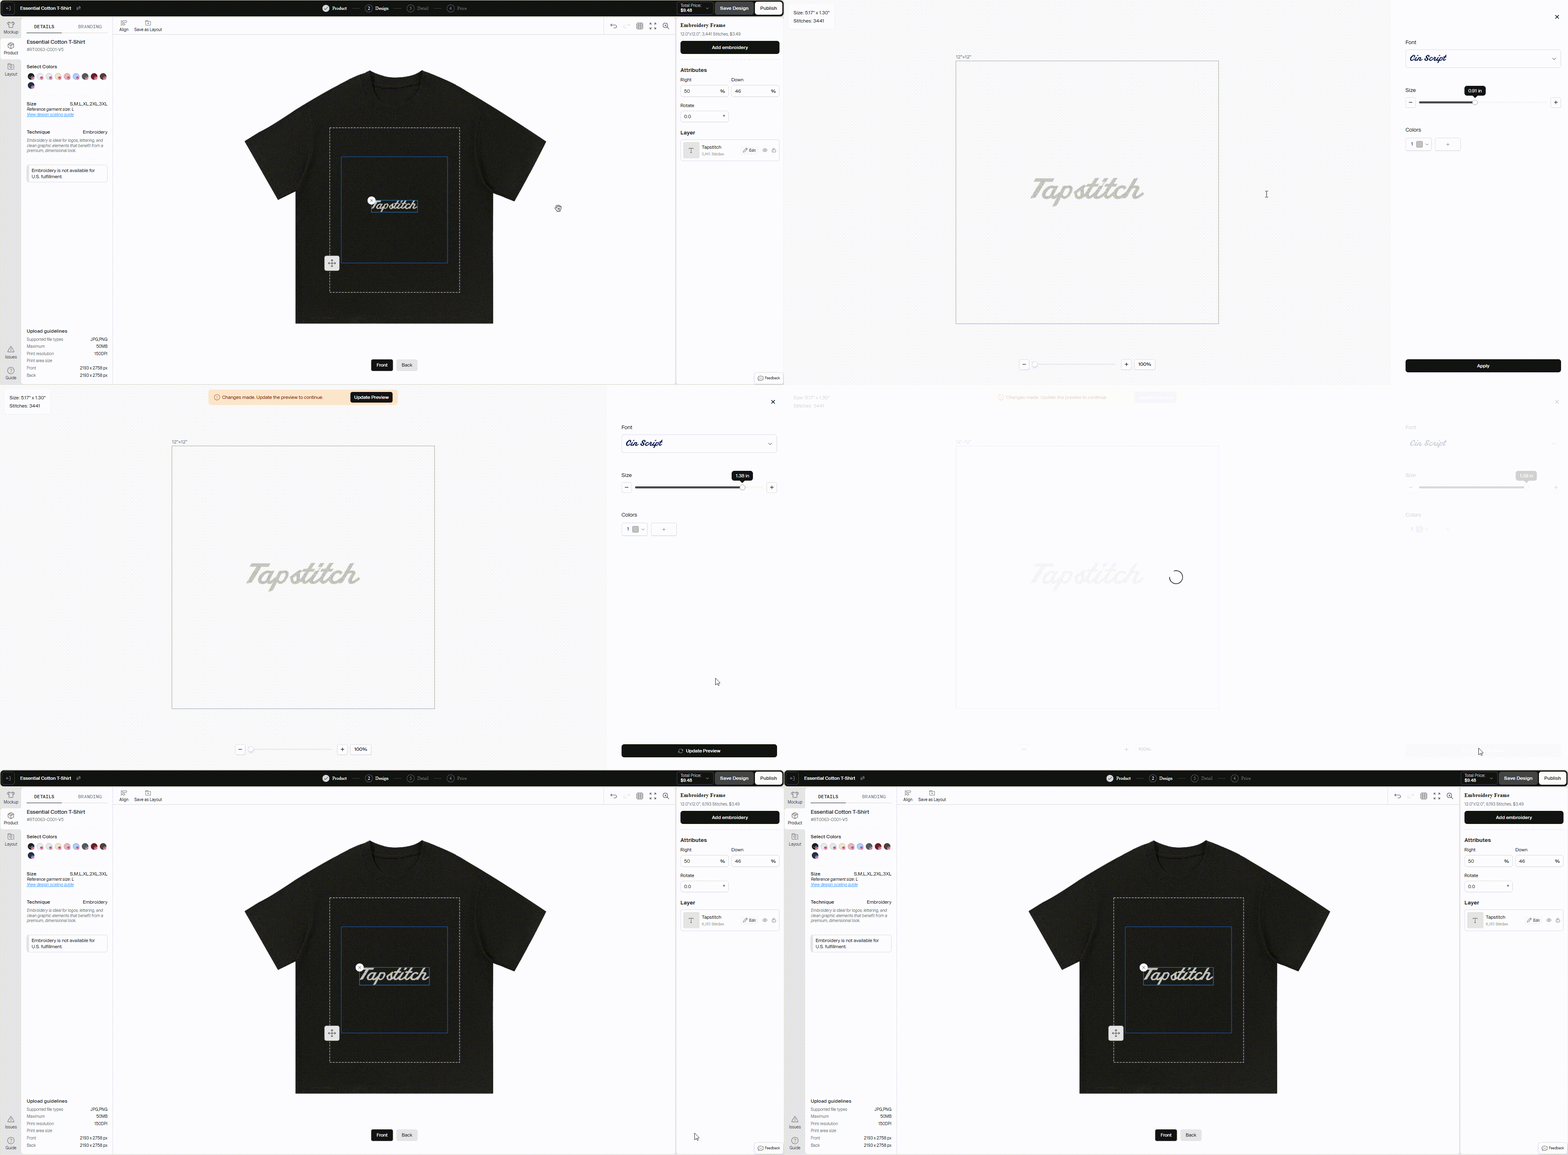
Resizing the embroidery
Use the Size slider to adjust the embroidery dimensions.
Click Update Preview after resizing to see the changes.
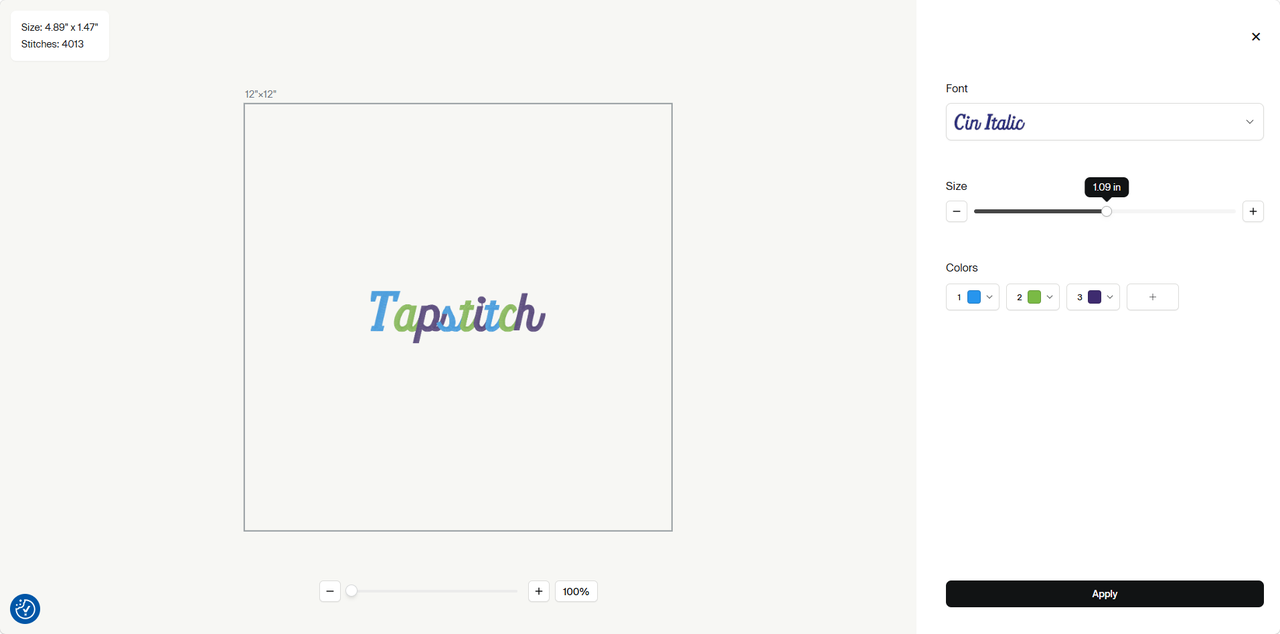
Change thread colors
Select one or more thread colors. If multiple colors are selected, they'll repeat across the text in sequence.
For example: Color 1 → Color 2 → Color 3 → Color 1 → Color 2...
The number of colors cannot exceed the number of characters.
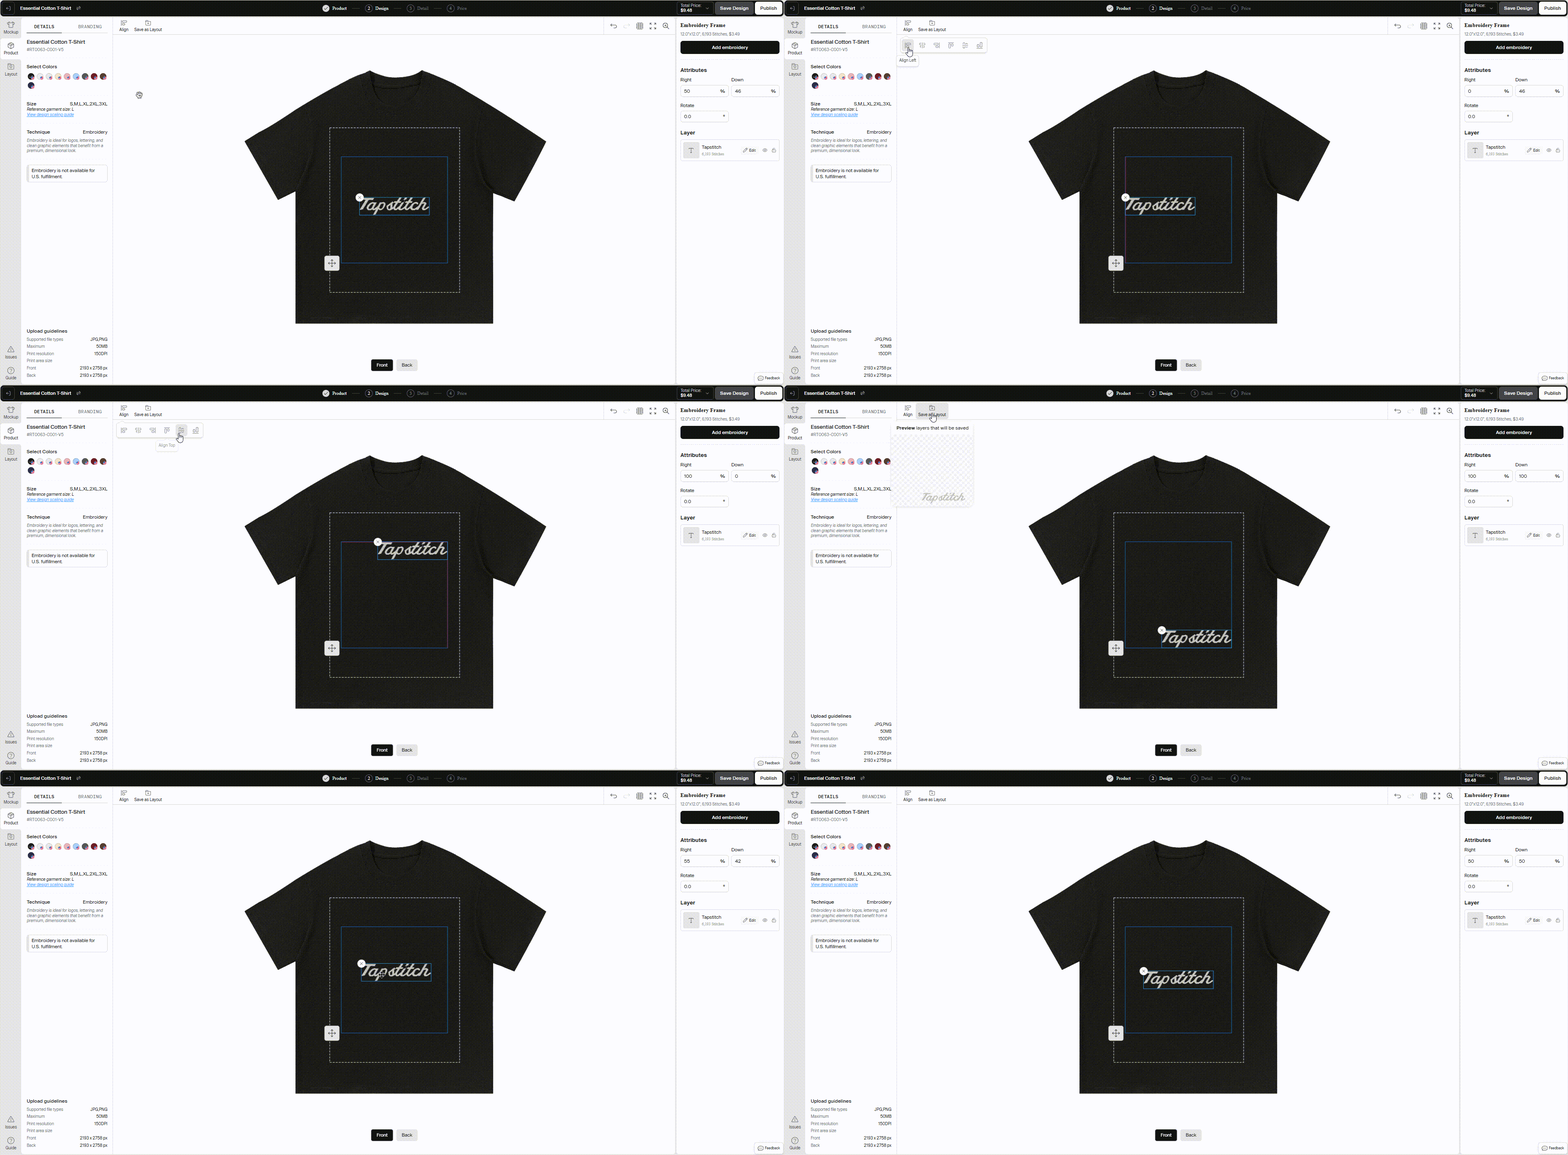
Adjust alignment
Use the Align options to align the embroidery within the embroidery frame.
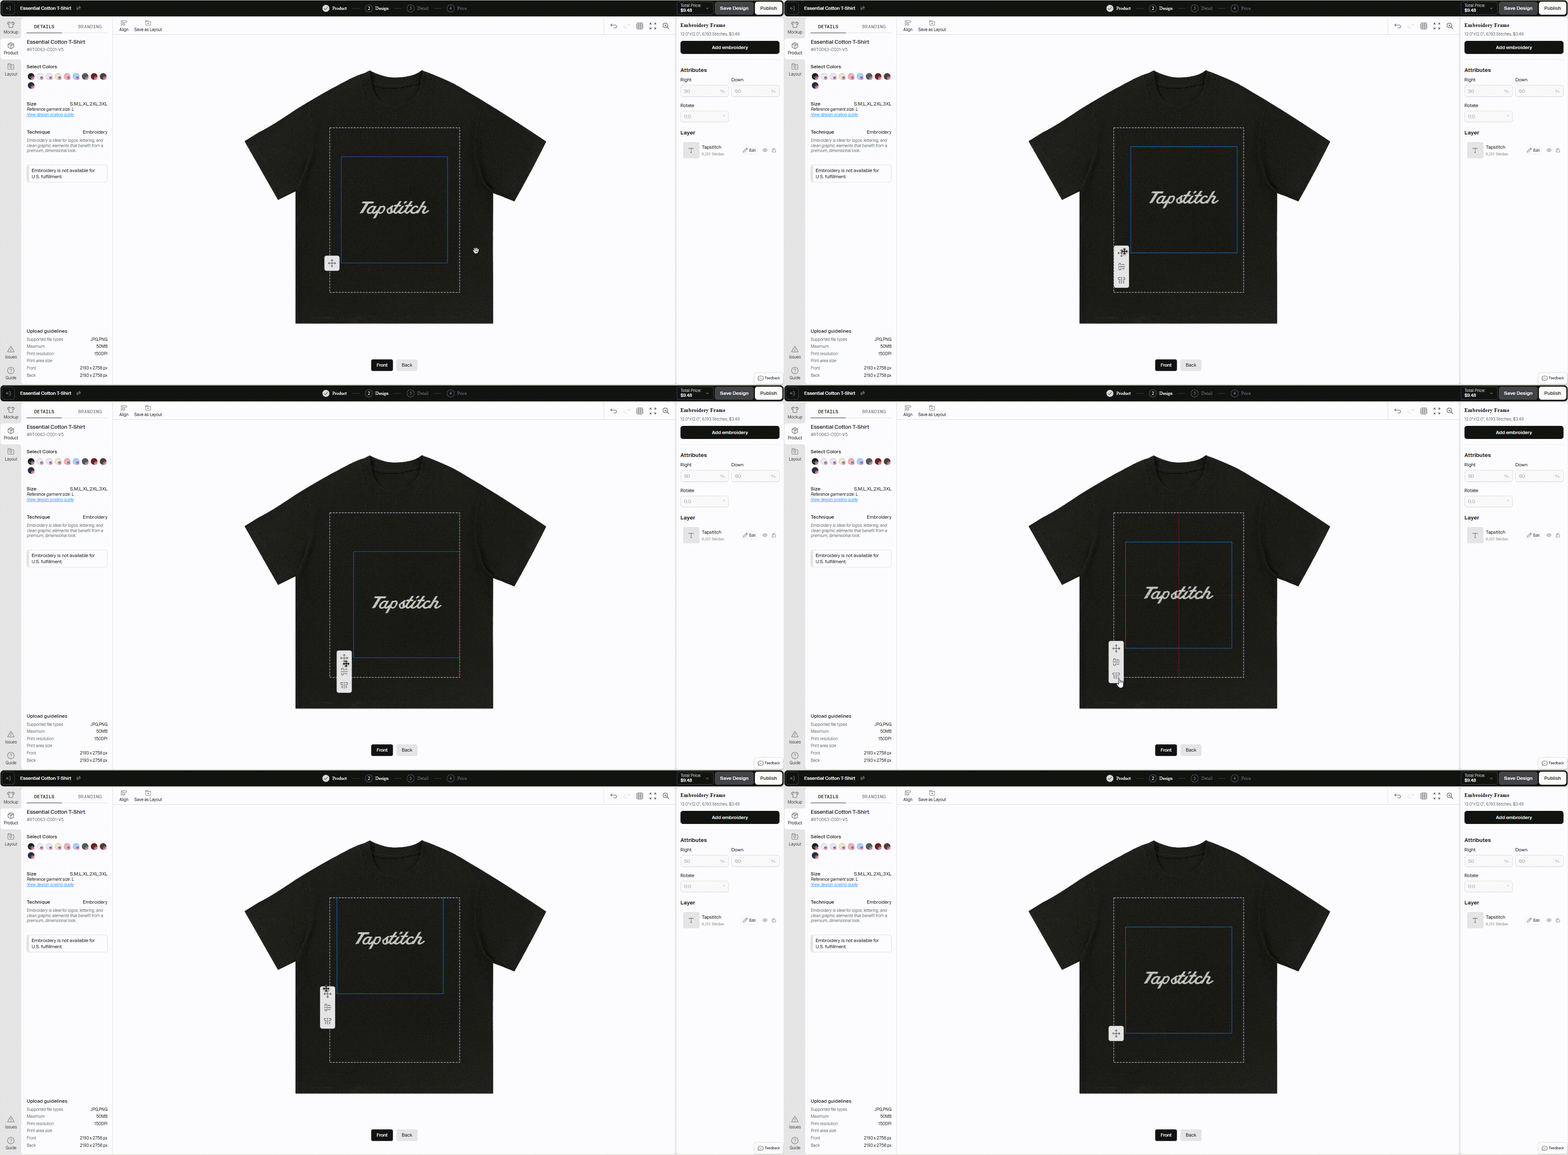
Move the embroidery frame
Drag the embroidery frame to reposition your design.
The frame can only be moved within the available embroidery area.
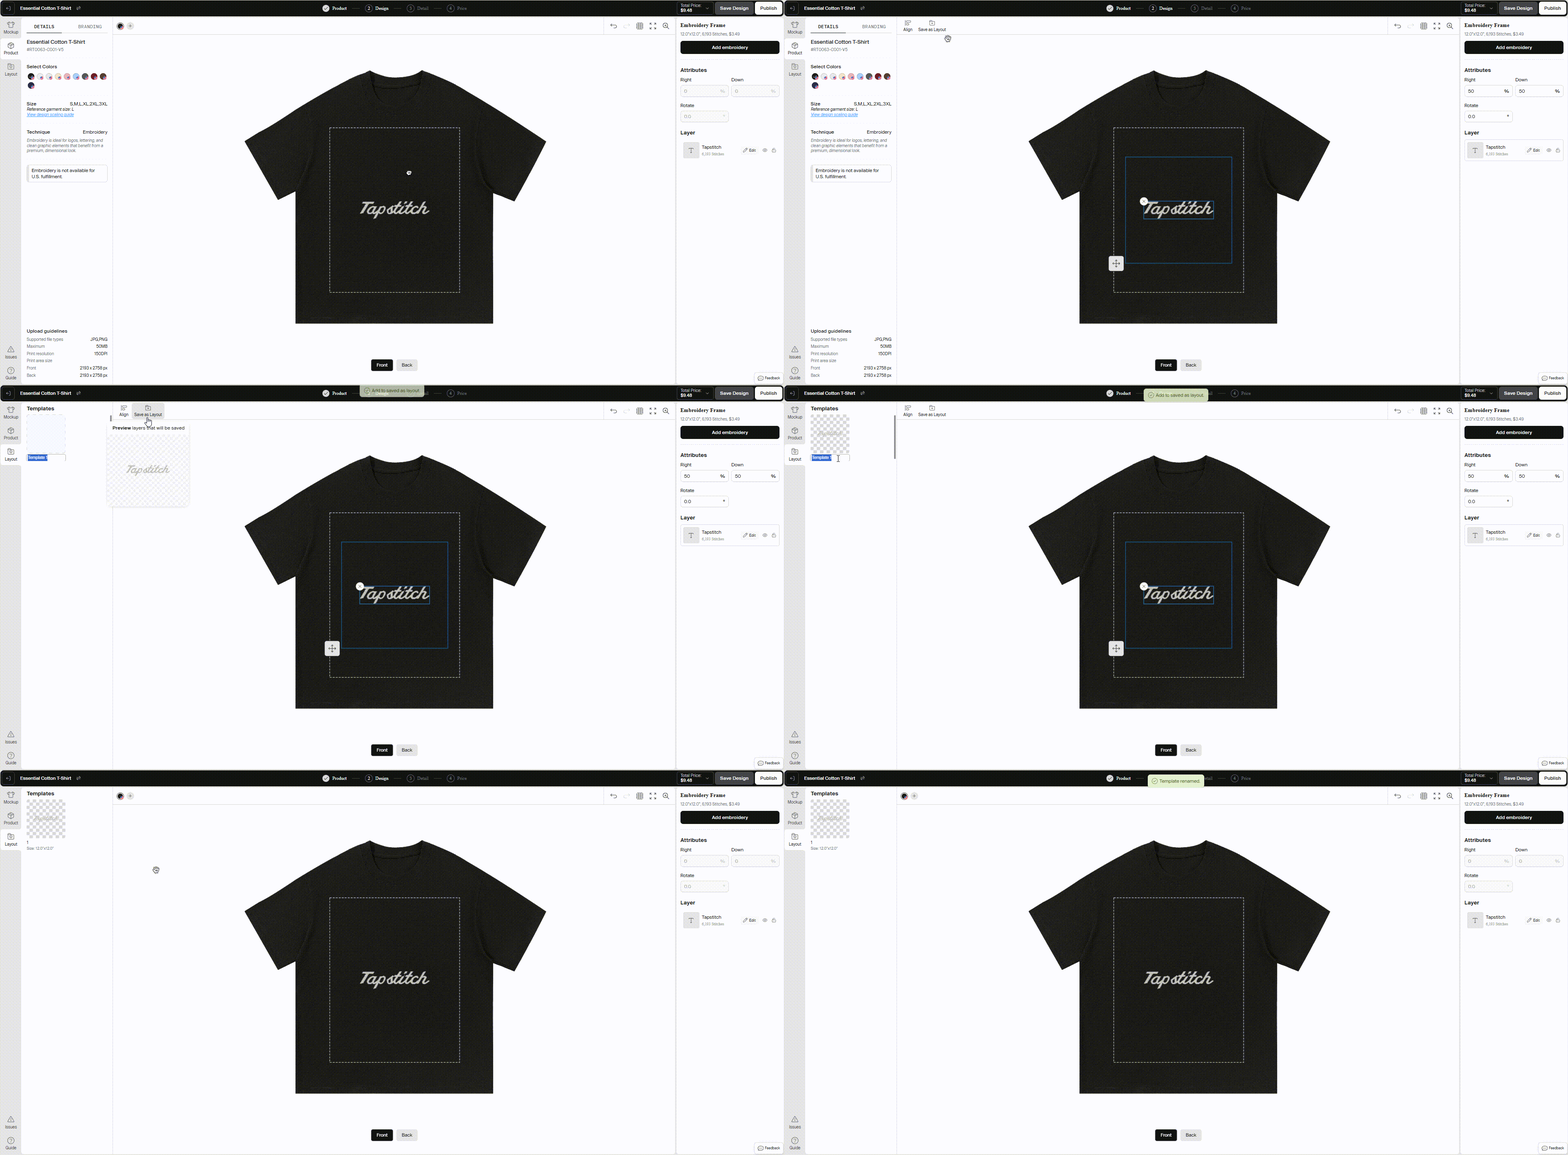
Save as a layout template
Want to keep the same layout for future embroidery designs? Select the embroidery frame and click Save as Layout. You can reuse saved layouts on other compatible products.
Note: Larger layouts cannot be applied to products with a smaller embroidery area.
Step 5: Preview and Save
Click anywhere outside the embroidery frame to preview the final effect without editing guidelines.
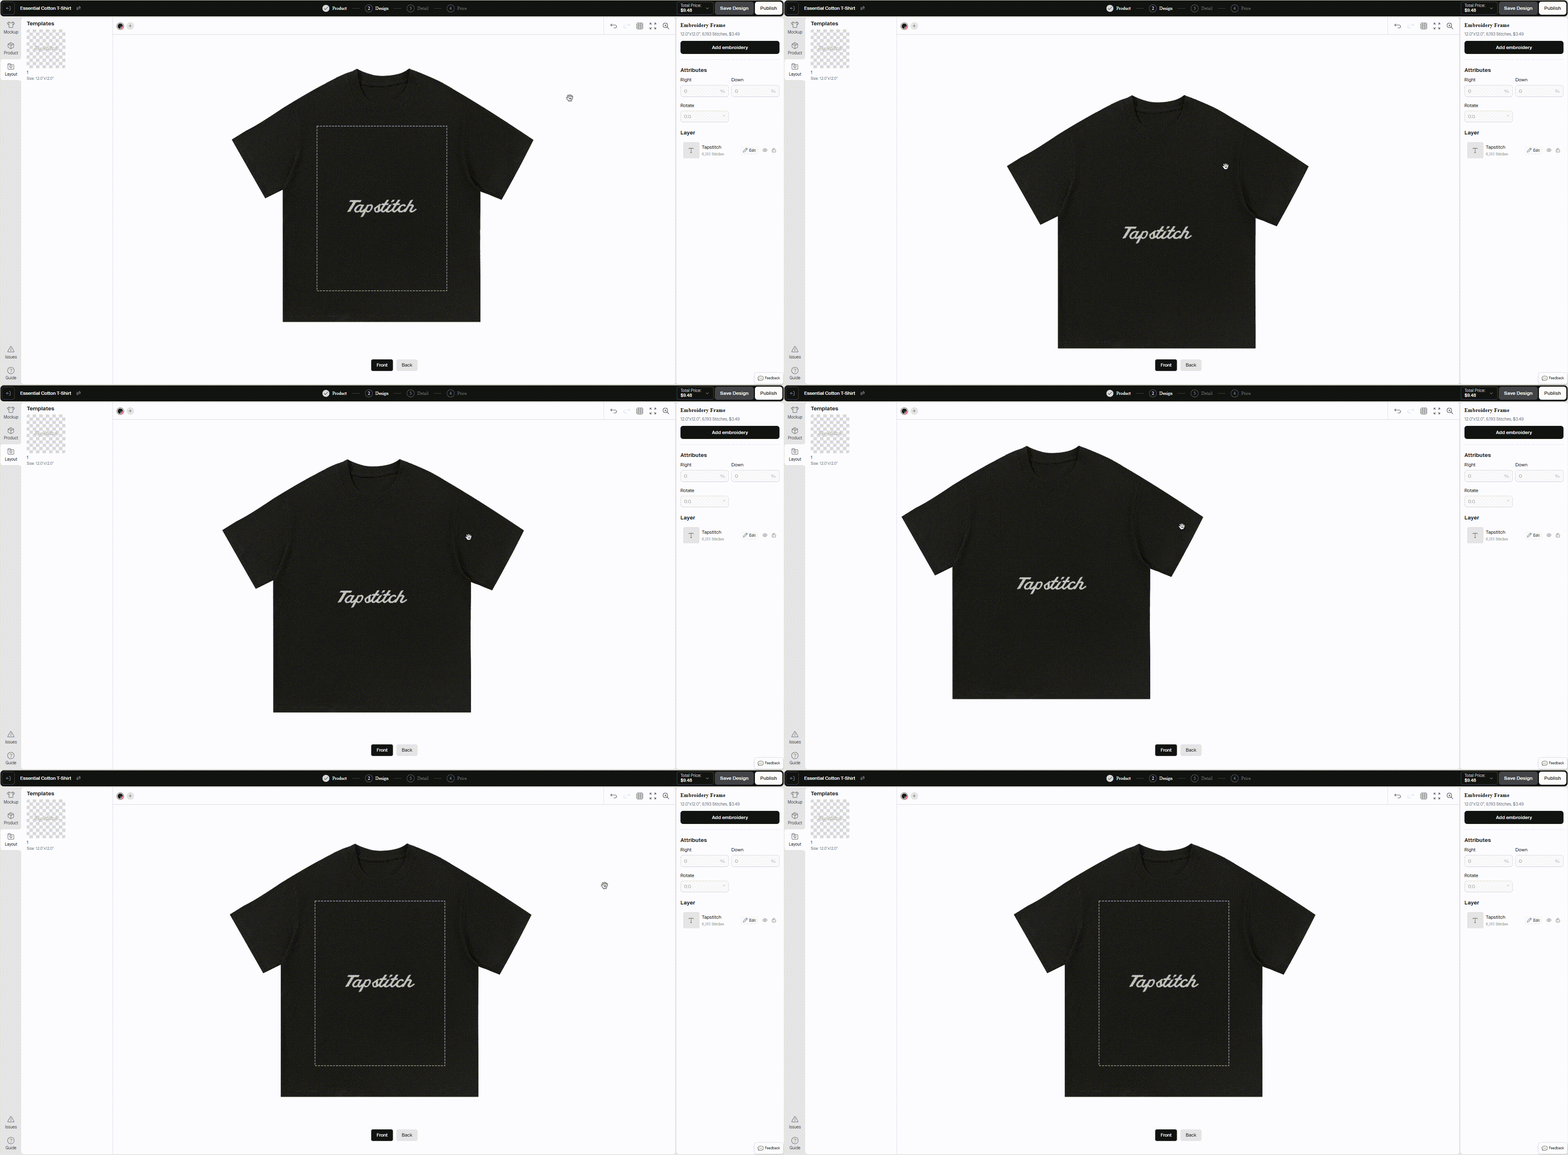 When you're satisfied with the result:
- Review the embroidery preview
- Check the price breakdown (optional)
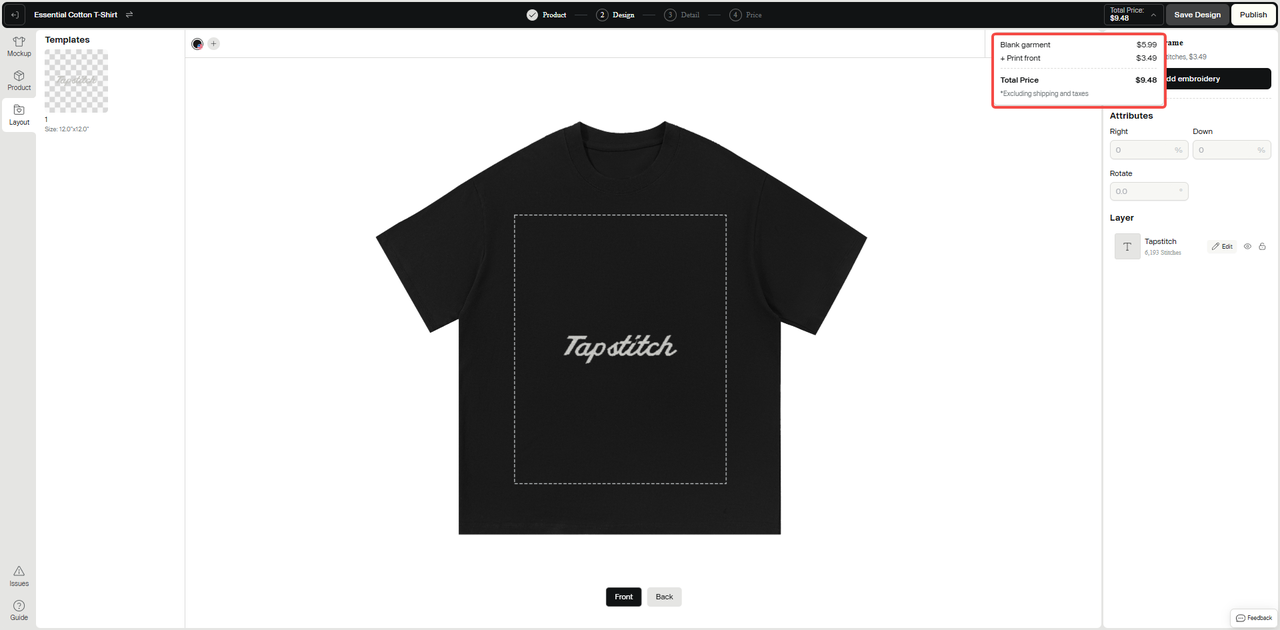
- Click Save Design
Your embroidery design is now ready to be published and ordered.
Tip: Updating the preview also recalculates the estimated stitch count. As a result, the embroidery price may change depending on your design. For more information, see What is Embroidery?
Frequently Asked Questions
1. Why can’t I find the Embroidery option?
Embroidery is only available for supported products. Confirm that the product appears when you filter the Catalog by Decoration Method → Embroidery.
If the product supports embroidery, you can select it on the product page or switch to it from Product → Technique inside the Design Tool.
2. Why doesn't the preview change after editing?
After changing the text, font, size, or colors, click Update Preview to regenerate the embroidery effect.
3. Can I upload my own embroidery artwork?
Not yet. The current version supports text embroidery only.
4. Can I resize the embroidery by dragging it?
No. Use the Size slider inside the editor, then click Update Preview.
5. How are multiple thread colors applied?
Thread colors are applied repeatedly in the order you select them.
6. Where can I view the embroidery price?
Click the Total Price dropdown in the upper-right corner of the Design Tool to view the pricing breakdown.
Need More Help?
If you have any questions about embroidery, please contact our Customer Support team via Live Chat or contact us via support@tapstitch.com.
Was this article helpful?
11 found this helpful