How can I integrate my Woocommerce store?
January 20, 2026 · Updated
Here are specific steps:
1.Adjust your Permalinks settings
- In your WooCommerce dashboard, locate and click “Settings” in the left-side menu.
- Select “Permalinks.”
- Choose any option other than “Plain”(e.g., choose “Day and name”).
- Click Save changes.
2. Generate API key
- Go to yourWooCommerce Dashboard > Settings.
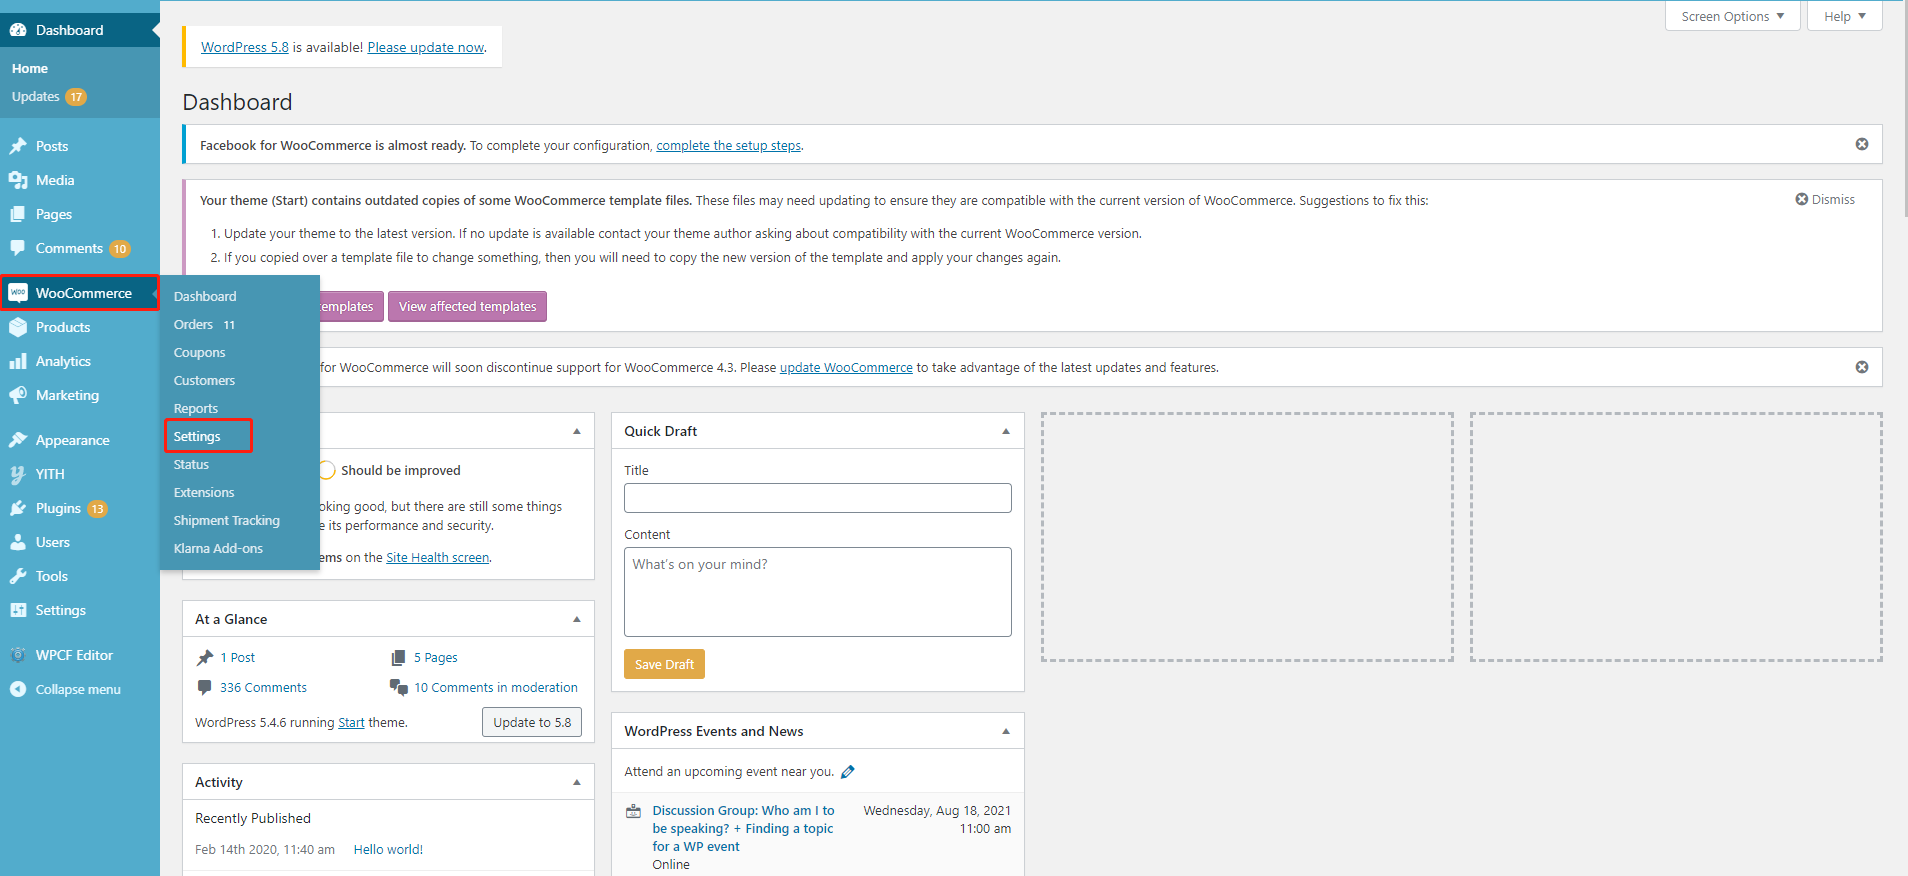
- Select Advanced and clickREST API > Add key.
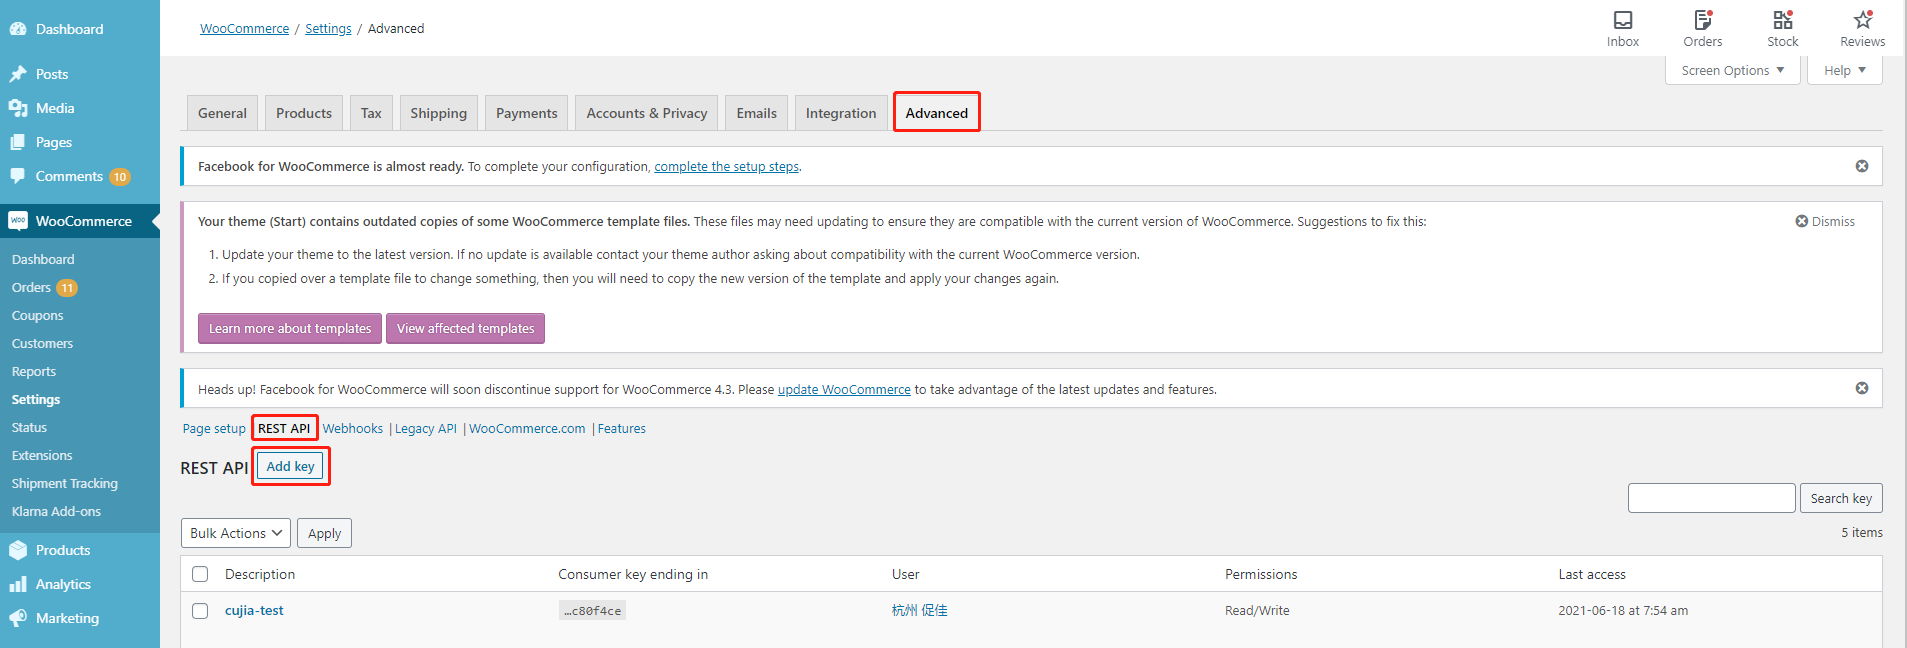
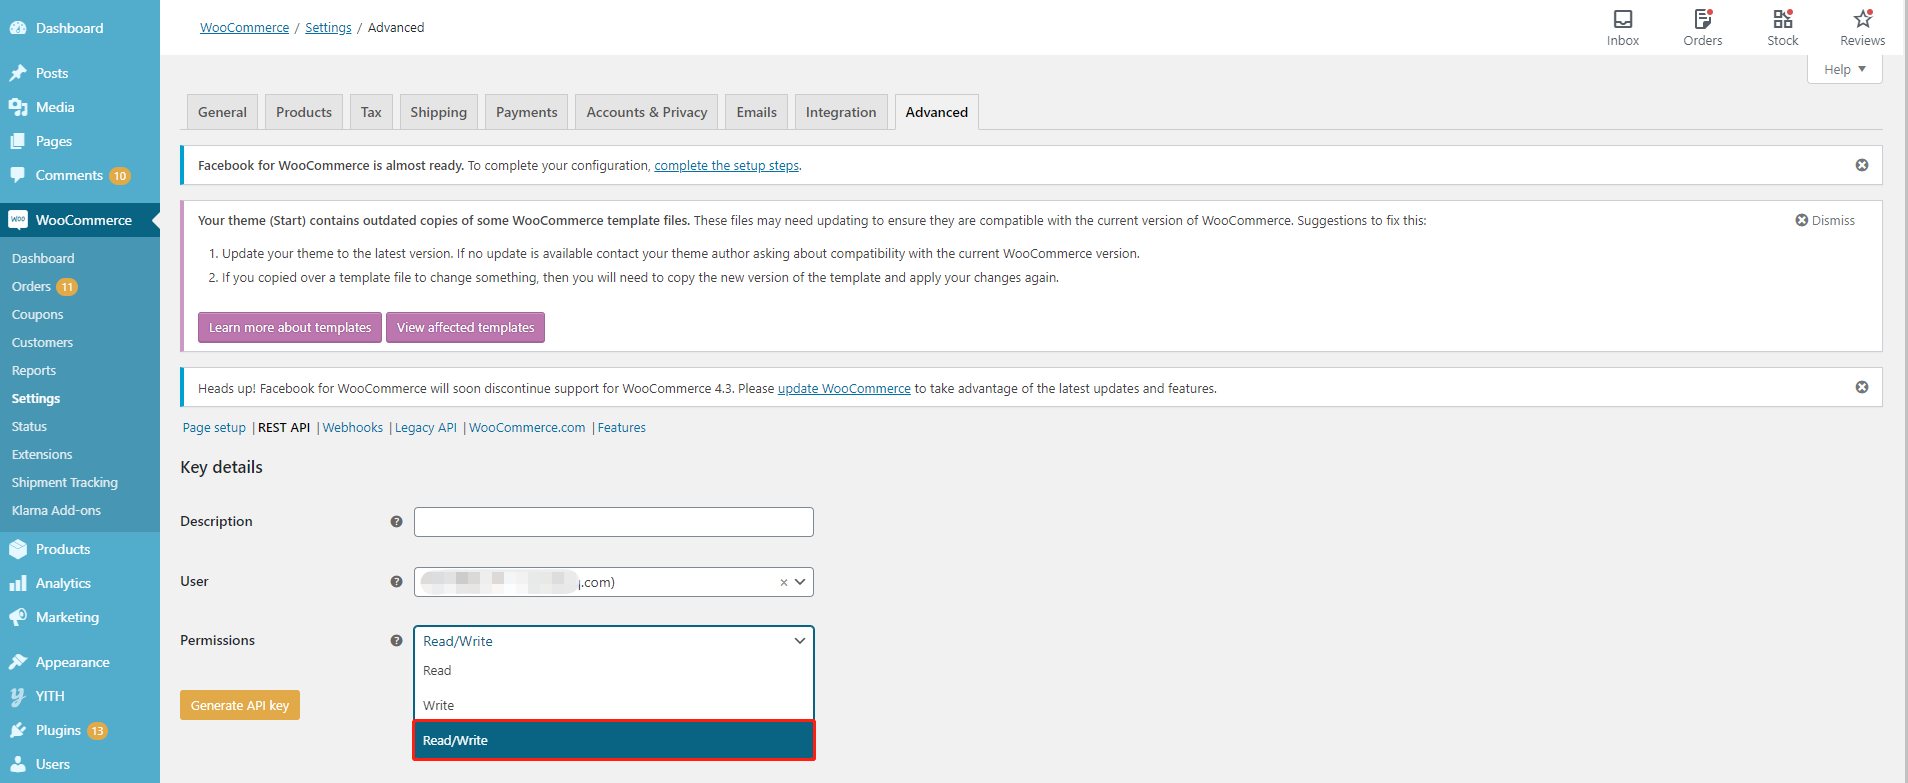
- Fill in the description, select the user and select a level of access for this API key —Read/Write access.
3. Connect your store to Tapstitch
- Go to https://www.tapstitch.com/stores and click the Link button under the WooCommerce icon
- Next, enter theURLfor your WooCommerce store in the popover and clickConnect
Ensure that the store URL you enter matches what’s visible in your WordPress admin under “Settings” → “General”. Your store URL will typically appear in one of these formats:
- http://yourstore.com
- https//yourstore.com
- https://www.yourstore.com/
Note

When entering URLs, use only the specific formats listed above. Do not include URLs that lead to specific pages, such as "https://yourstore.com/store" or "https://yourstore.com/shop". Instead, the URL should represent your main store address without any additional page specifications.
4. Disable legacy REST API (if currently enabled)
- Log into your WordPress admin > Woocommerce>Settings>Advanced
- Click REST API and fill in the Description, and Choose Read/Write permission to generate API key
- Proceed to “Legacy API”.
- If the box next to “Enable the legacy REST API” is checked, uncheck it.
- Click Save changes.
5. Whitelist our IP addresses in Cloudflare to avoid synchronization failures
If you are using Cloudflare or other firewall services, Tapstitch API requests may be blocked, which can cause connection or synchronization issues.
Please whitelist the following IP address to ensure proper integration.
How to whitelist (Cloudflare):
1.First, log in to the Cloudflare account, then select your Website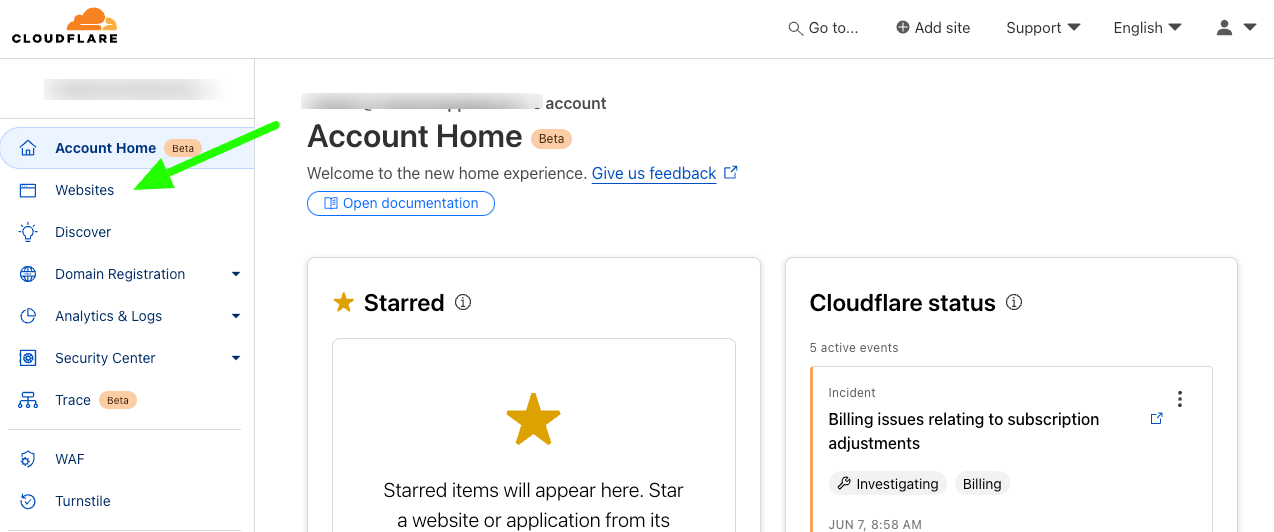 2.Next, click on Security, then WAF
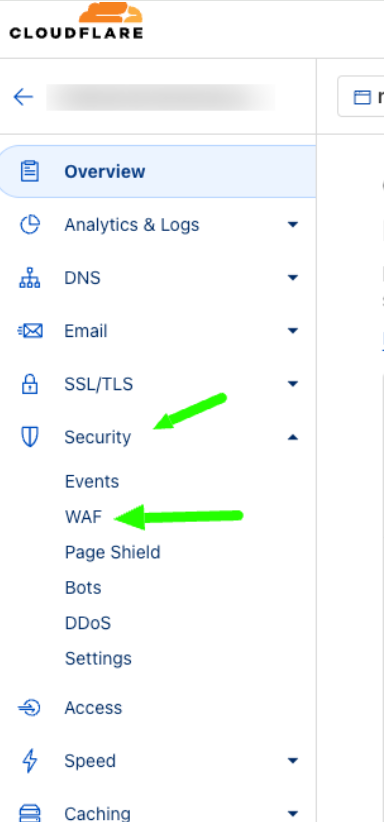 3.Then, click Custom Rules, then Create Rule
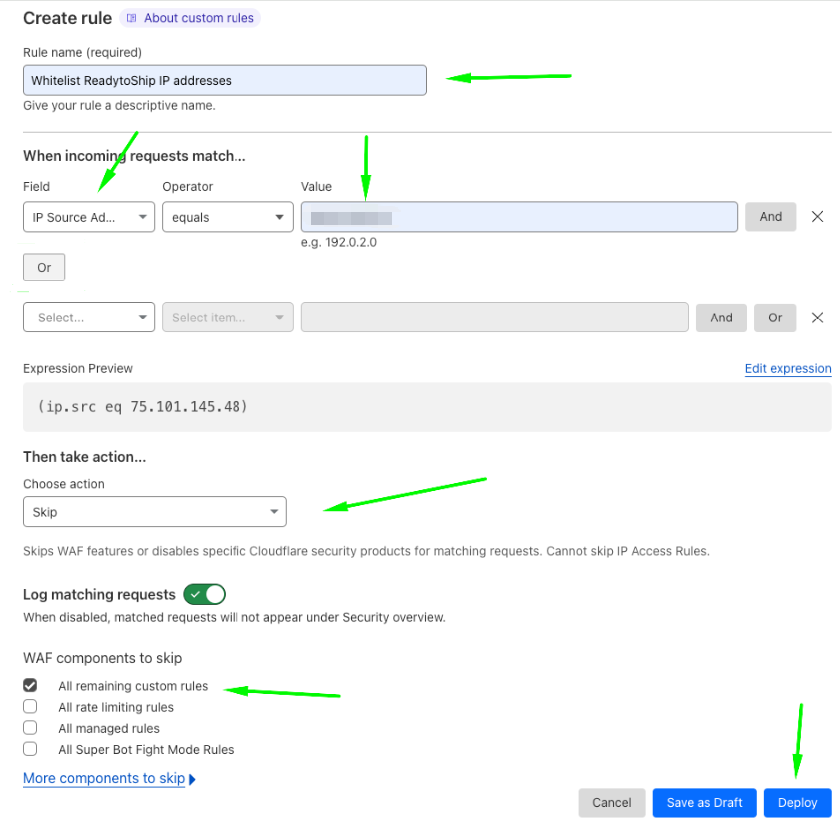
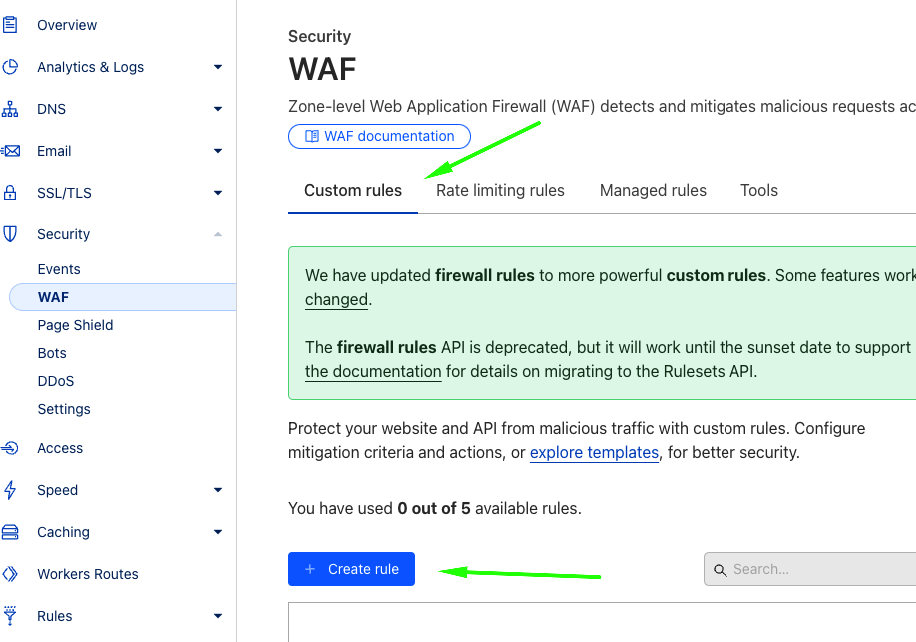 4.Add the Tapstitch IP addresses(47.254.82.144) by selecting Incoming IP Source. Then select 'Skip' as the action, select the checkbox to skip 'All remaining custom rules', then Deploy.
Tapstitch IP:
Was this article helpful?
7 found this helpful