Product Labeling Guide
June 20, 2026 · Updated
How to create and manage custom clothing labels
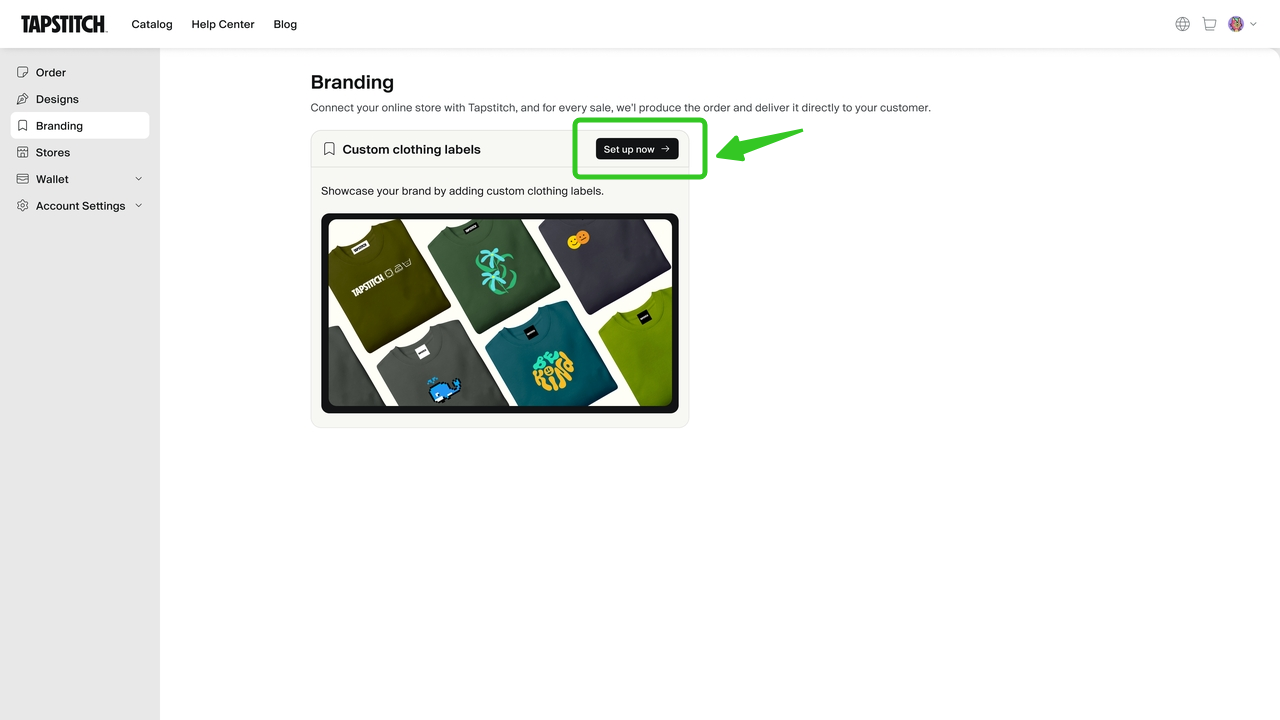
From your Home page, click the profile icon in the top-right corner to find the Branding page.
- Click 'Set up now' to start designing and managing custom labels.
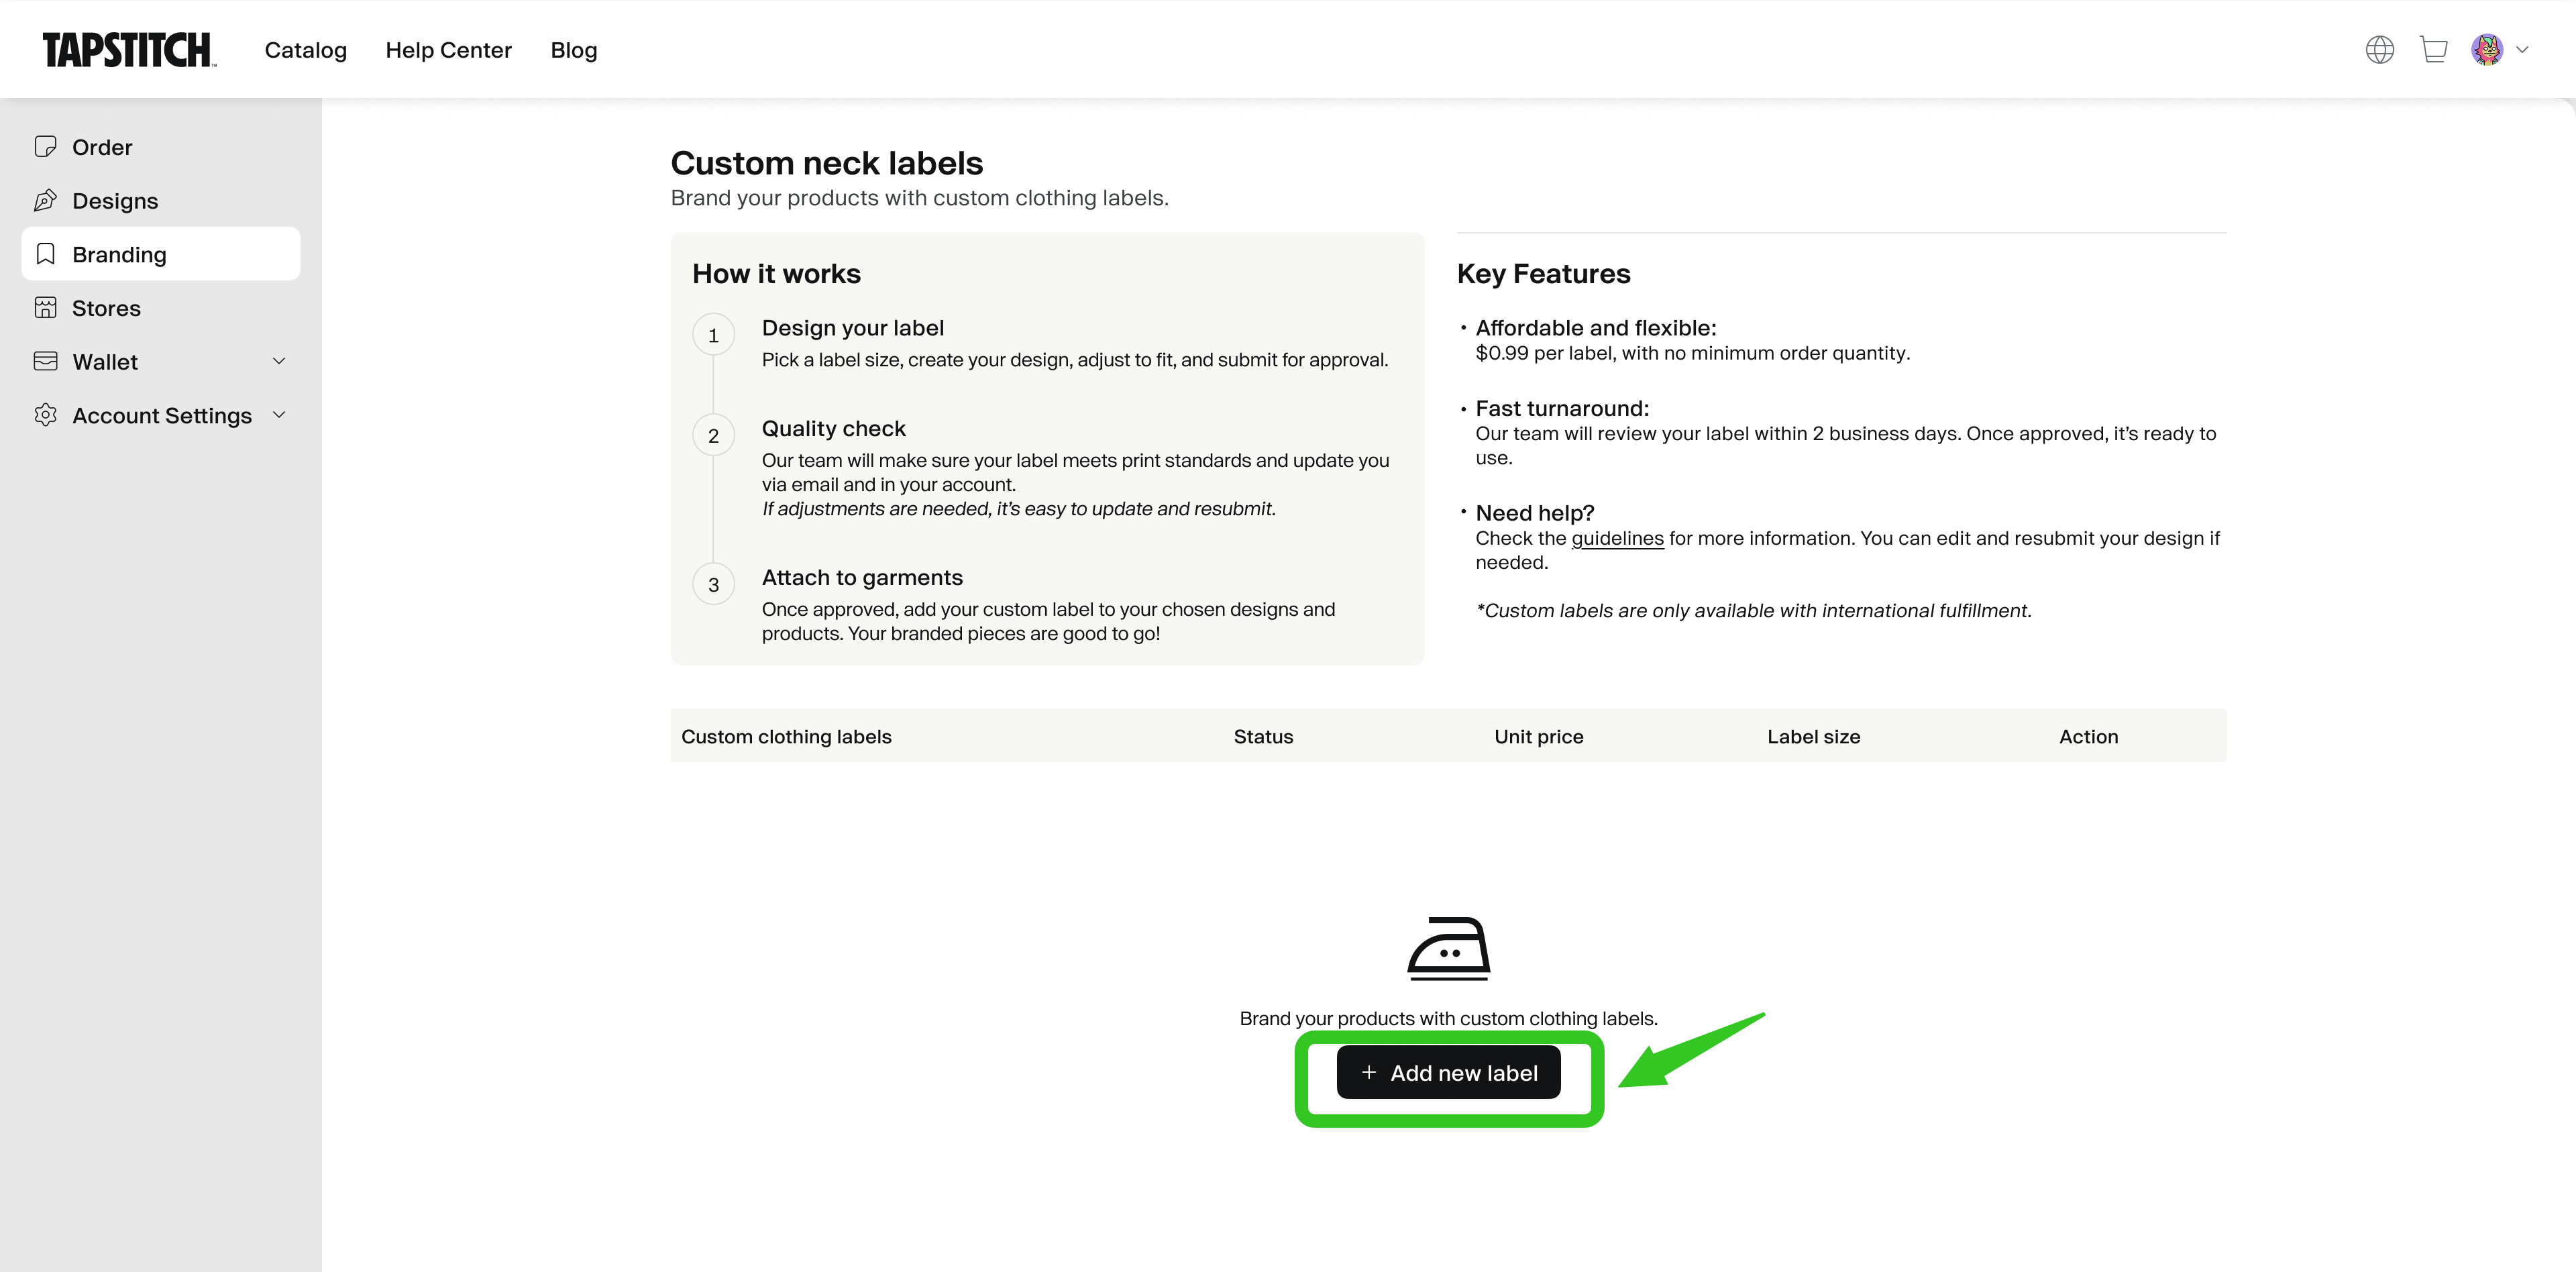
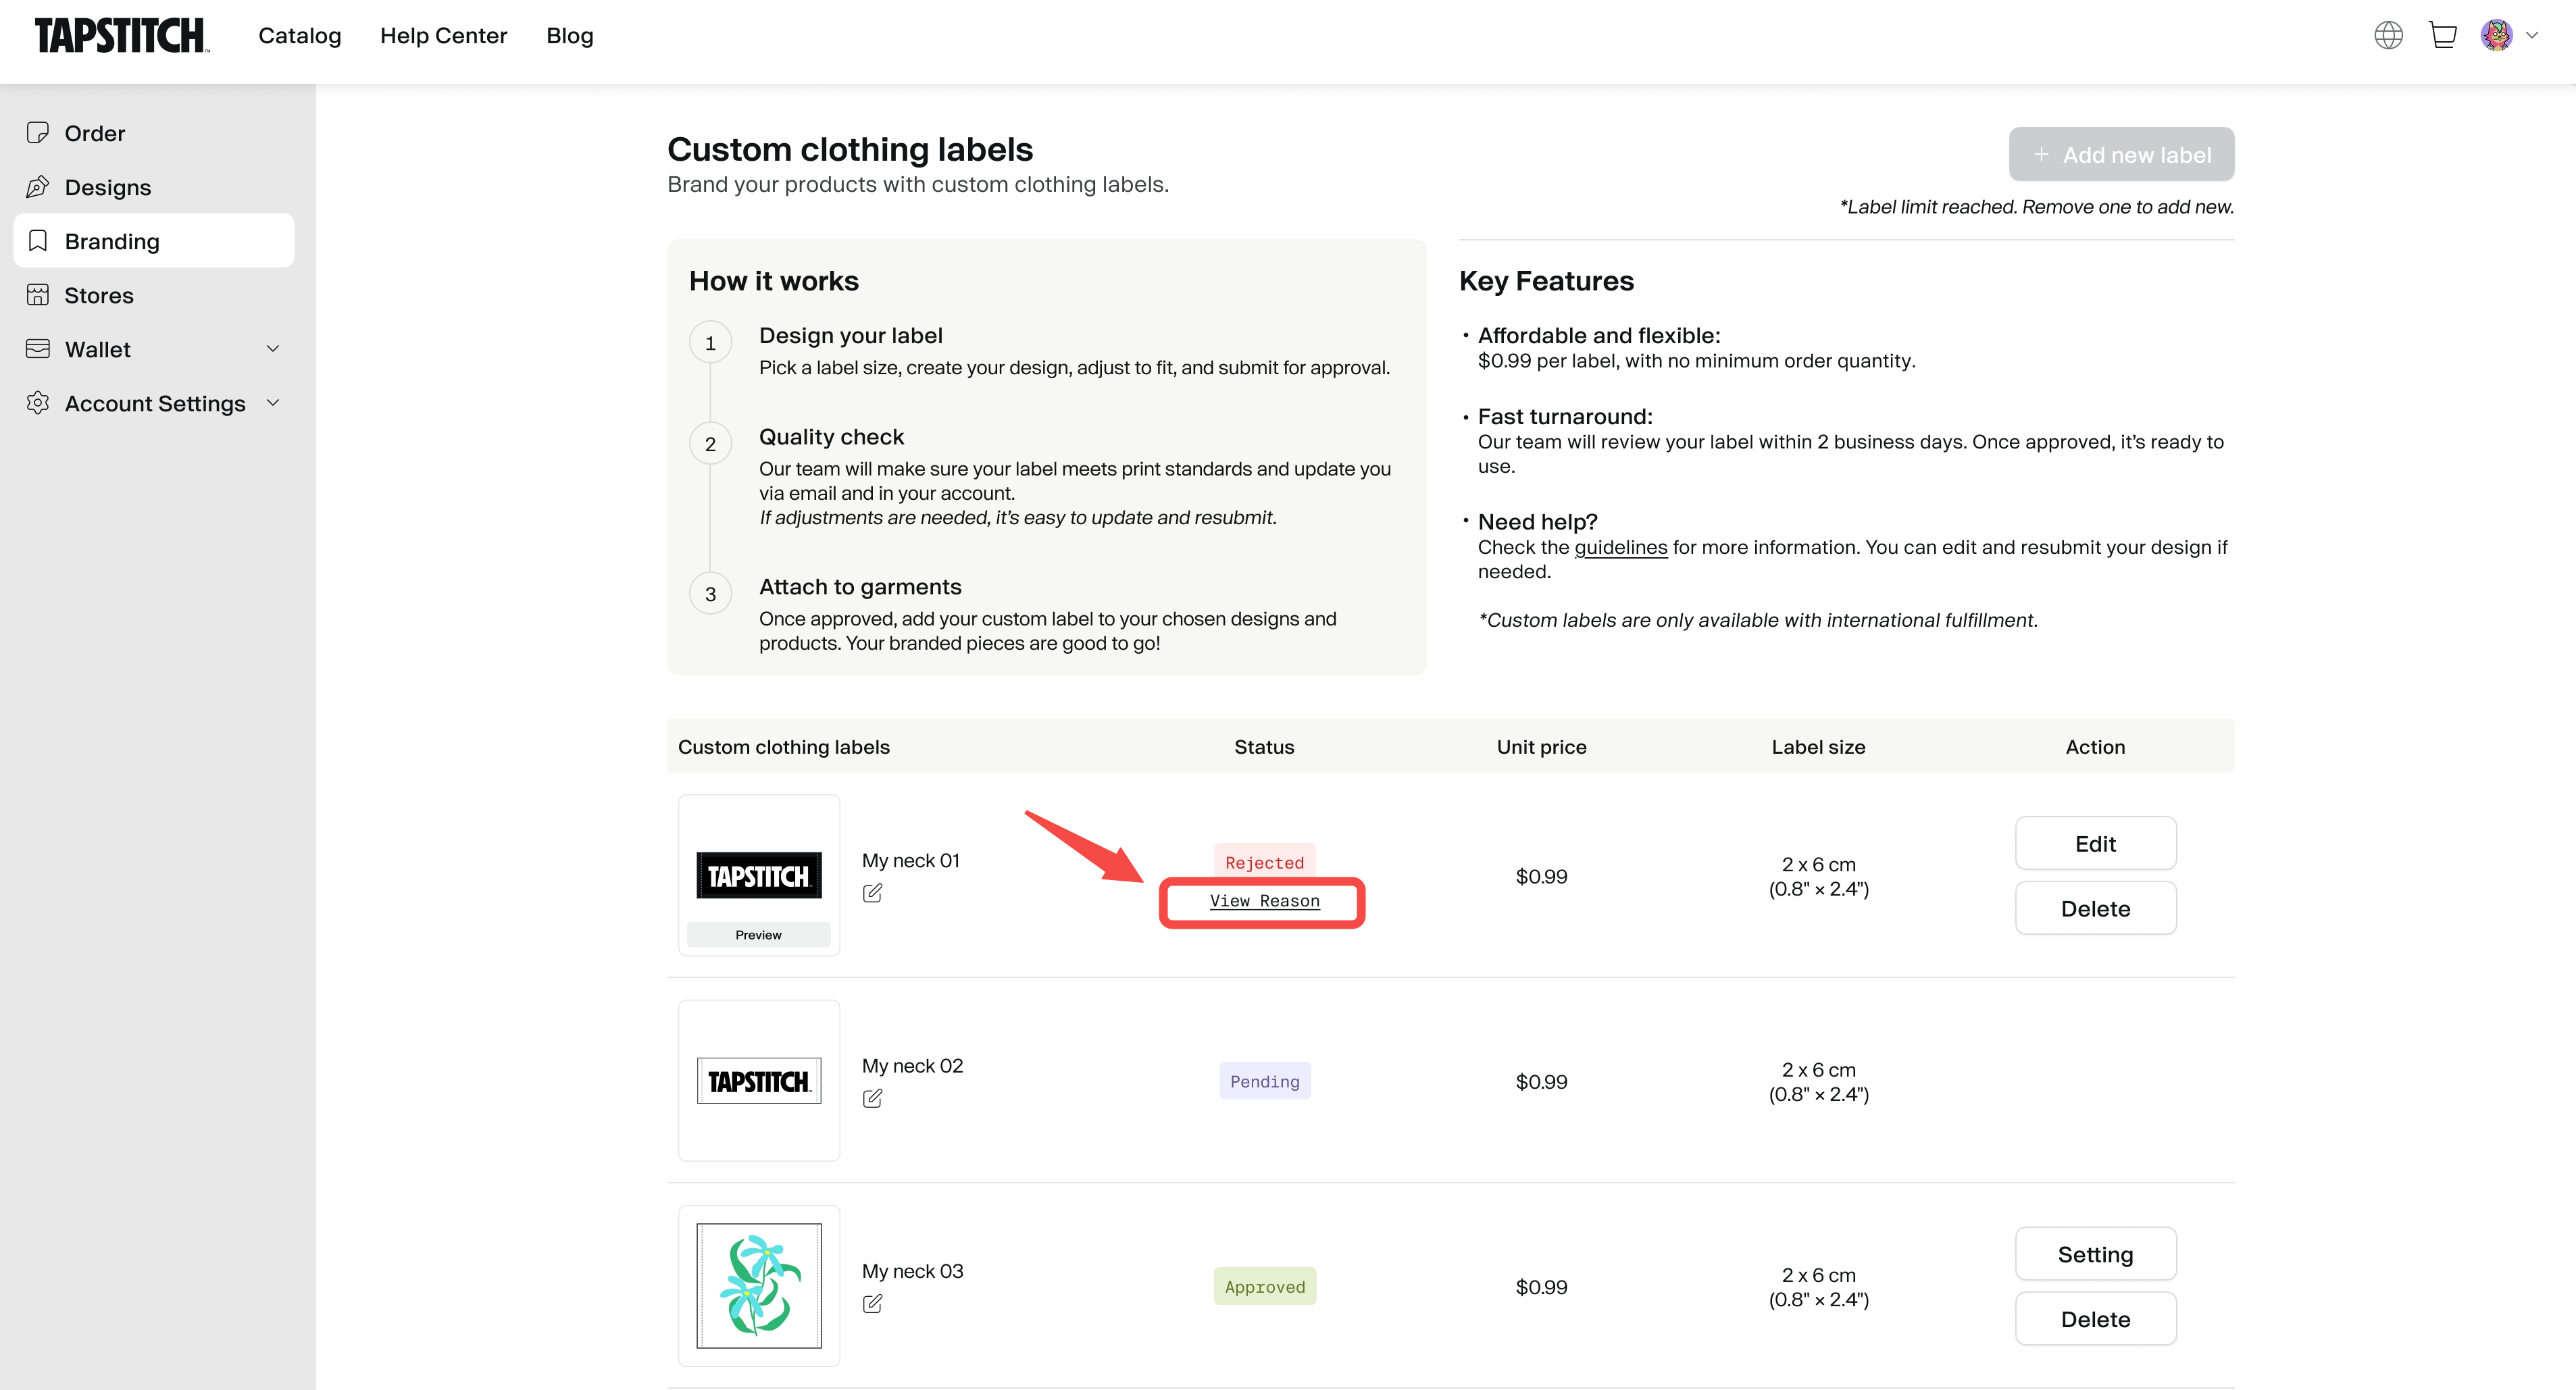
 On the Custom clothing label page, you can:
- Click “Add new label” to start designing.
- View helpful info in the “How it works” and “Key features” sections.
- Edit or delete any existing labels.
- If you haven’t created a label yet, you’ll be prompted to get started.
How to add a new custom label
Click 'Add new label' to start customizing your clothing label settings.
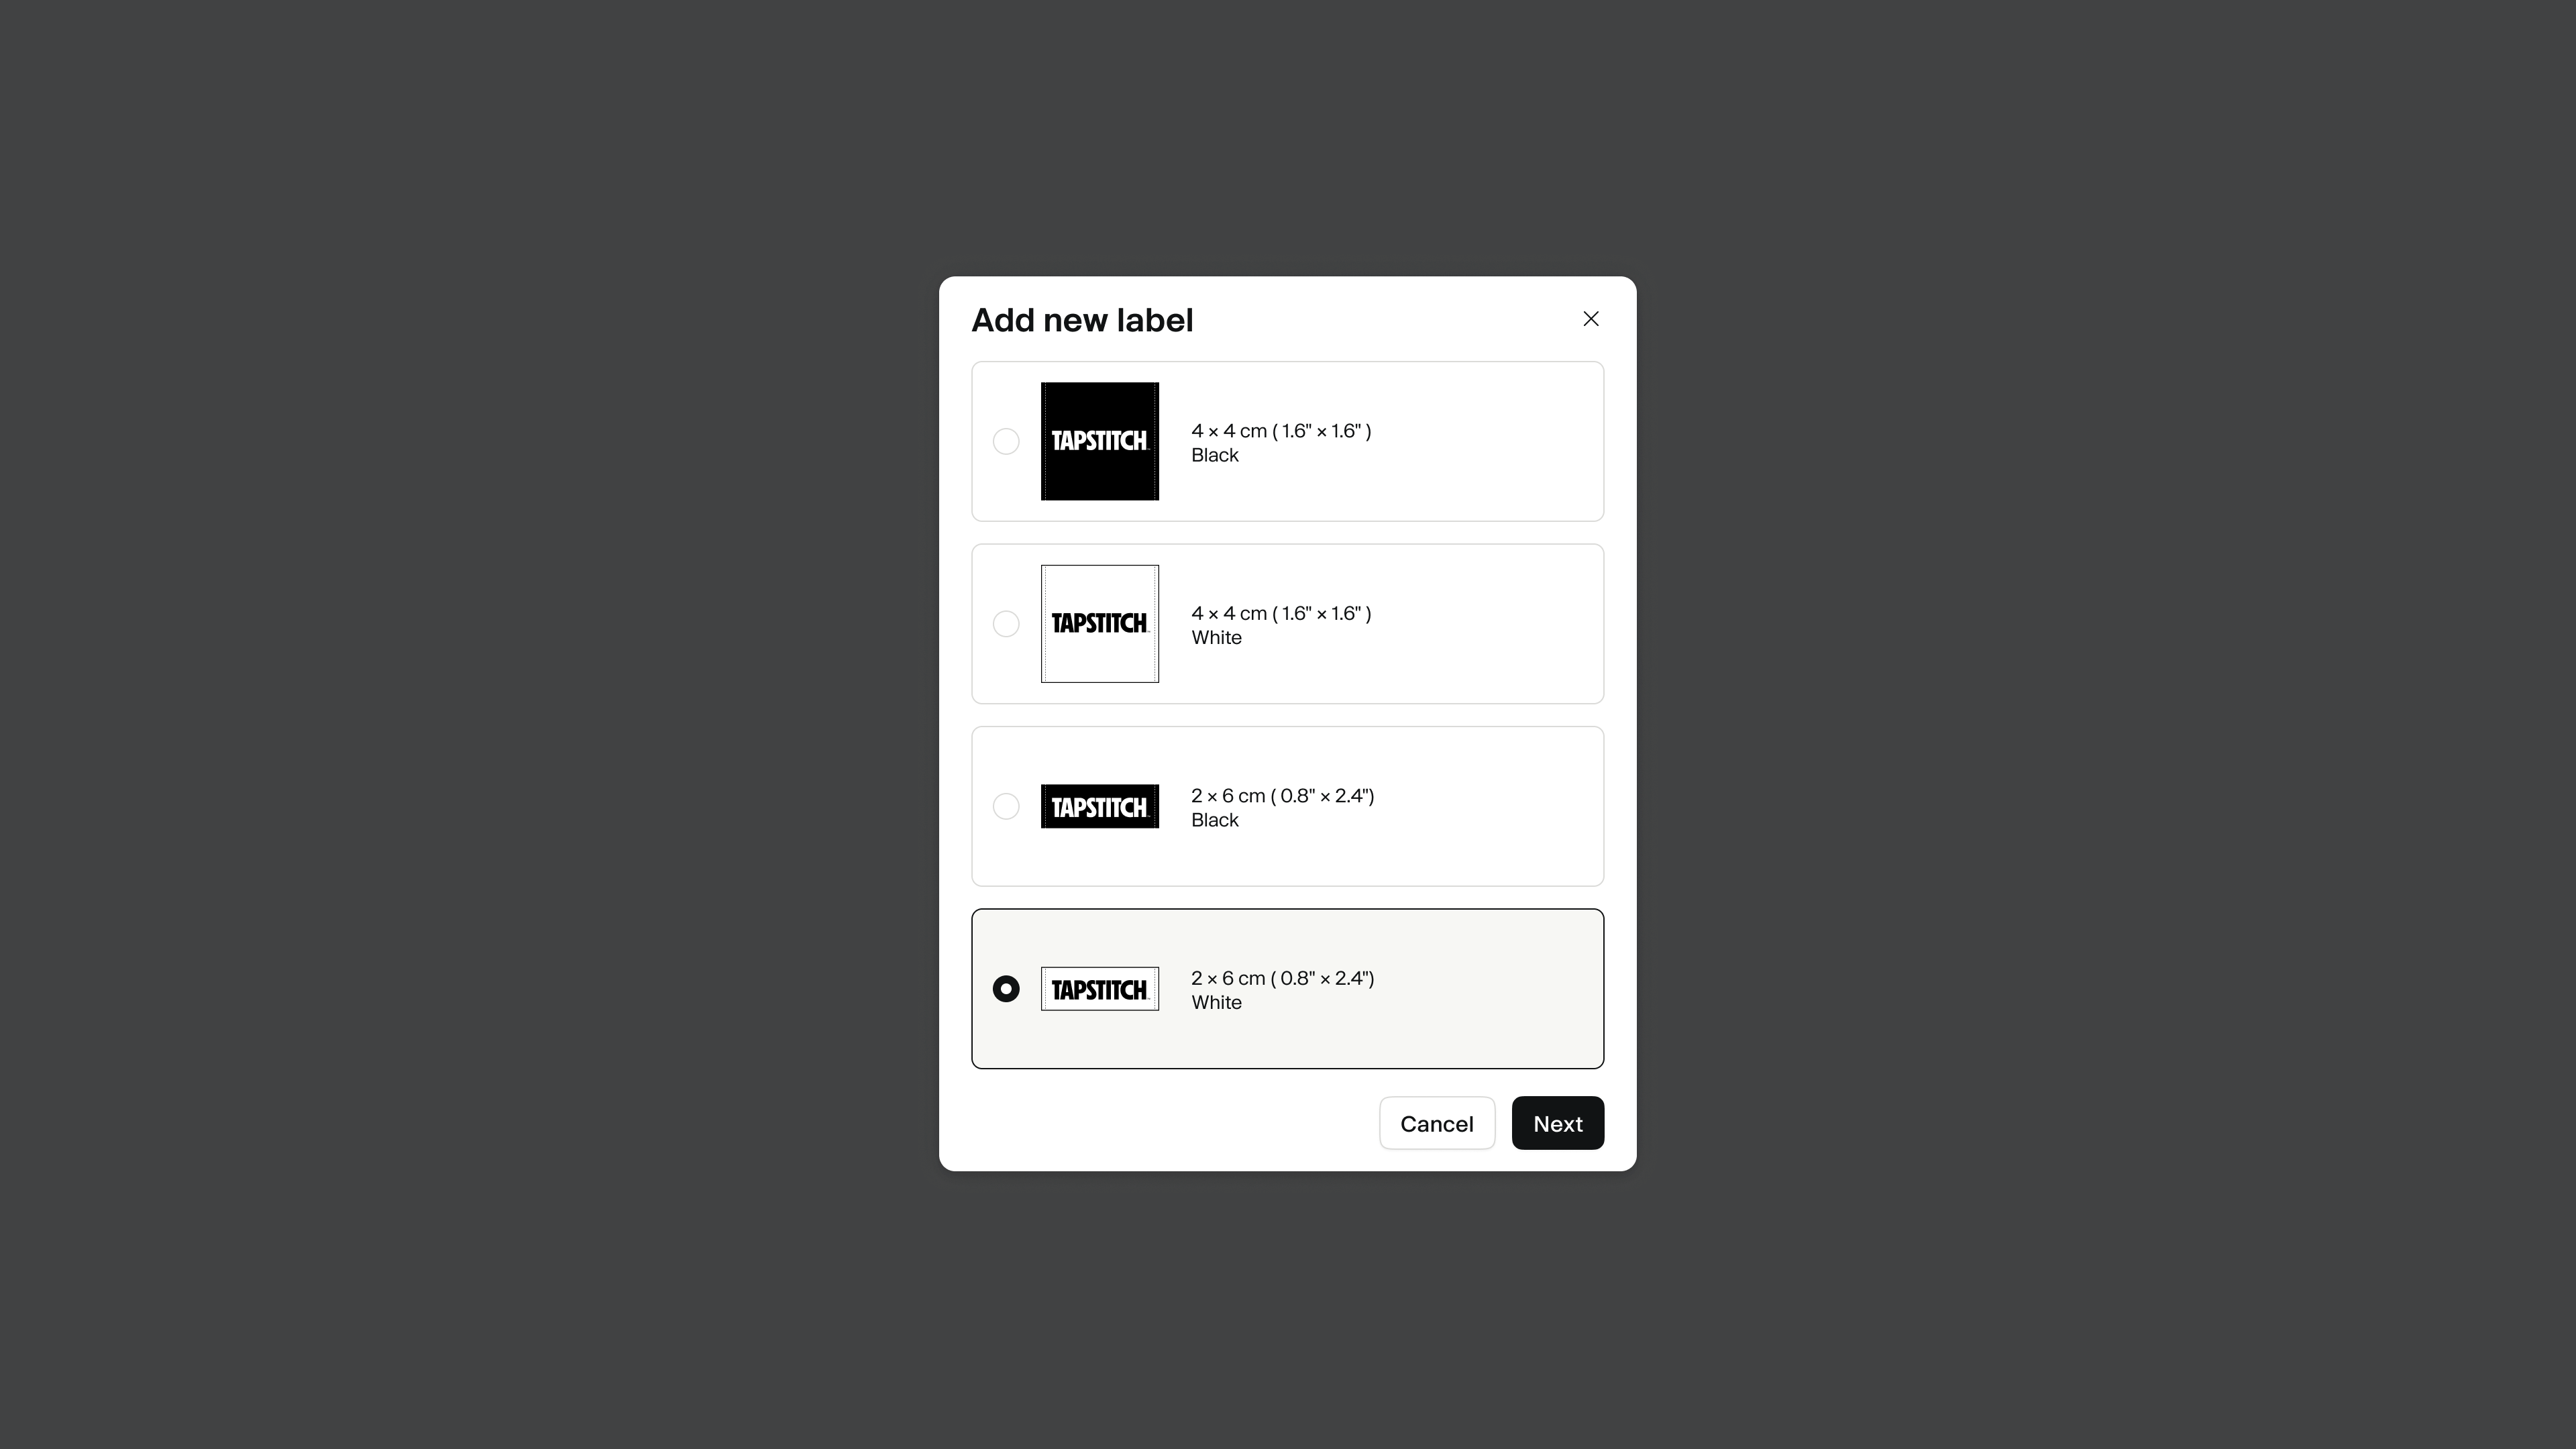
1. Choose label size and background color
- Sizes available:
- Rectangle (2 × 6 cm)
- Square (4 × 4 cm)
- Background options:
- Black
- White
2.Upload Design and Logo
- Upload graphic or text elements (e.g., logos);
- Follow the on-screen guidance to place your design within the specified area;
- For best results, use high-resolution images and text files.
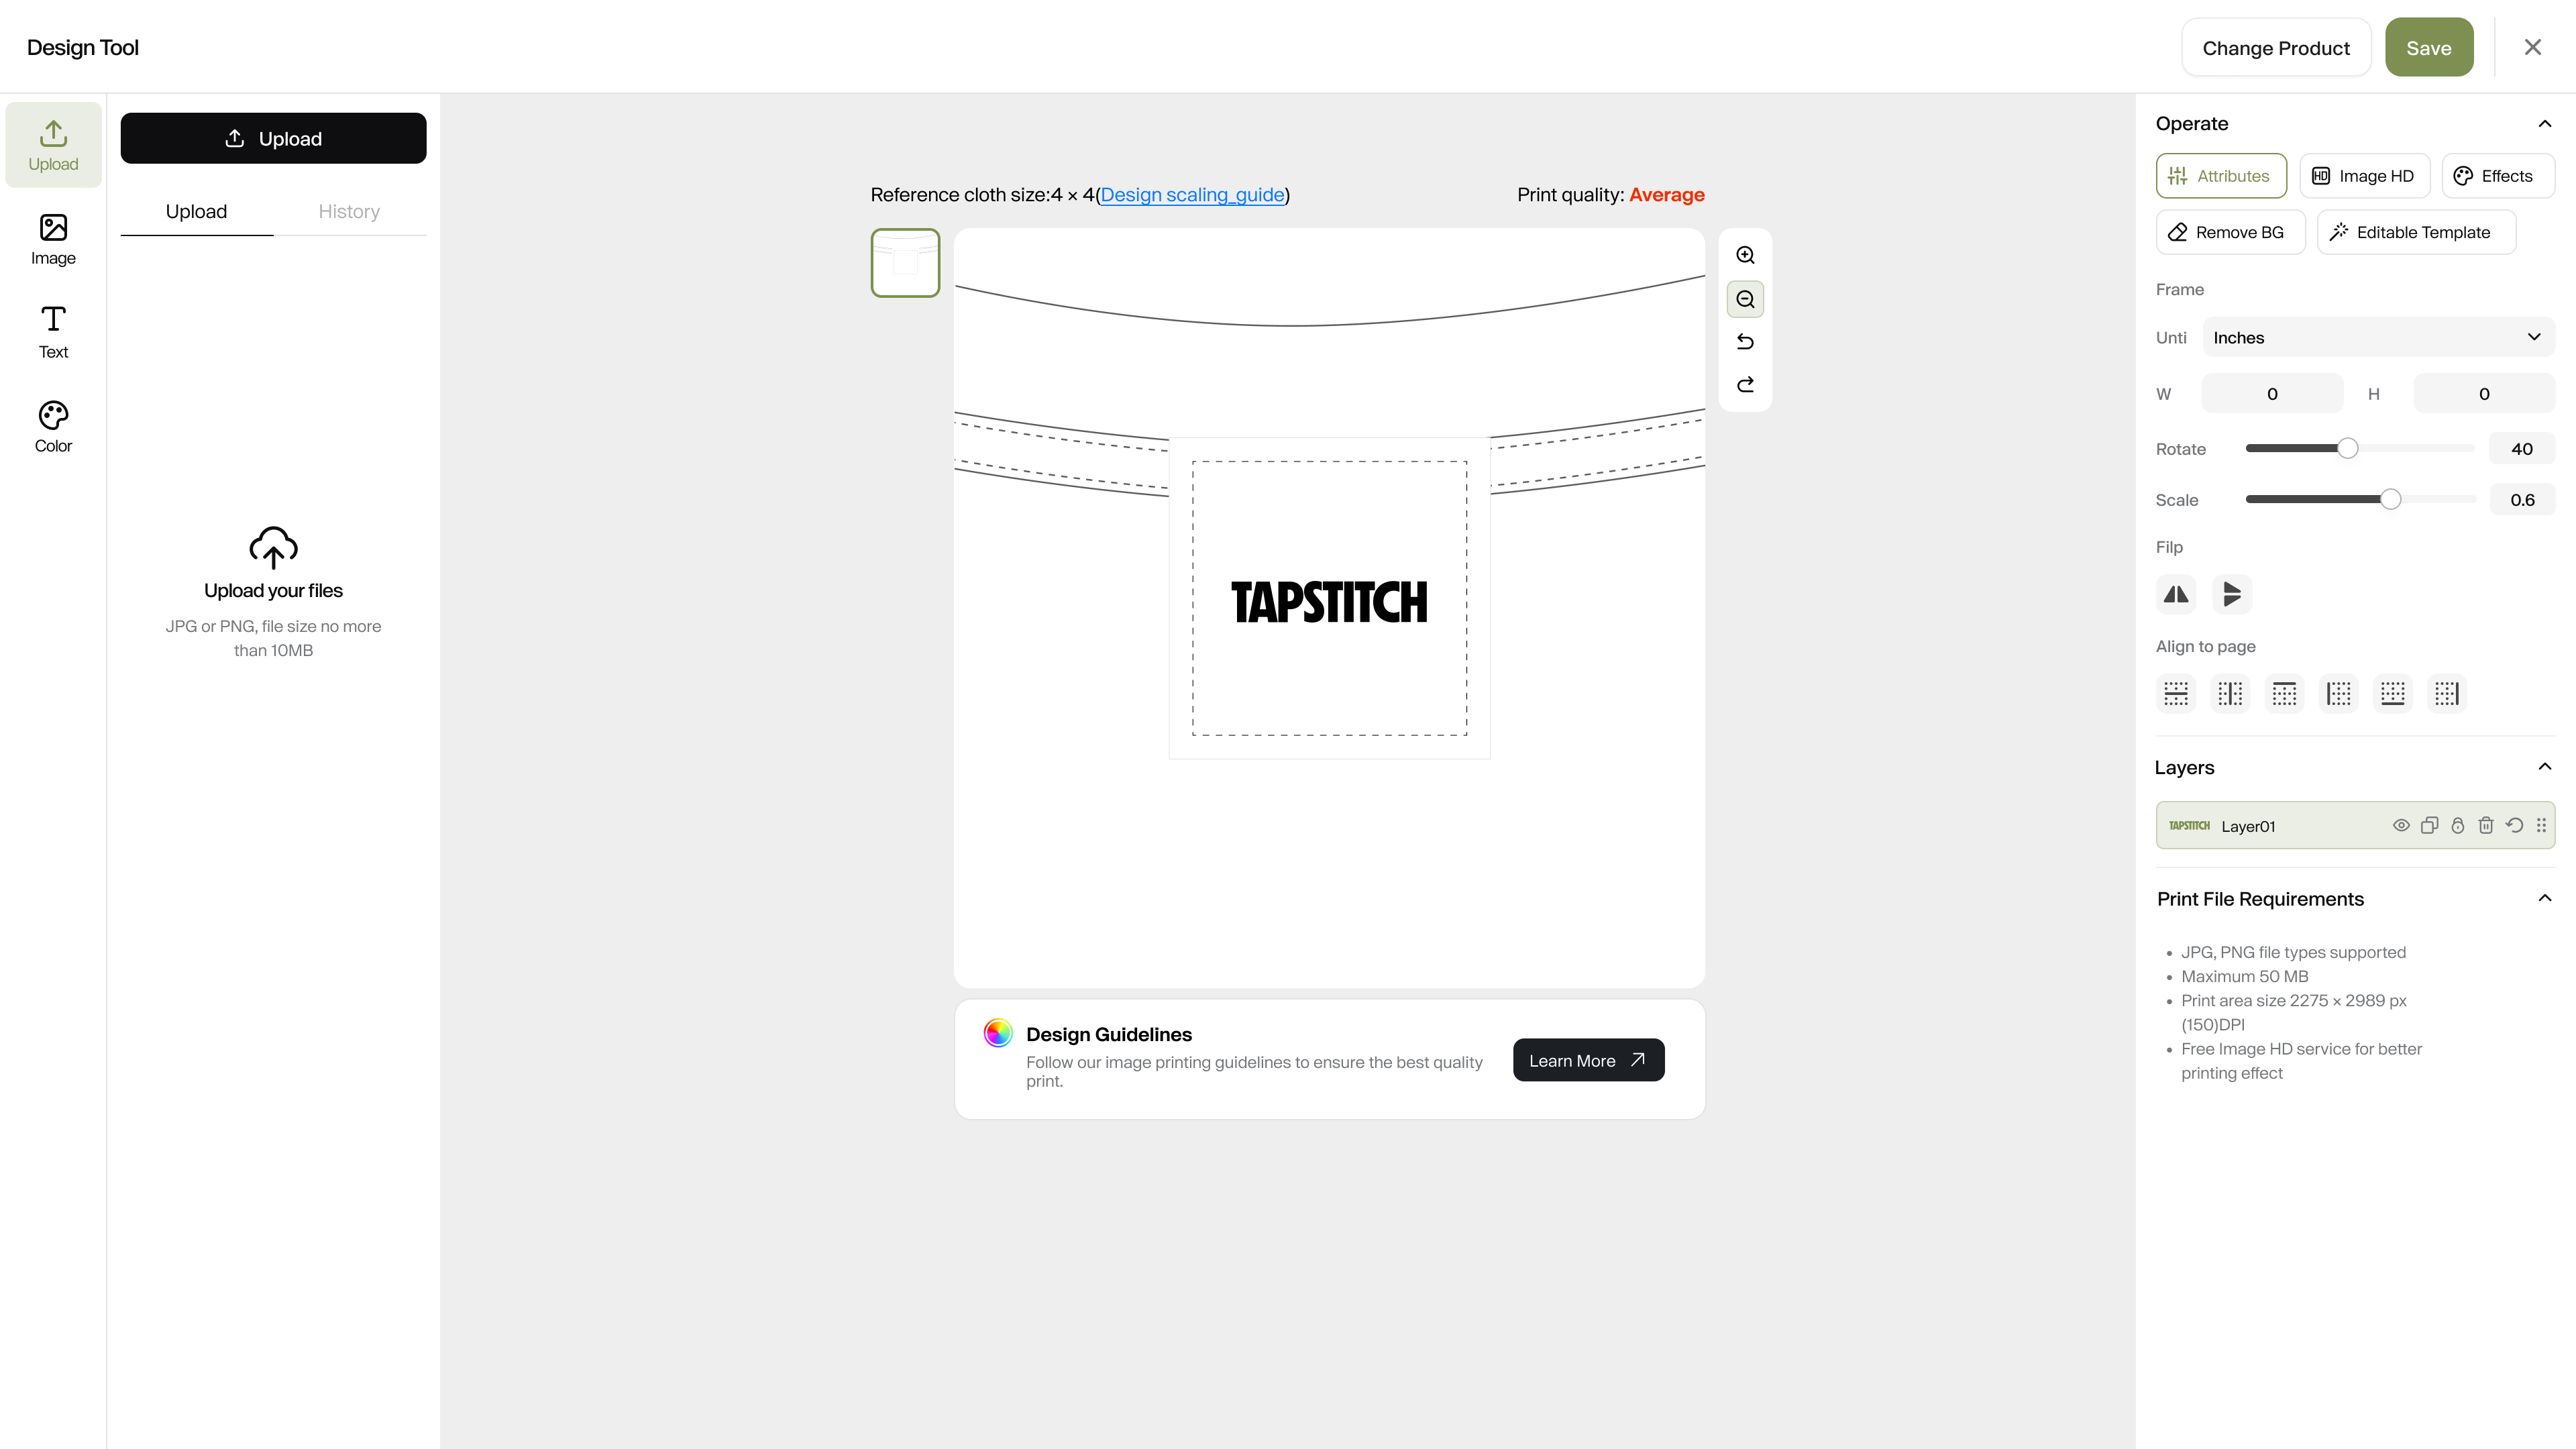
3.Submit for Review and Check Status
- Once your design is complete, click ‘Submit’ to begin the review process.
- Label status types:
- Approved – Ready to use
- Pending – Under review
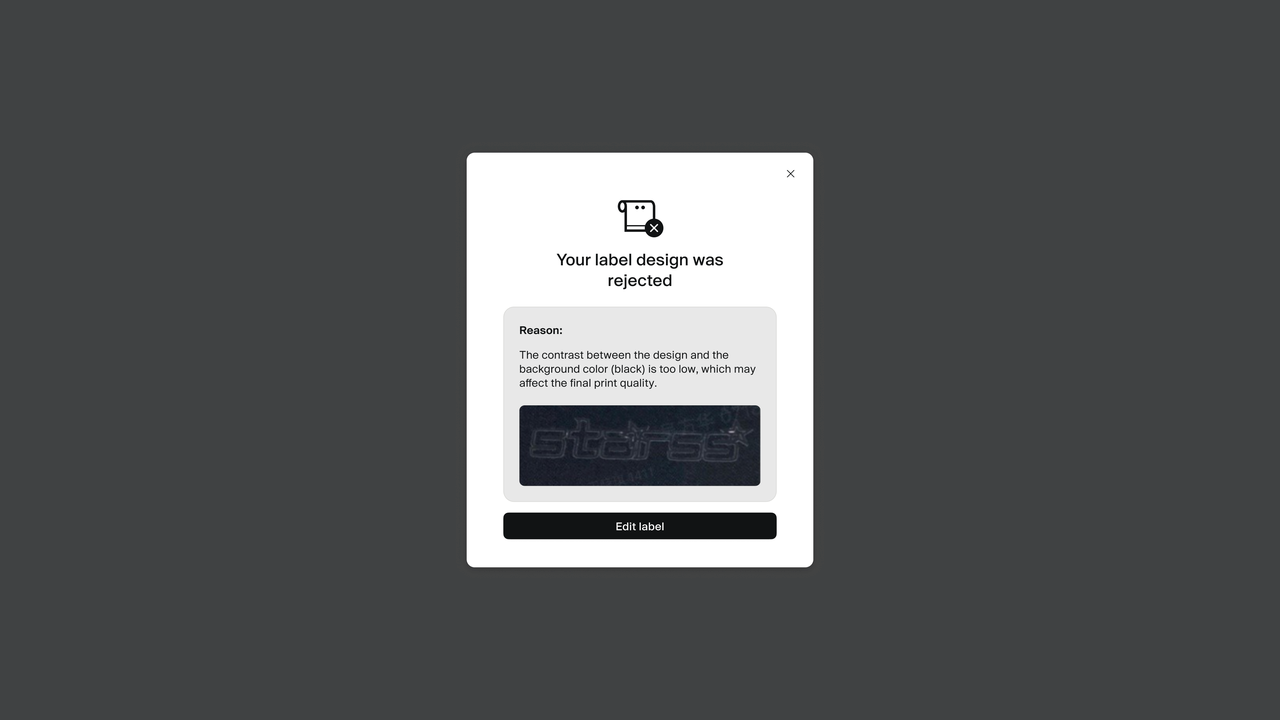
- Rejected – Not approved
- If your design is rejected, you can review the feedback and resubmit after making edits.
- The review result will be available within 2 business days.
💡 Tips
- Your design won’t be saved if you leave the page before submitting. Be sure to complete and submit your label before exiting.
- If your label is rejected, check the feedback provided, make any needed changes, and resubmit.
- Labels won't be applied automatically to previously generated on-hold orders. Go to your on-hold orders list to add labels manually.
- For detailed steps, refer to the section below on how to bind and apply labels.
Custom labels are only available with international fulfillment.
How to add labels to products
You can choose different ways to add custom labels depending on your needs.
✅ Synced store items
To add a custom label to products already synced to your online store:
- Go to the Branding page from your Home screen by clicking the profile icon.
- Find the label you want to use and click Settings.
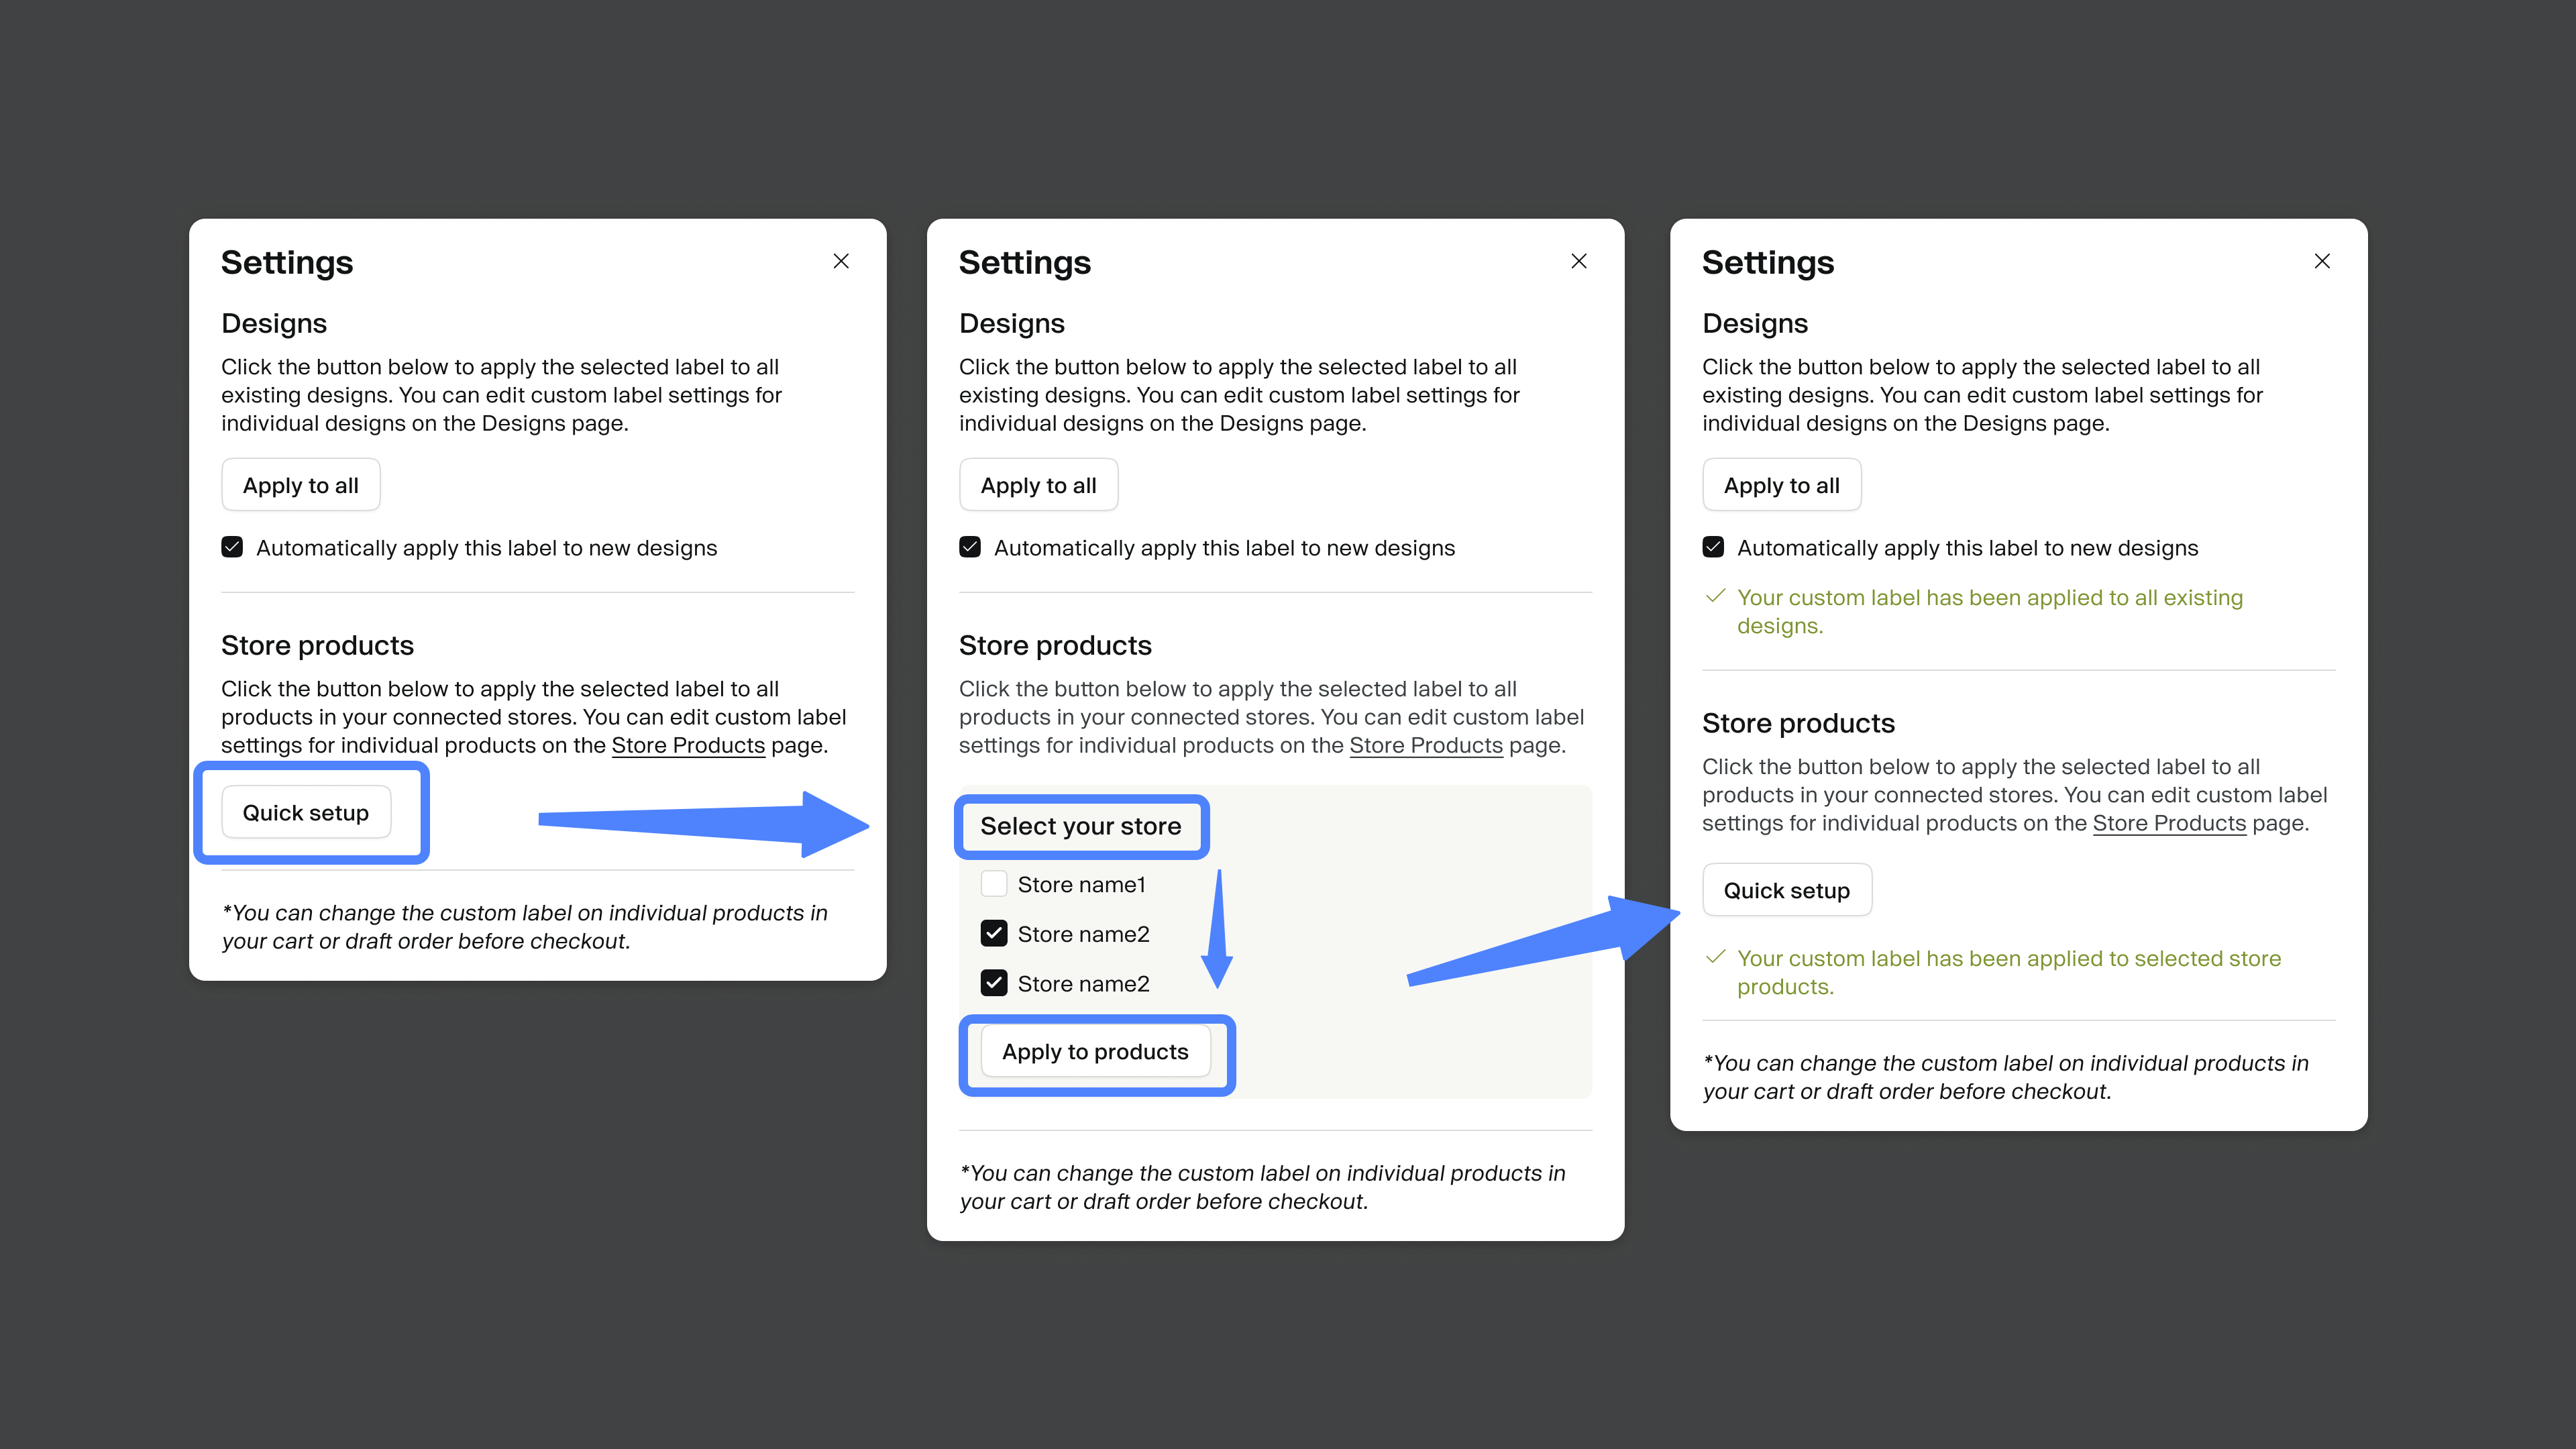
- In the settings pop-up, choose where to apply the label:
- Designs:
- Add the label to all design drafts.
- You can also check Automatically apply this label to new designs to set it as the default going forward.
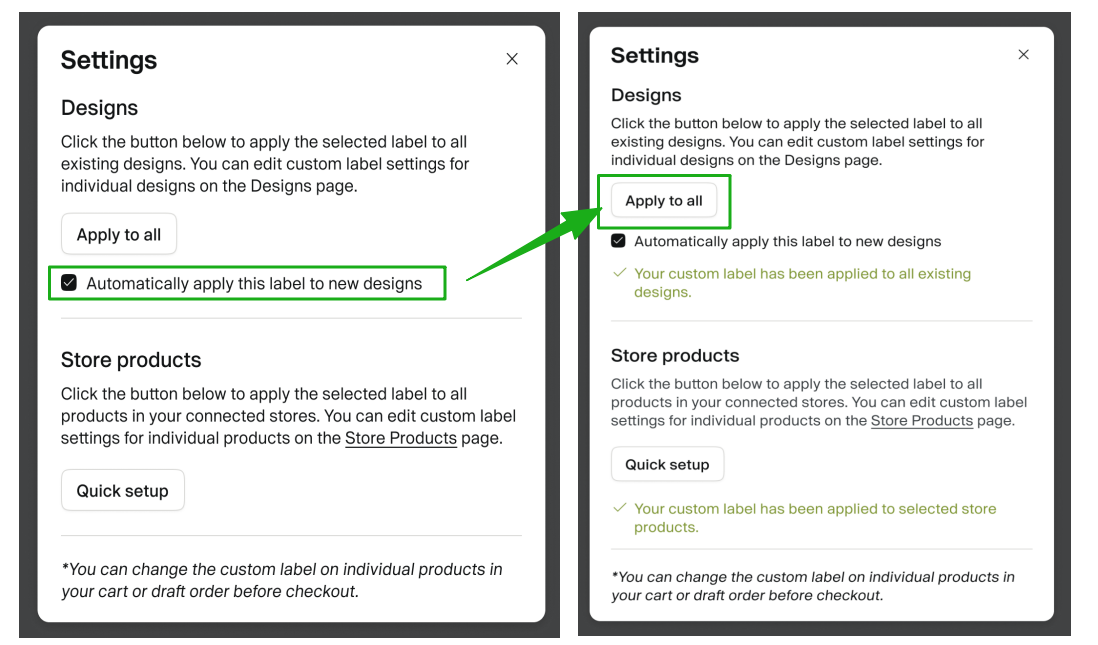
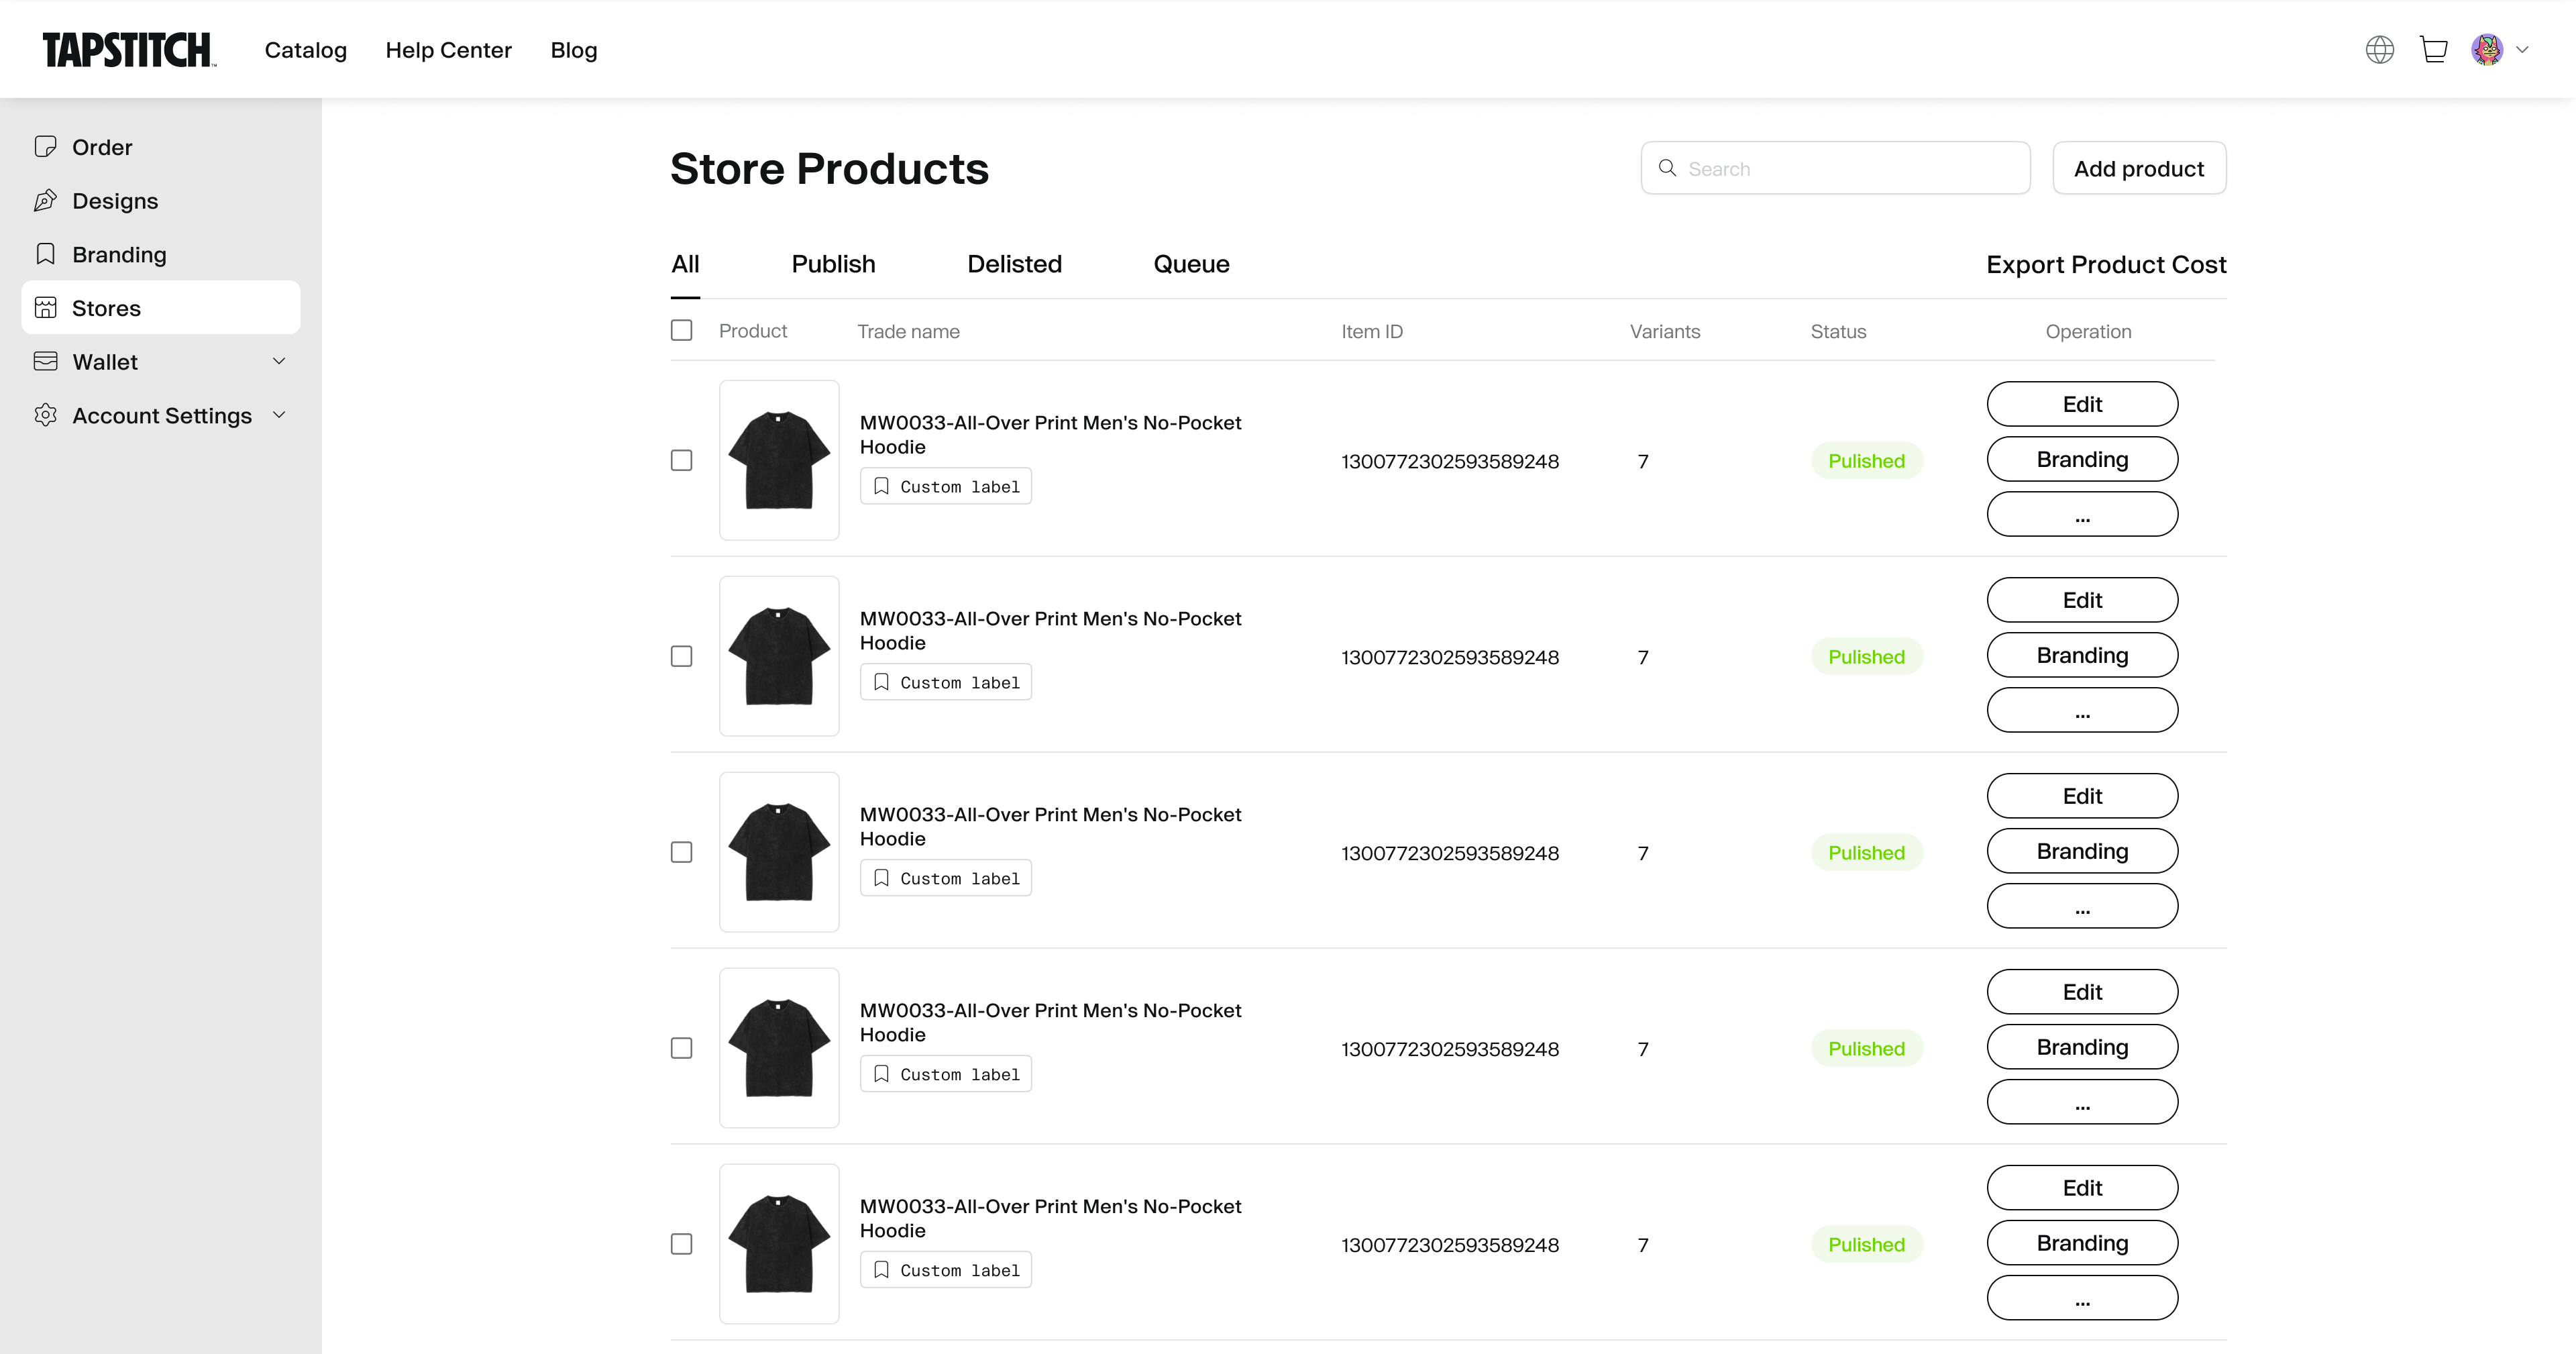
- Store Products:
- If you’ve connected multiple stores, select one from the 'Select your store' dropdown.
- Click Apply to products or use Quick setup to add the label to all products in that store.
- You’ll see a confirmation message when your label is added successfully:
- ✅ Your custom label has been applied to selected store products.
📌 Notes
- You can still change the label for individual items in your Cart or Draft Orders before payment.
- If a product already has a different label, applying a new one will replace it.
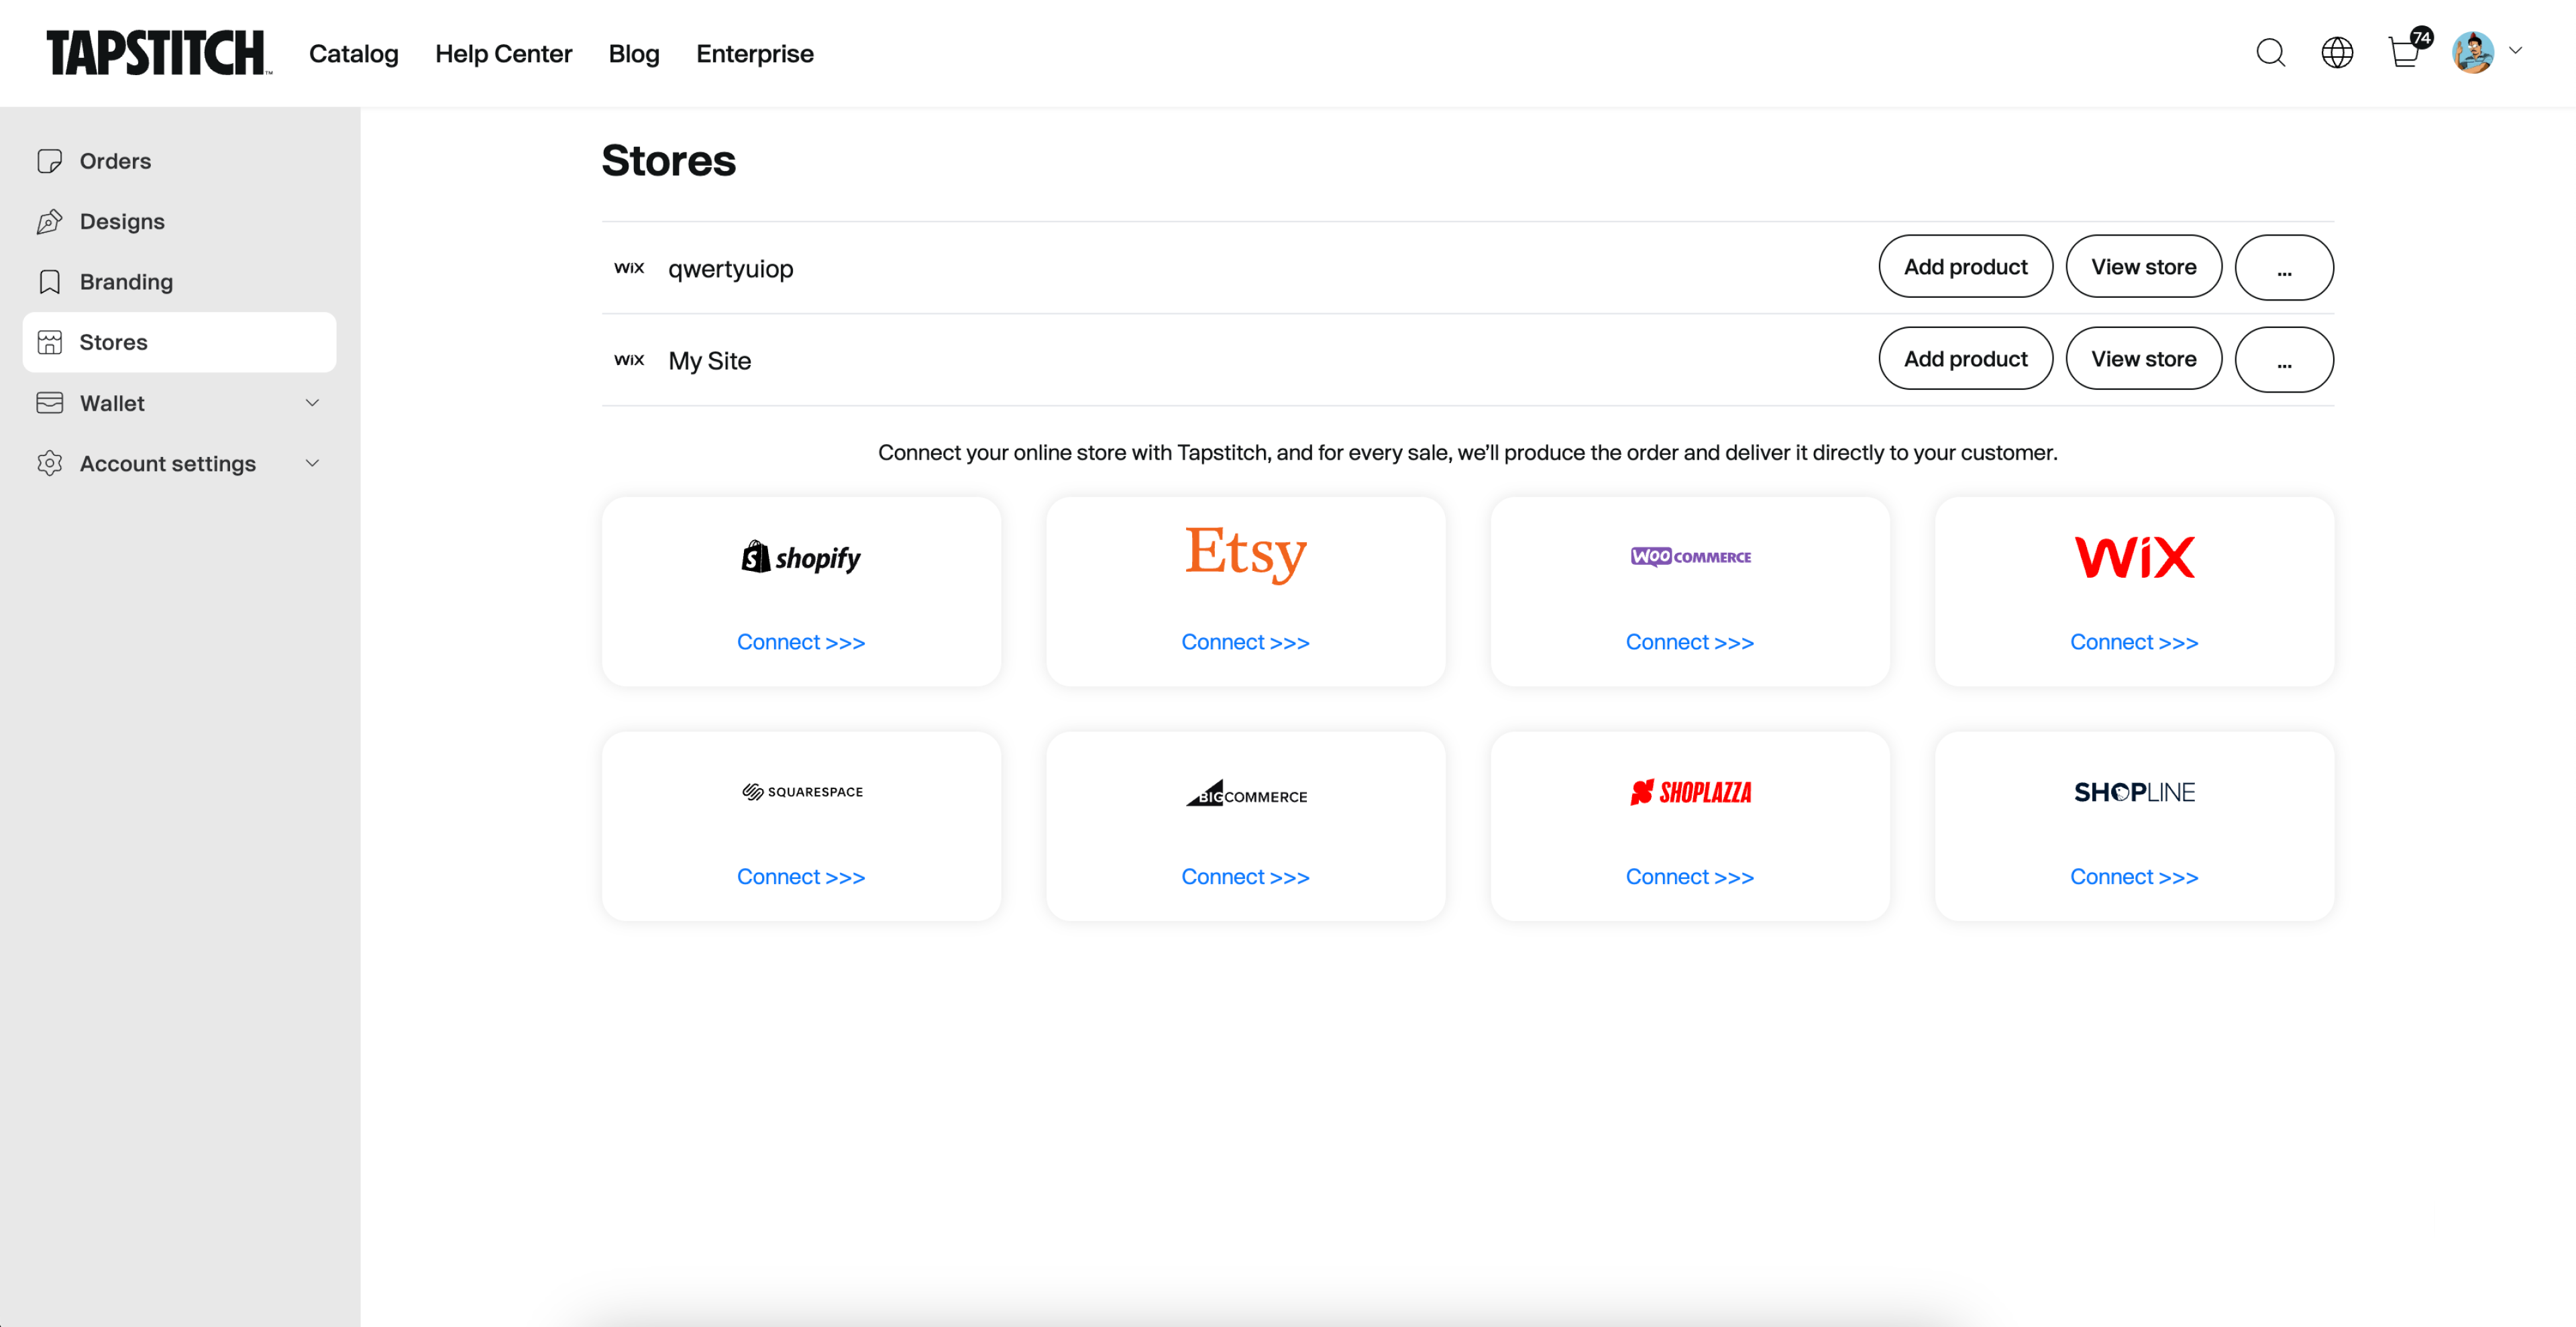
✅ Stores & collections
To apply custom labels across multiple stores or different collections within a single store.
- Go to the Stores page from your Home screen by clicking the profile icon.
- Find the store you want to bind labels to and click “View store”.
- Select the product, then click Branding below it.
- Select your custom label from the list and click Confirm.
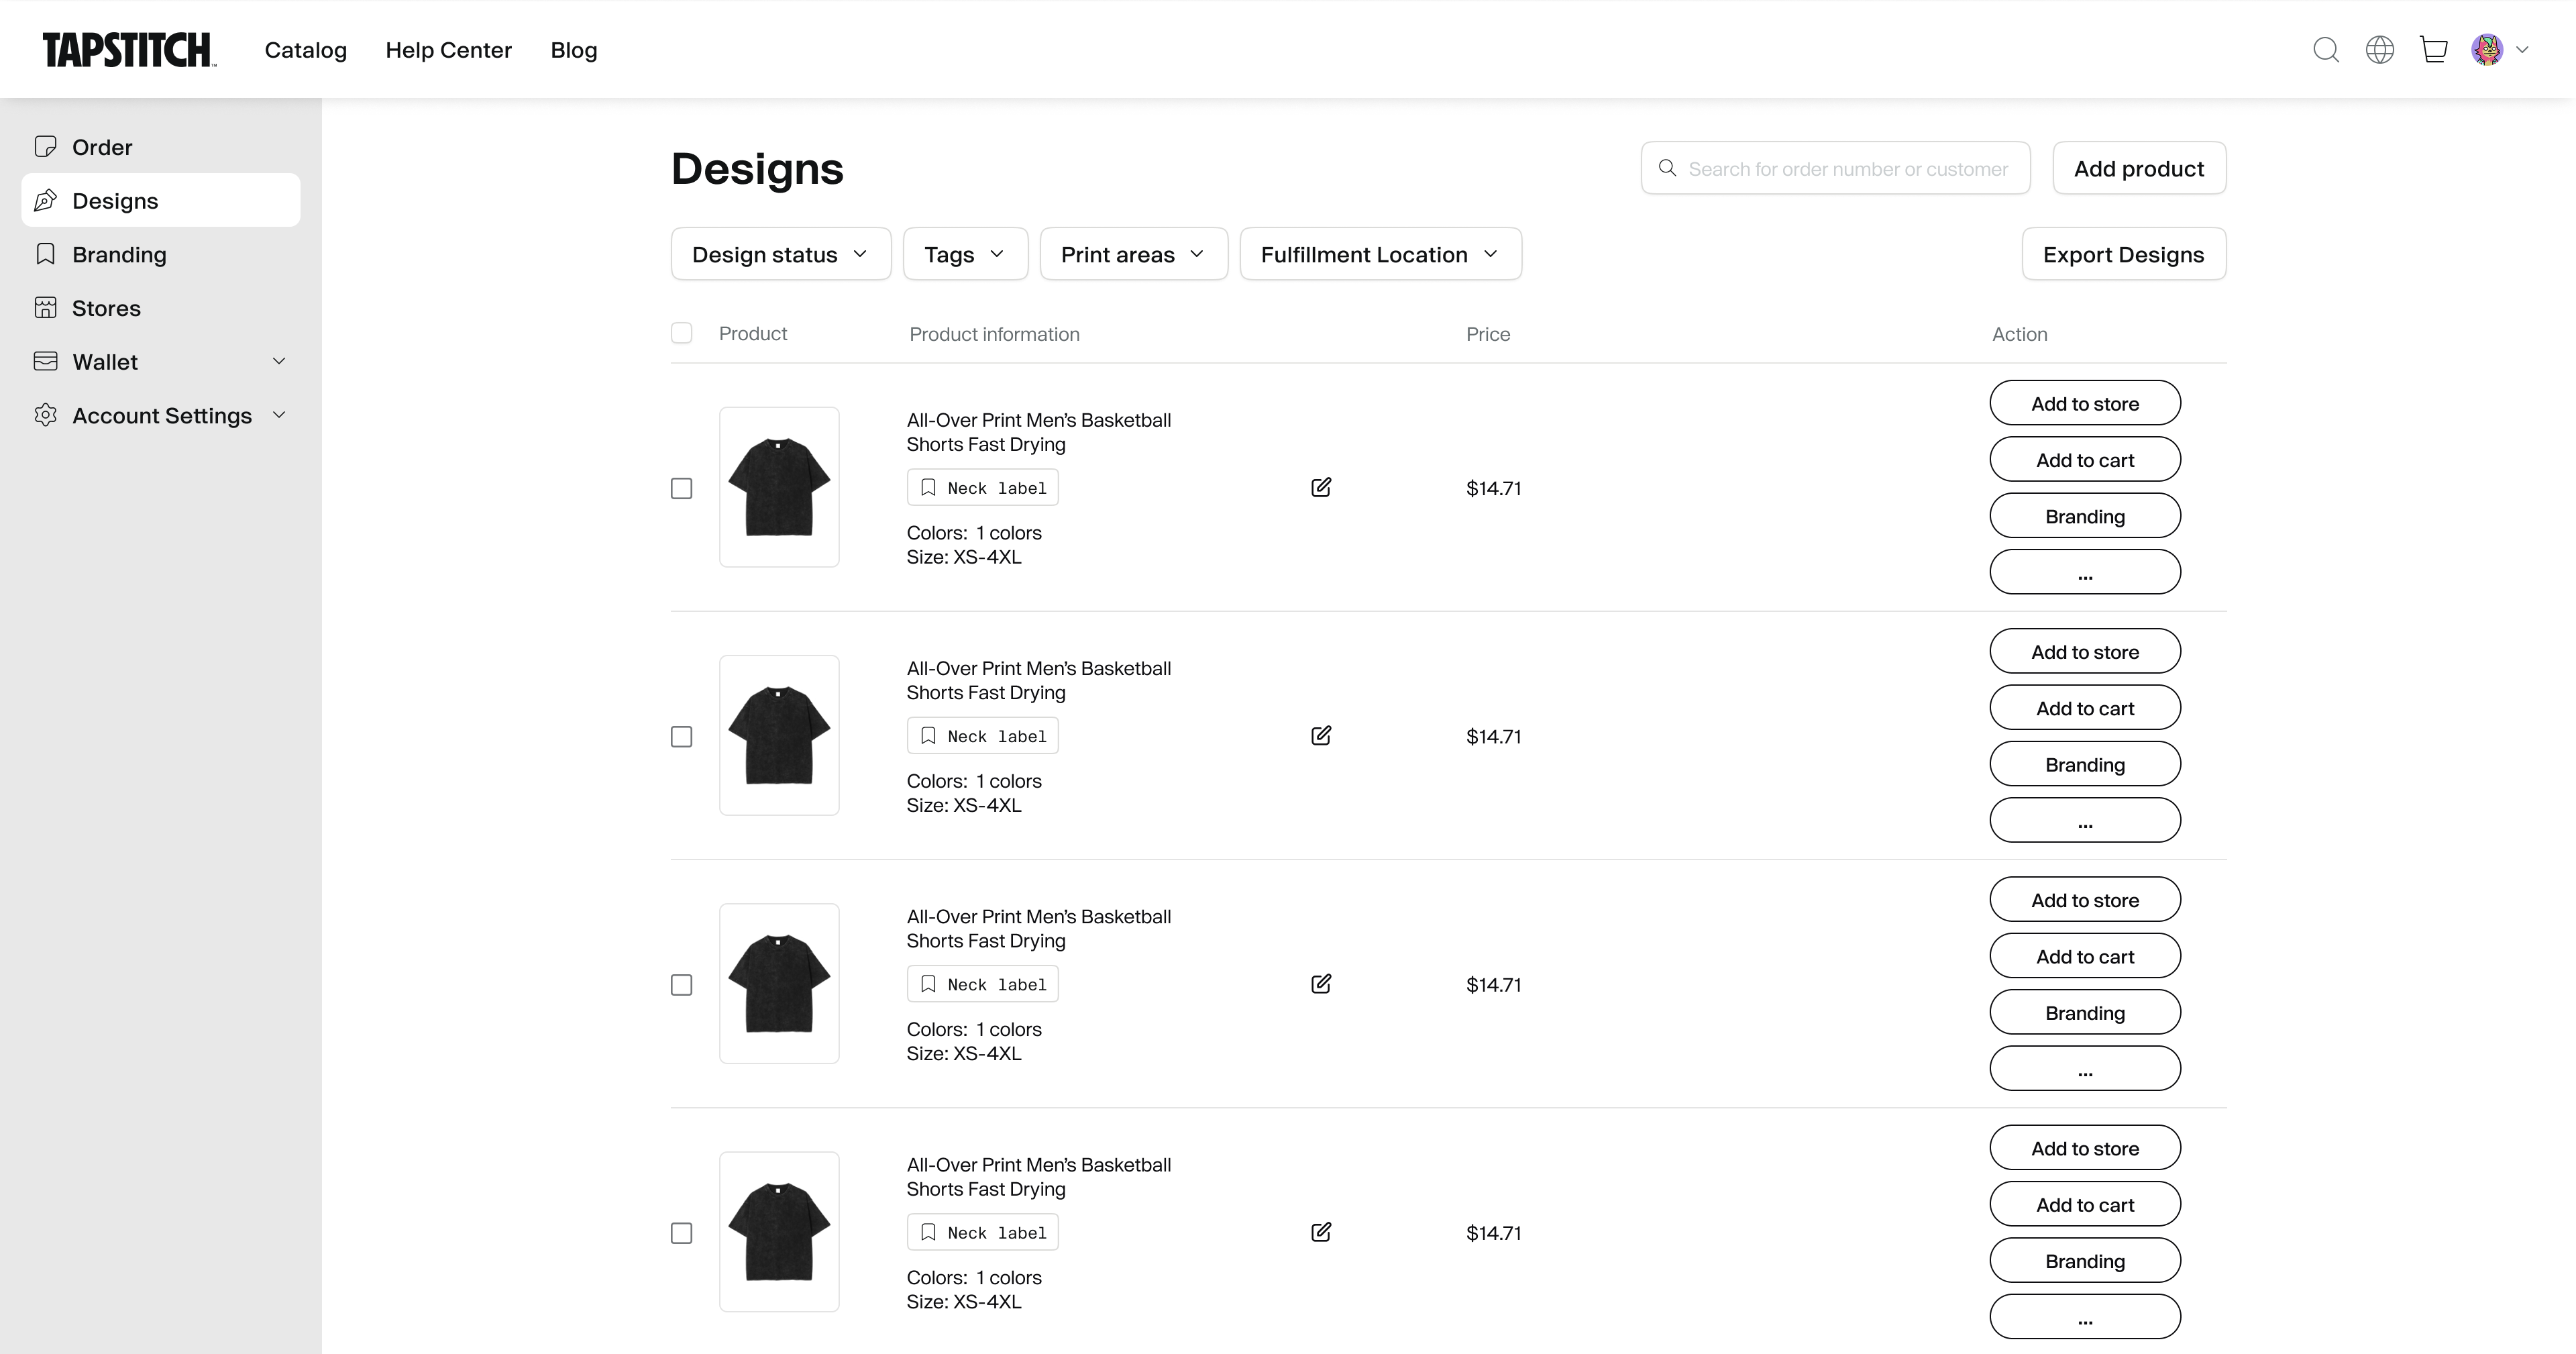
✅ Individual design items
To add a custom label to individual design drafts you've created.
- Go to the Designs page from your Home screen by clicking the profile icon.
- Find the product you want to customize.
- Under the item details, click Branding.
- Select your custom label from the list and click Confirm.
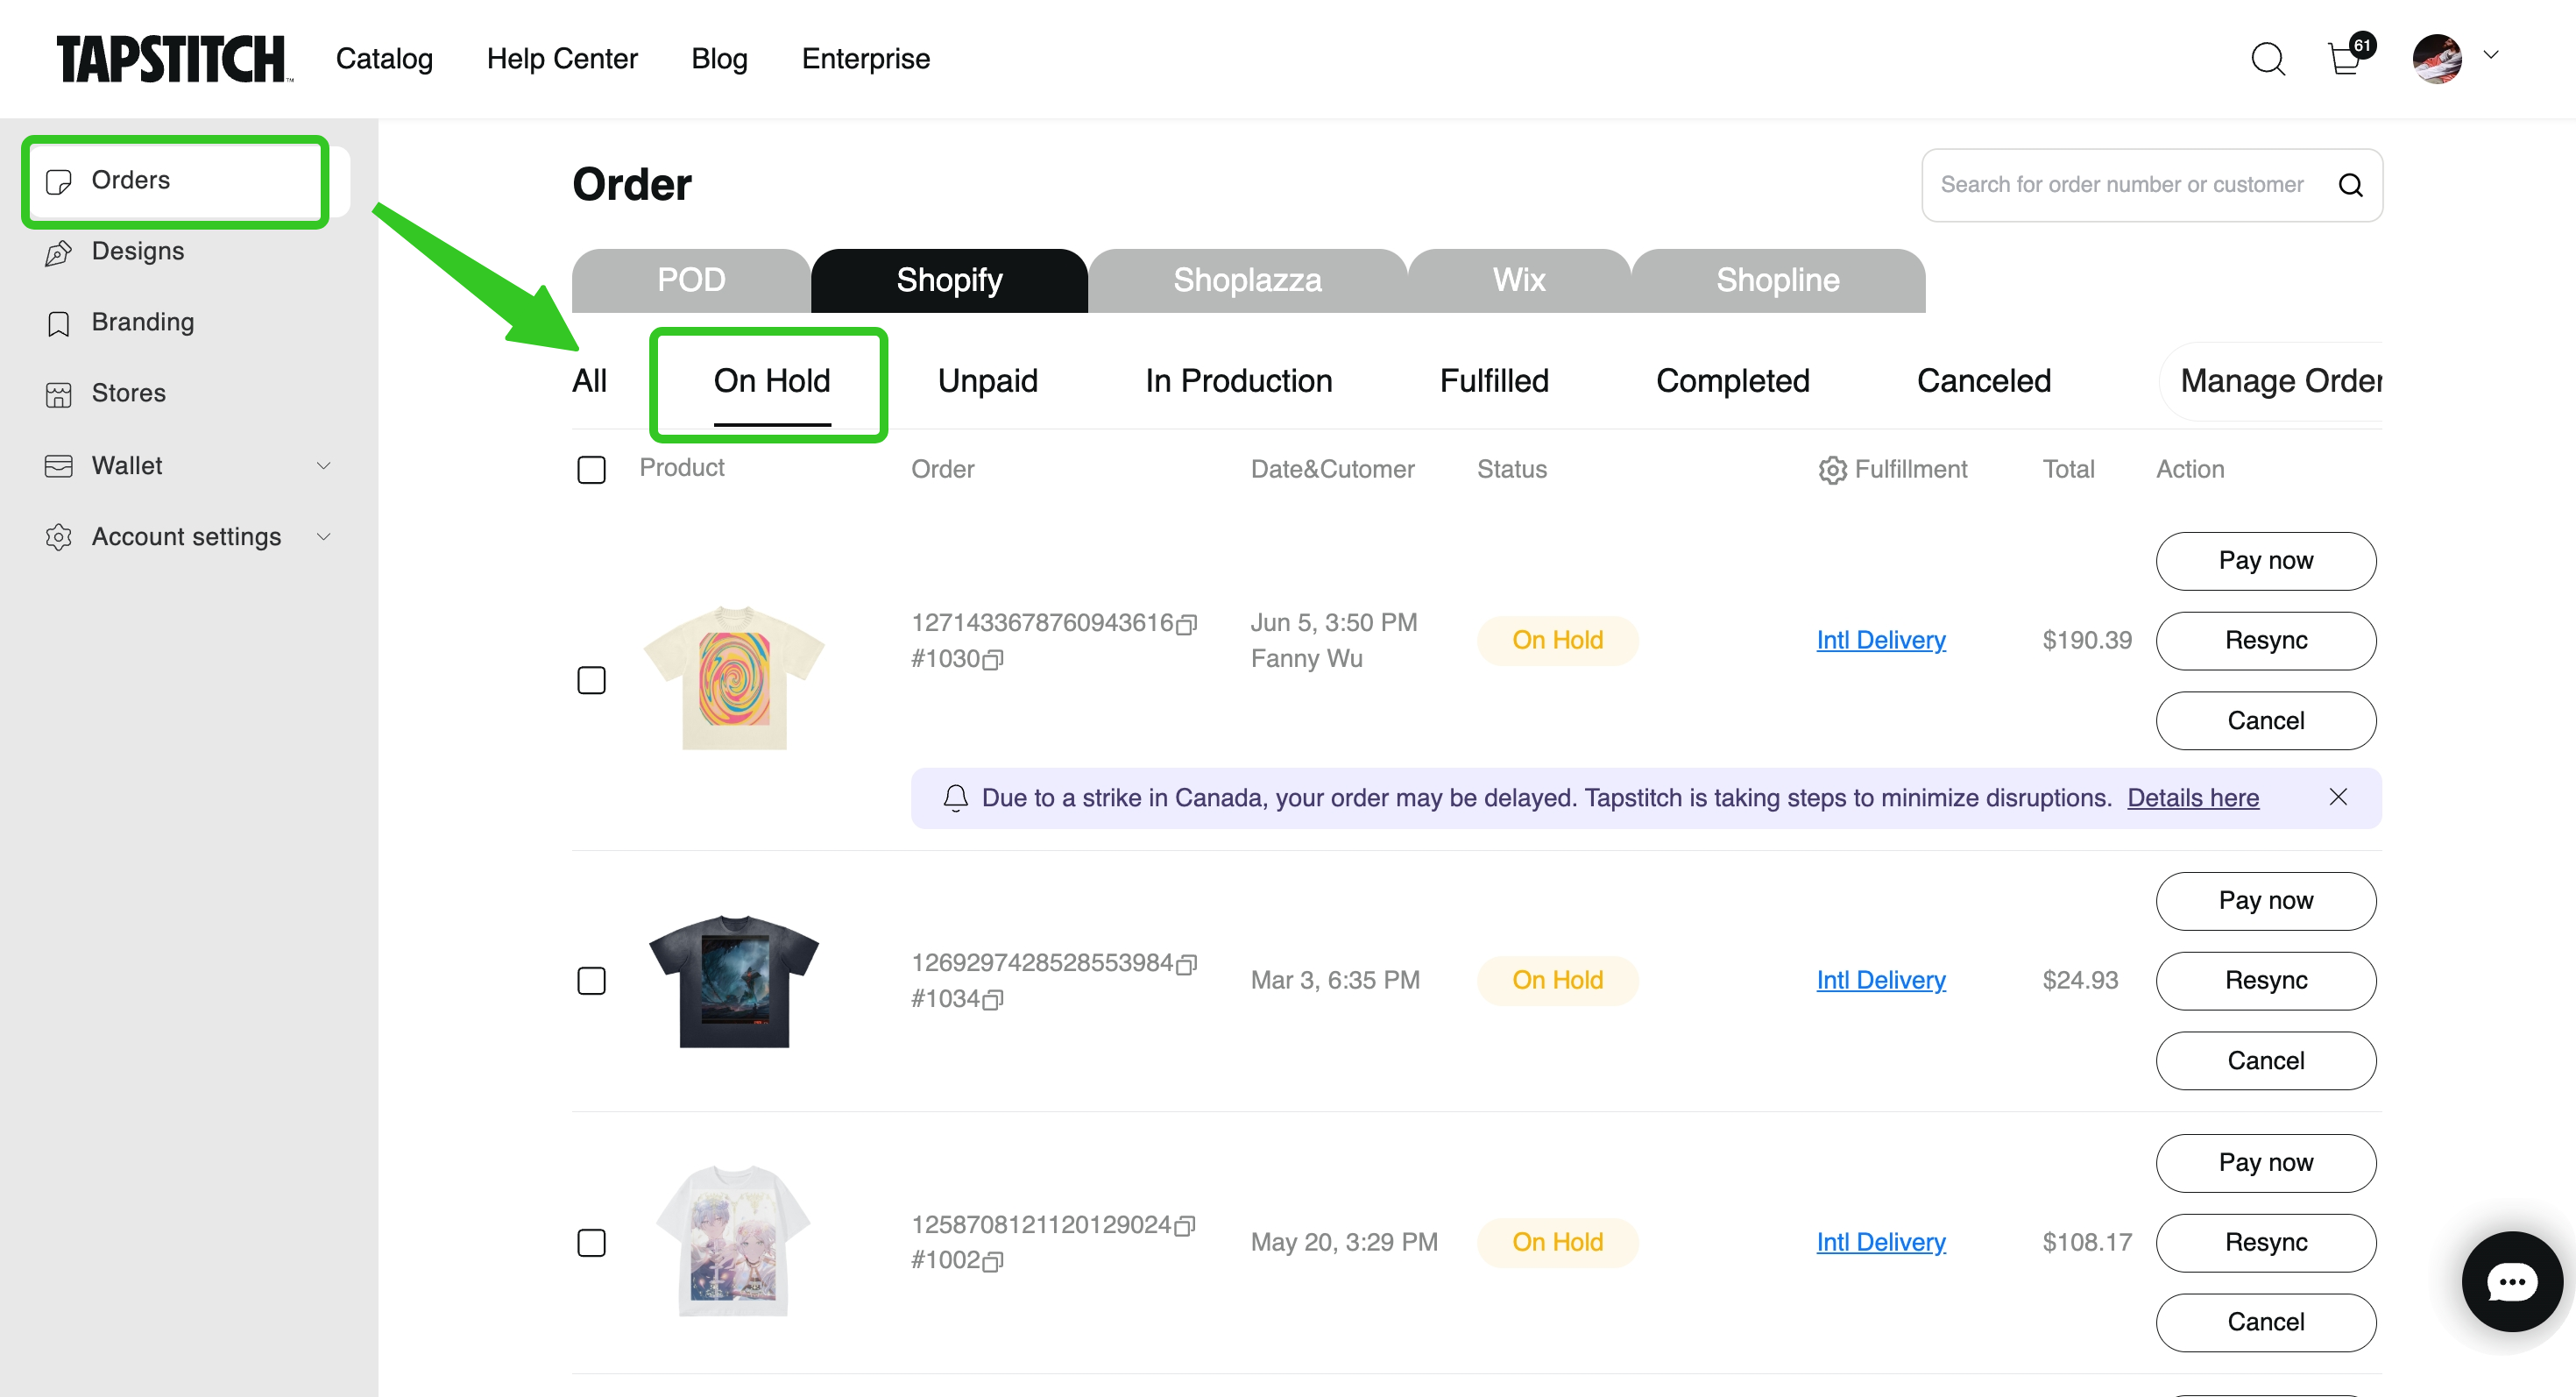
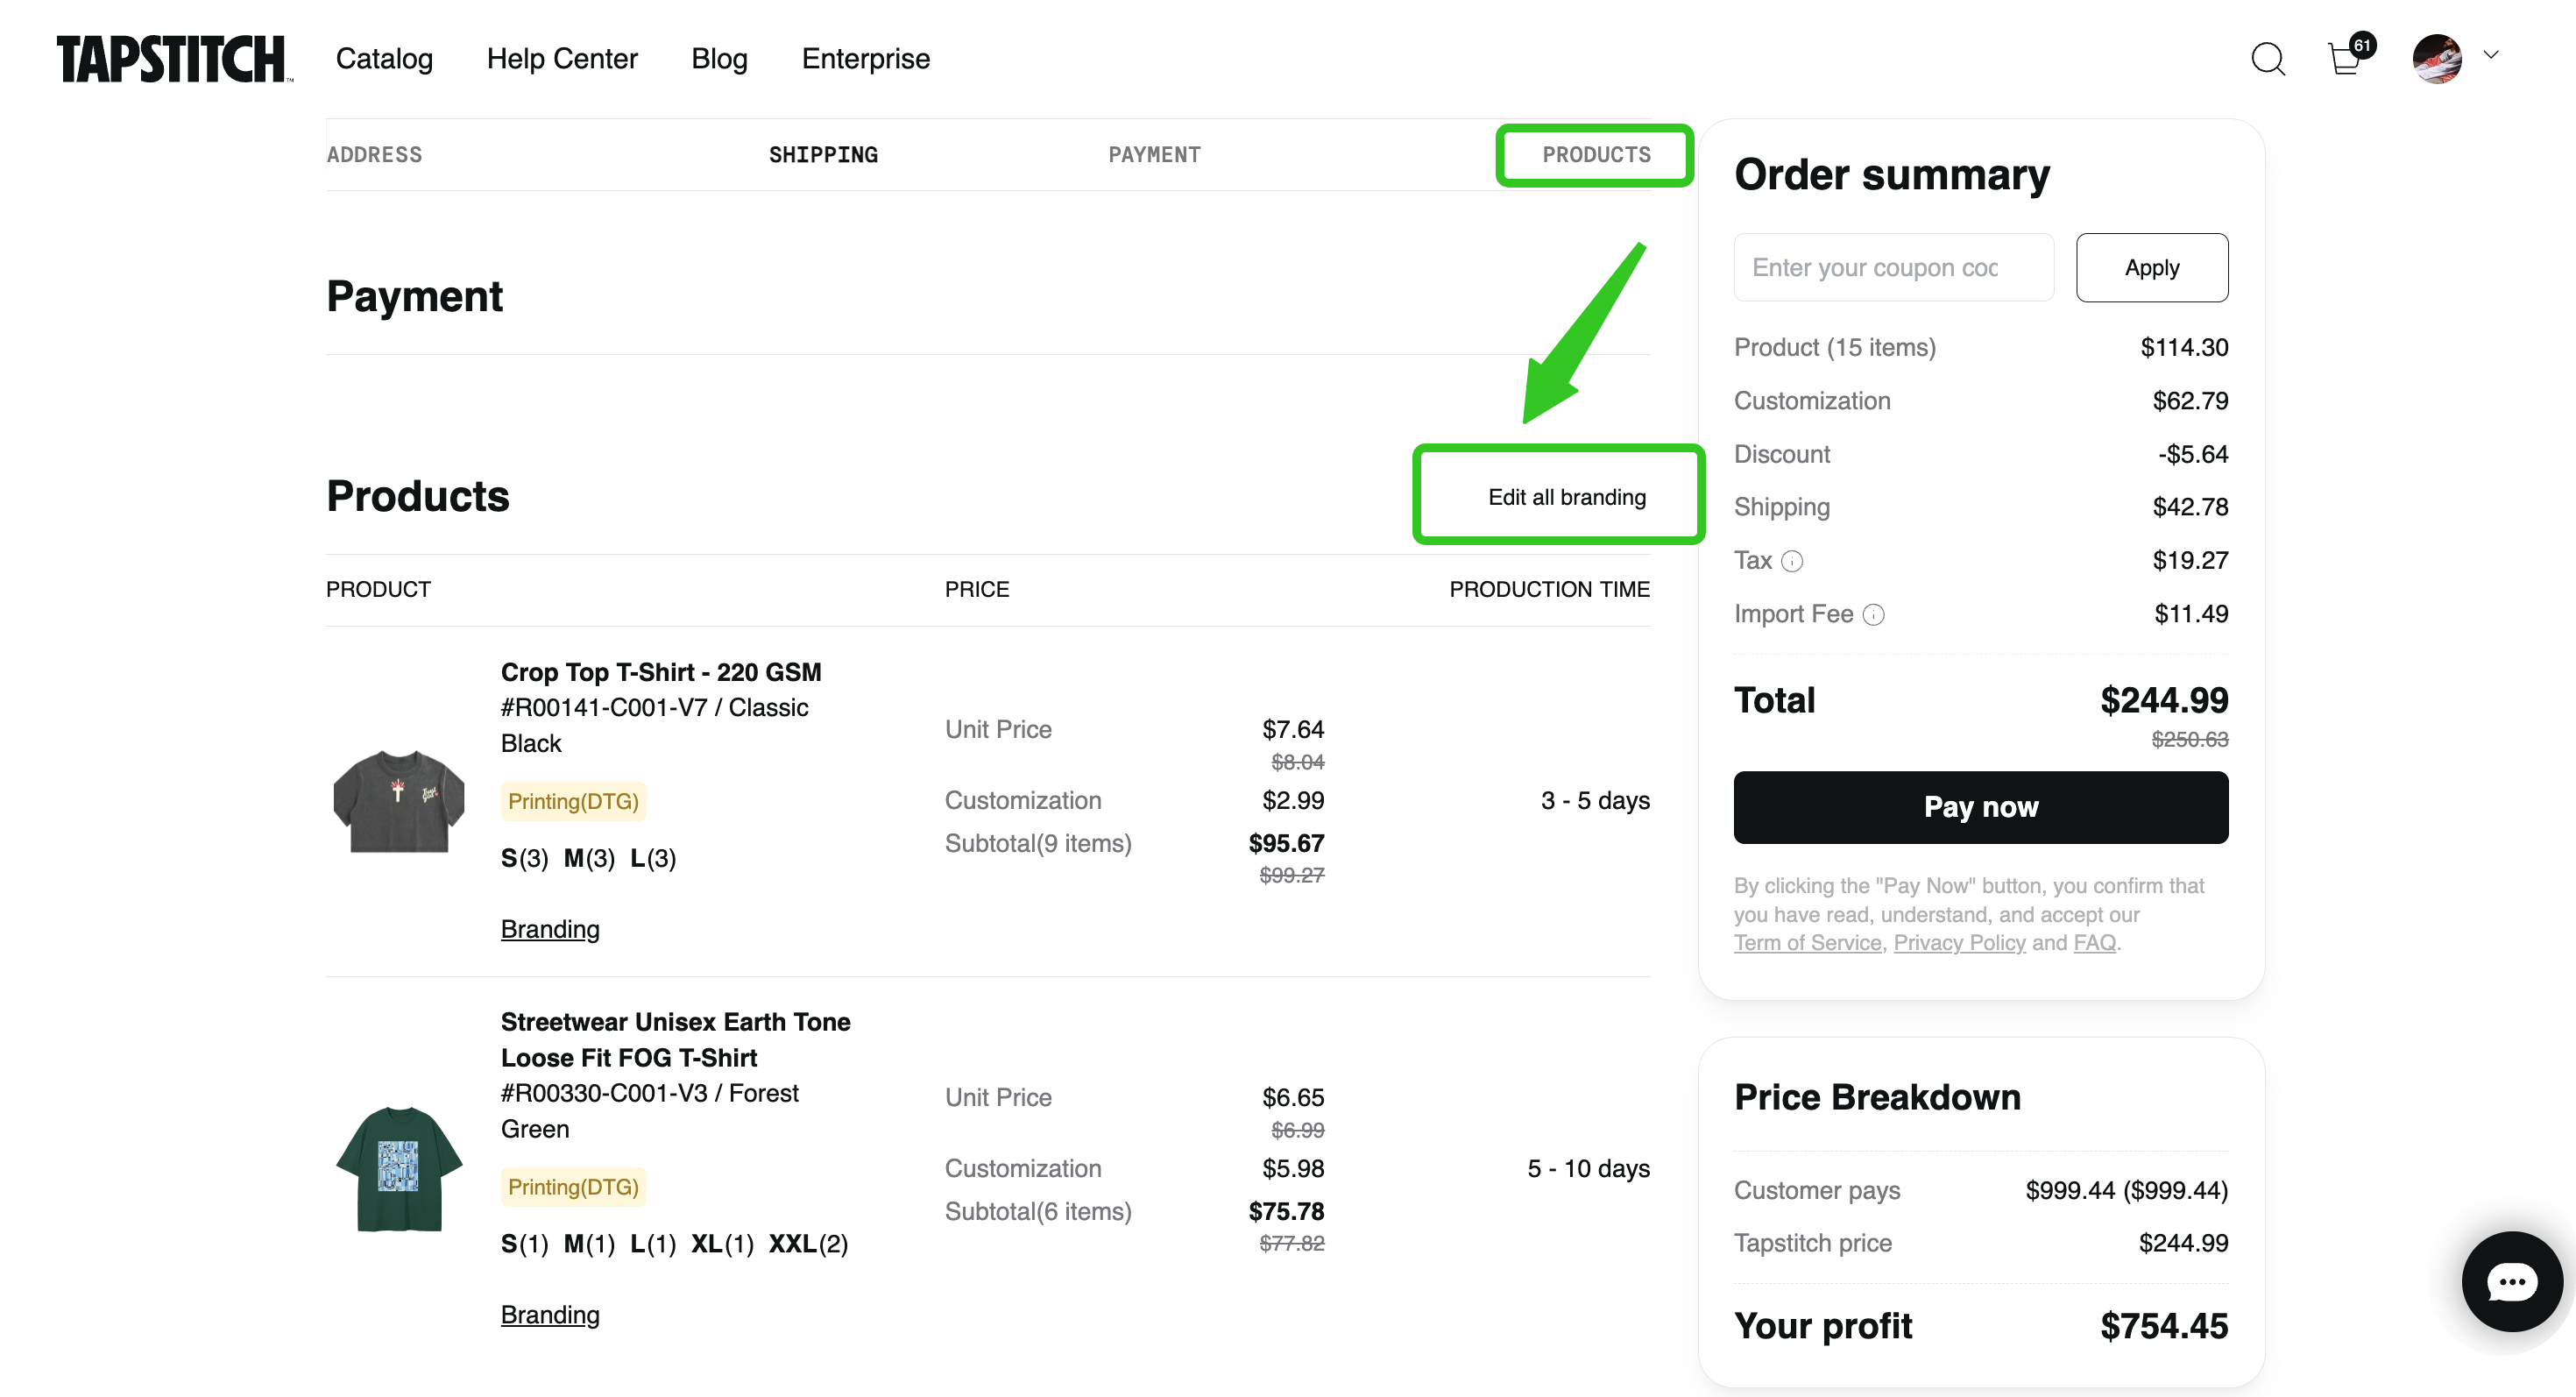
✅ Items in on-hold orders
To apply custom labels to products in previously generated on-hold orders.
- Go to the Orders page from your Home screen by clicking the profile icon.
- Open the On-hold order list and select the order you want to update.
- In the Products section, click Edit all branding in the top right corner to bind labels in bulk.
- Select your custom label from the list and click Confirm.
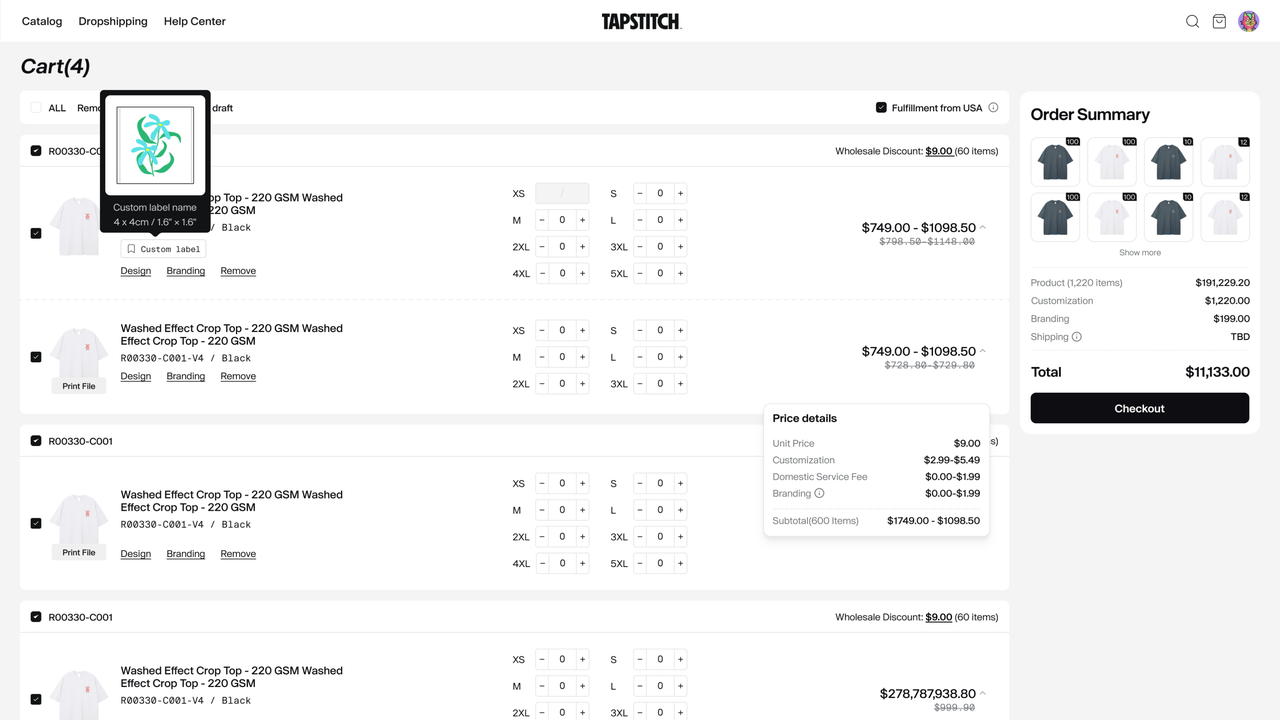
✅ Items in your cart
To add a custom label to a product in your cart:
- Find the product you want to customize.
- Under the item details, click Branding.
- Select your custom label from the list and click Confirm.
Need help? Get in touch with our support team anytime.
Was this article helpful?
81 found this helpful