How to set shipping rates on Shopify stores
July 13, 2026 · Updated
Learn how Tapstitch automatically assigns shipping profiles to your products when publishing to Shopify — and how to manage advanced shipping settings if needed.
🧩 What are shipping profiles?
Shipping profiles are used in Shopify to define how products are shipped and what rates apply.
Tapstitch uses shipping profiles to automatically assign suitable shipping rates to your products — either individually or as a default for your store.
🚀 Automatic Shipping Profiles (Recommended)
When you publish products from Tapstitch to your Shopify store, we automatically assign the correct shipping profile for each product.
This means:
- No need to manually set up shipping zones or rates in Shopify
- Shipping rates are based on the product type and enabled shipping methods
- The correct profile is assigned automatically — either per product or as a store default
How to use it
🔧 Option 1: Assign per product
When publishing a product, scroll to the Shipping section and choose:
Shipping profile: Automatically assign Tapstitch shipping profiles
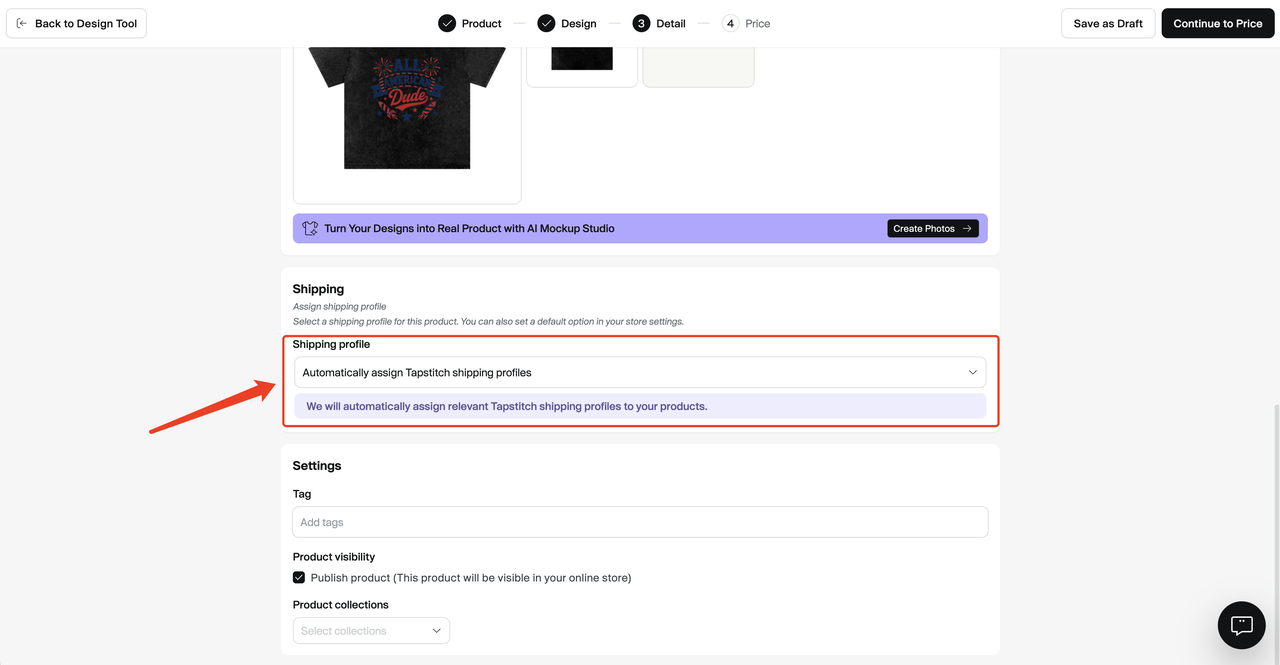
This ensures the correct shipping rates are applied to that product on Shopify.
🔧 Option 2: Set a default for your store
You can also enable this option by default for all future products:
- Go to Stores → Setting → Shipping Profiles
- Under “Shipping profile (default)”, select:
Automatically assign Tapstitch shipping profiles
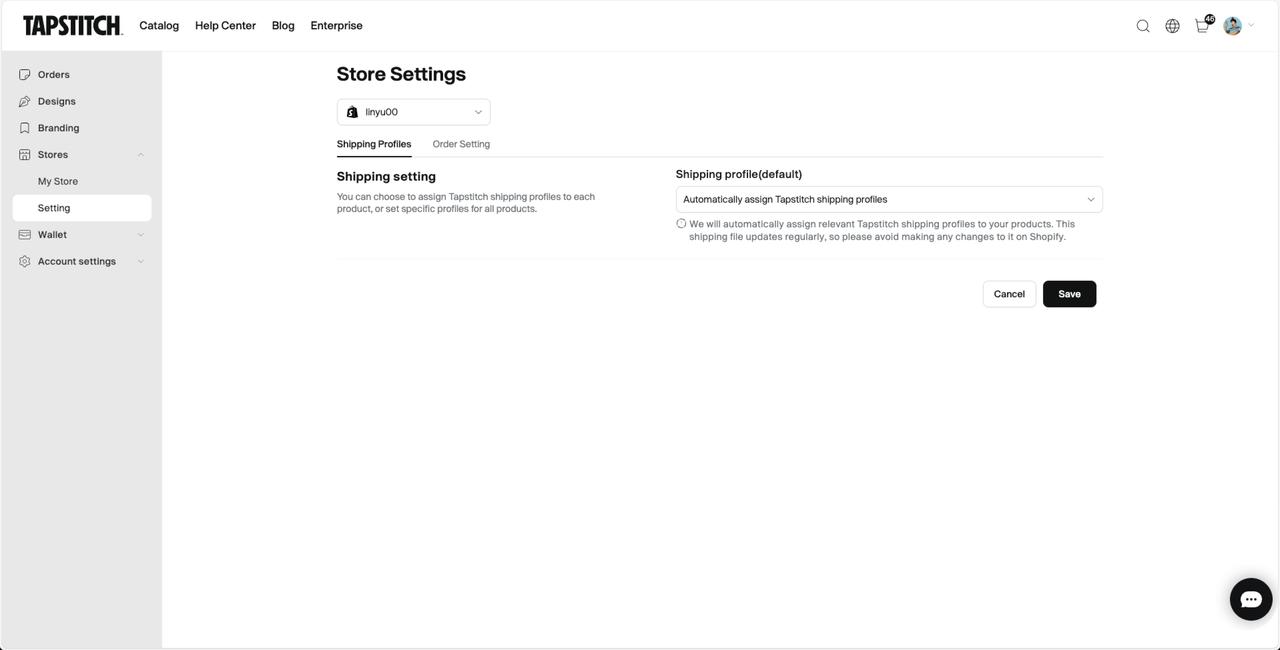
Once set, all future products will be published with the correct shipping profile applied.
Customize the shipping method display name
When you use Automatically assign Tapstitch shipping profiles, you can choose how the shipping method name appears to customers at checkout in your Shopify store. Go to Stores > Setting > Shipping Profiles. Under Store shipping method display name, choose one of the following options:
- Special Line
- Standard Shipping
- Custom
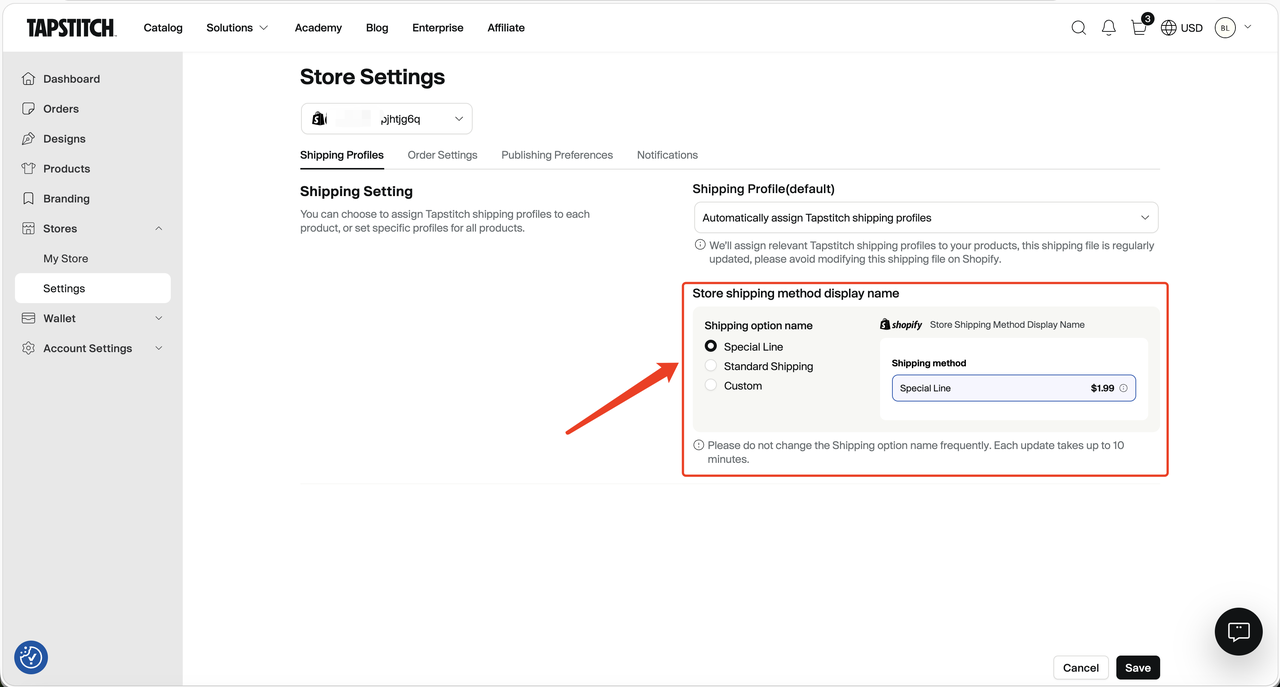
If you choose Custom, enter the shipping option name you want to display. Custom names can be up to 32 characters.
After you click Save, Tapstitch will update the shipping method display name in your Shopify shipping profile. The update may take up to 10 minutes to appear.
Please avoid changing the shipping option name frequently.
The shipping option name displayed to customers on the Shopify checkout page. ↓
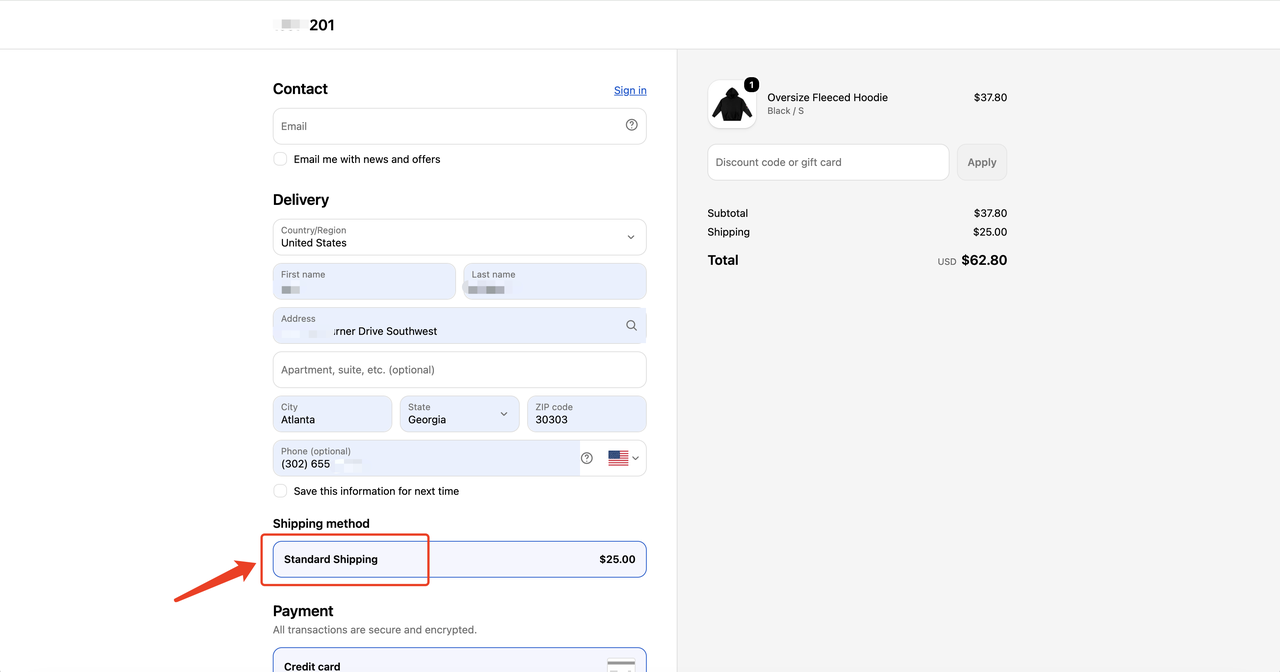
Notes
- Tapstitch regularly updates shipping profiles, so please avoid editing them directly in Shopify
- Shipping rates are automatically calculated based on the selected shipping methods and destination
- No Shopify apps or subscription upgrades are required
- The shipping method display name setting is available when Automatically assign Tapstitch shipping profiles is selected.
📚 Advanced: Manually setting shipping in Shopify (Optional)
Note: Tapstitch handles all shipping profiles and rates automatically.
Manual setup is only needed if:
- You disable automatic profile assignment
- You sell non-Tapstitch products
- You want full control over Shopify’s shipping logic
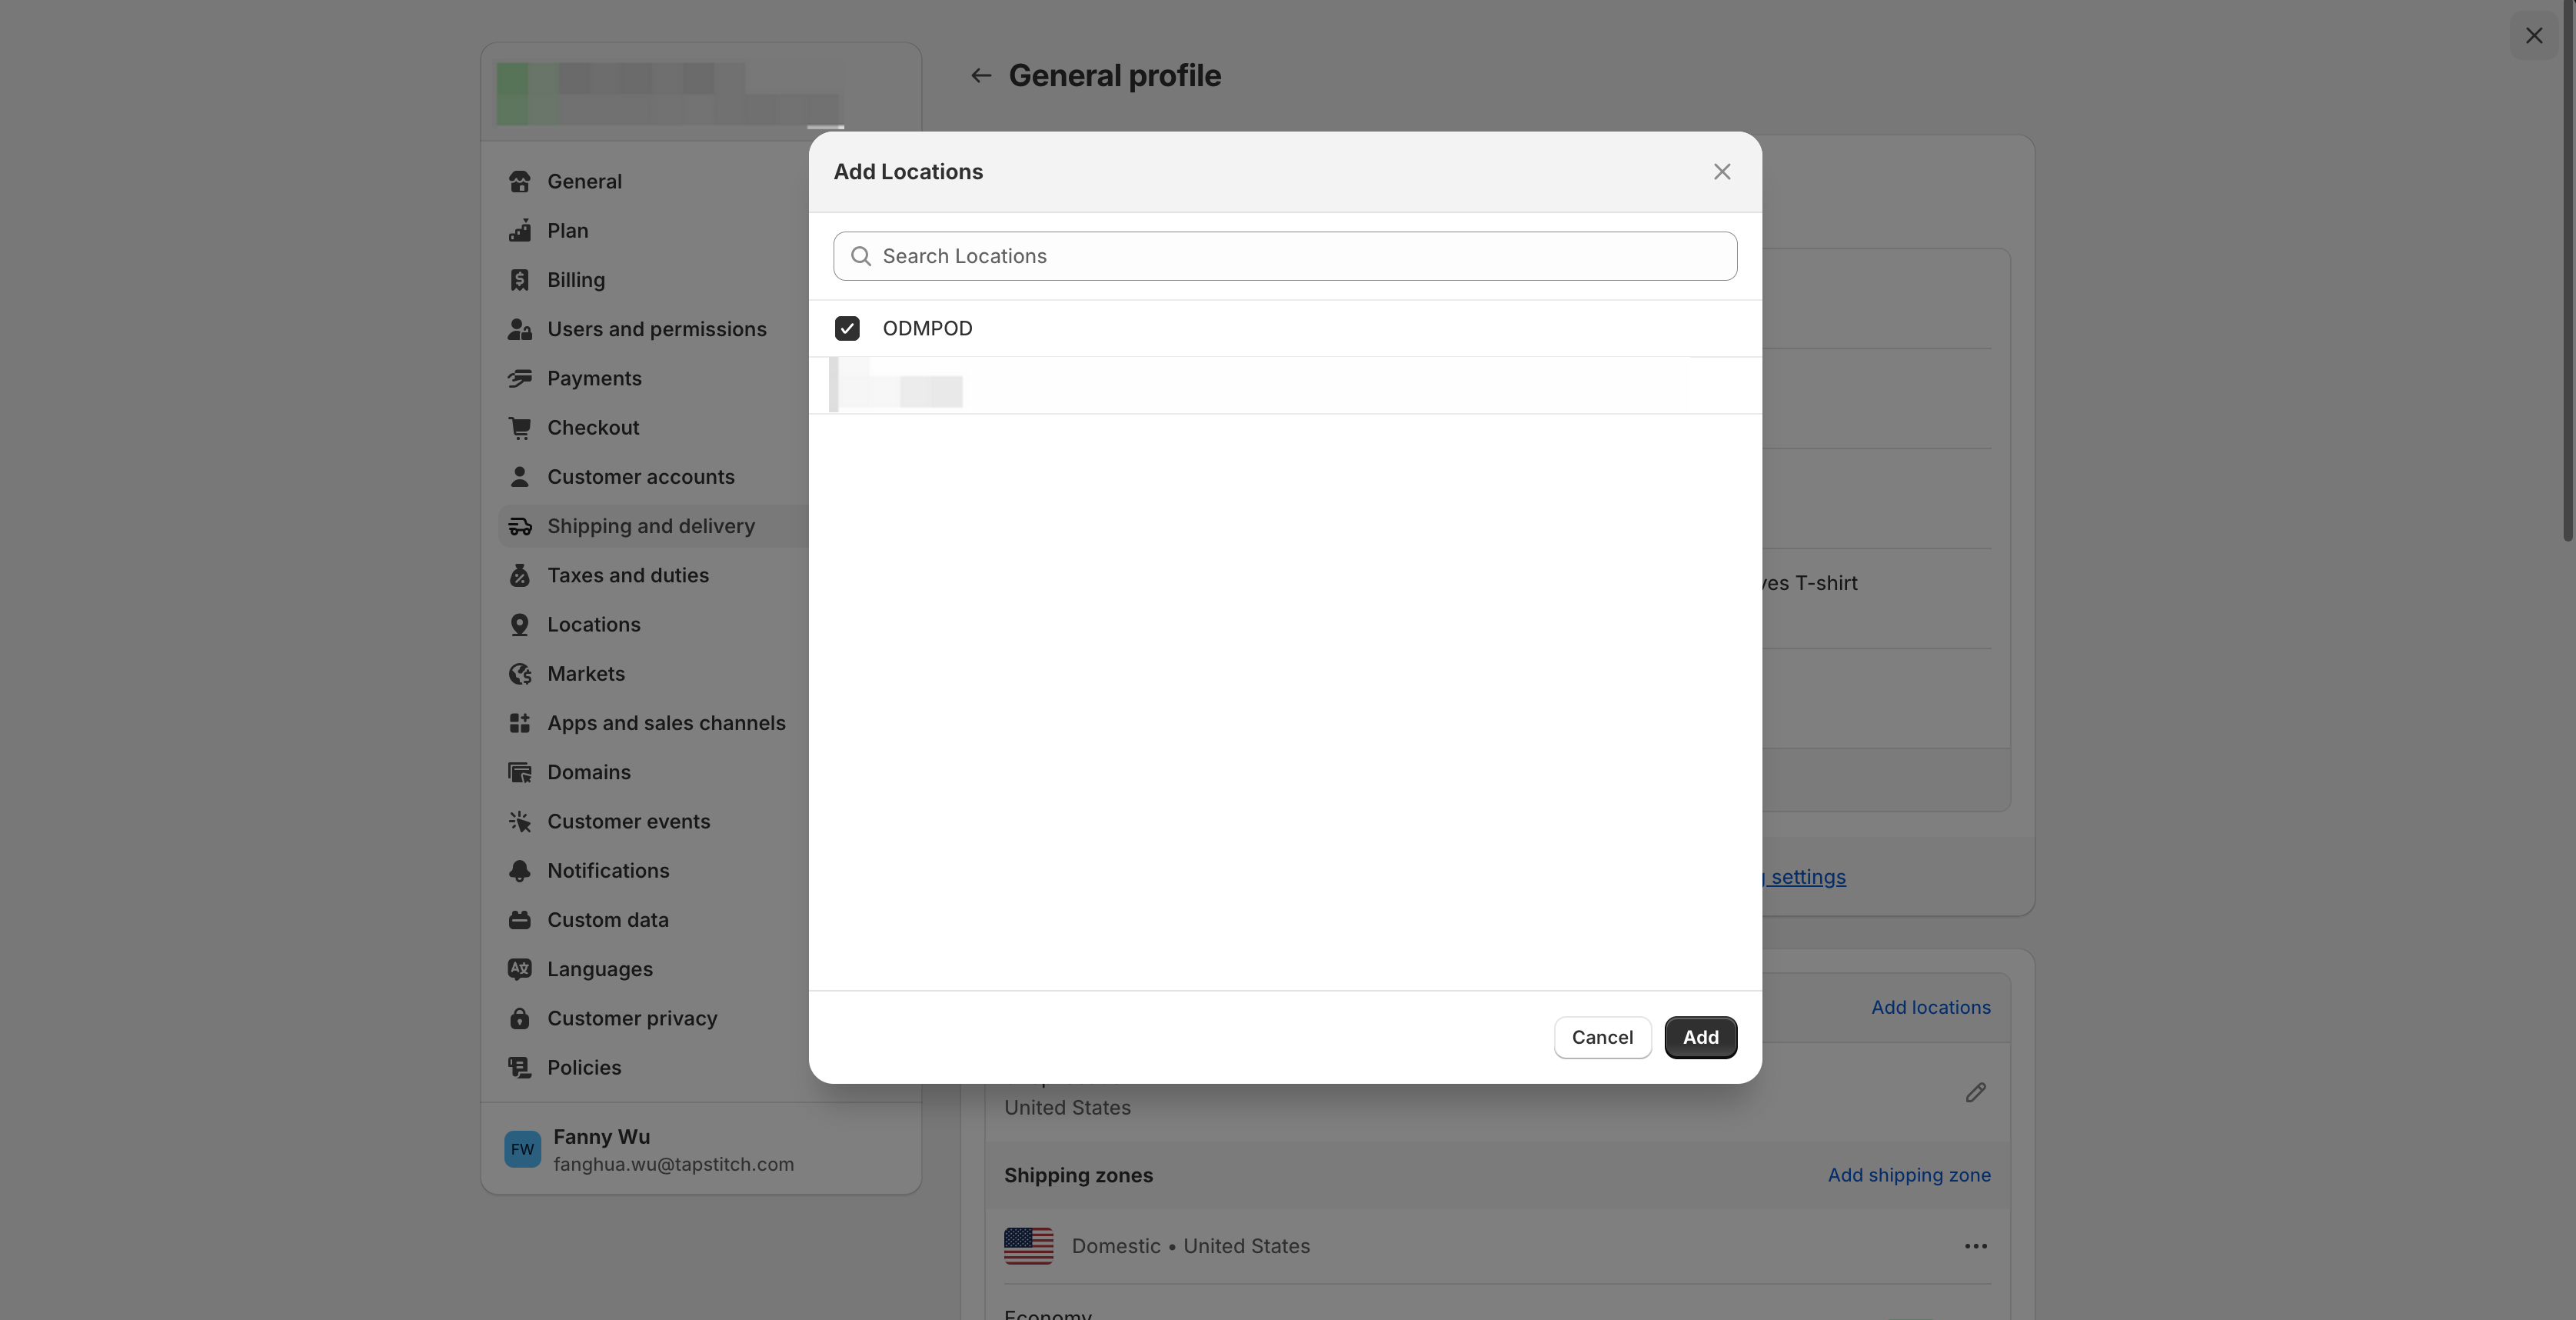
🔧 Step 0: Understand locations
When you first connect your Shopify store to Tapstitch, a new shipping location is created.
By default, it appears in the “Not shipping from” section in Shopify.
To activate it:
- Move the location into an existing shipping group, or
- Create a new group with its own zones and rates

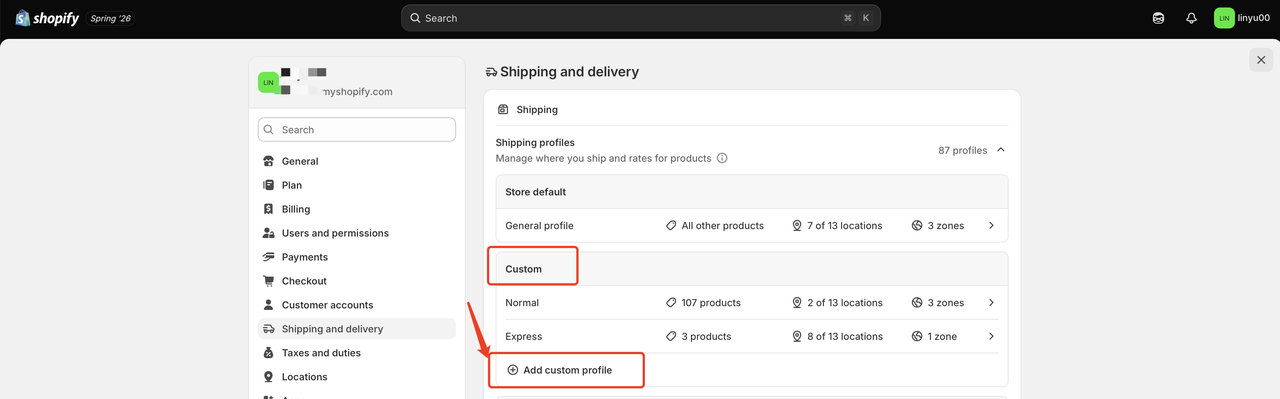
🔧 Step 1: Create a shipping profile
From Shopify admin → Settings → Shipping and delivery:
- Click Add custom profile
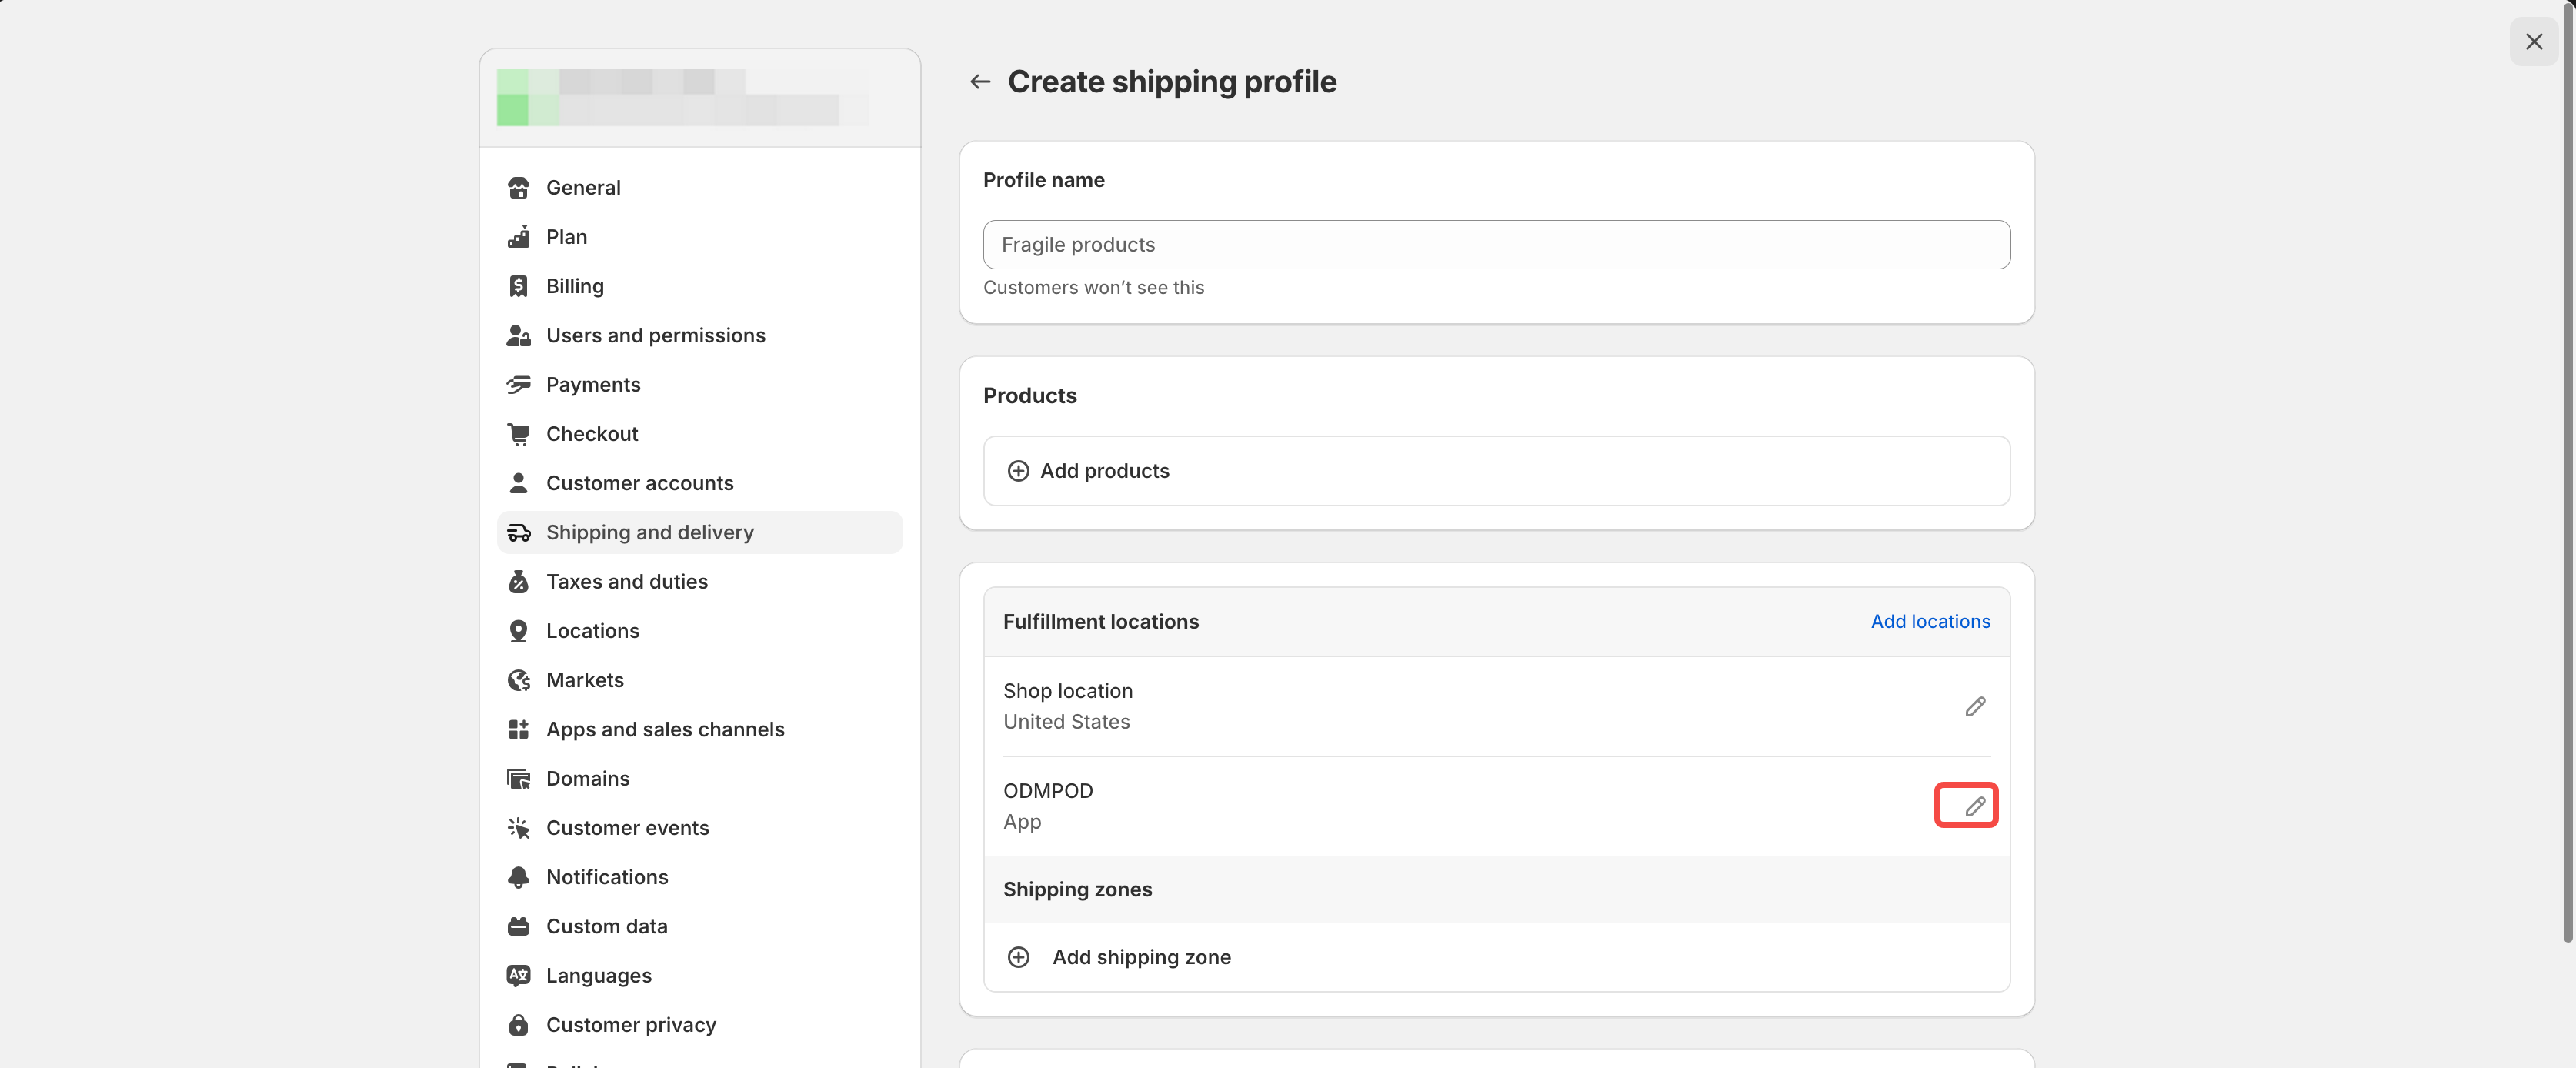
- In the Shipping form, click ODMPOD Manage.
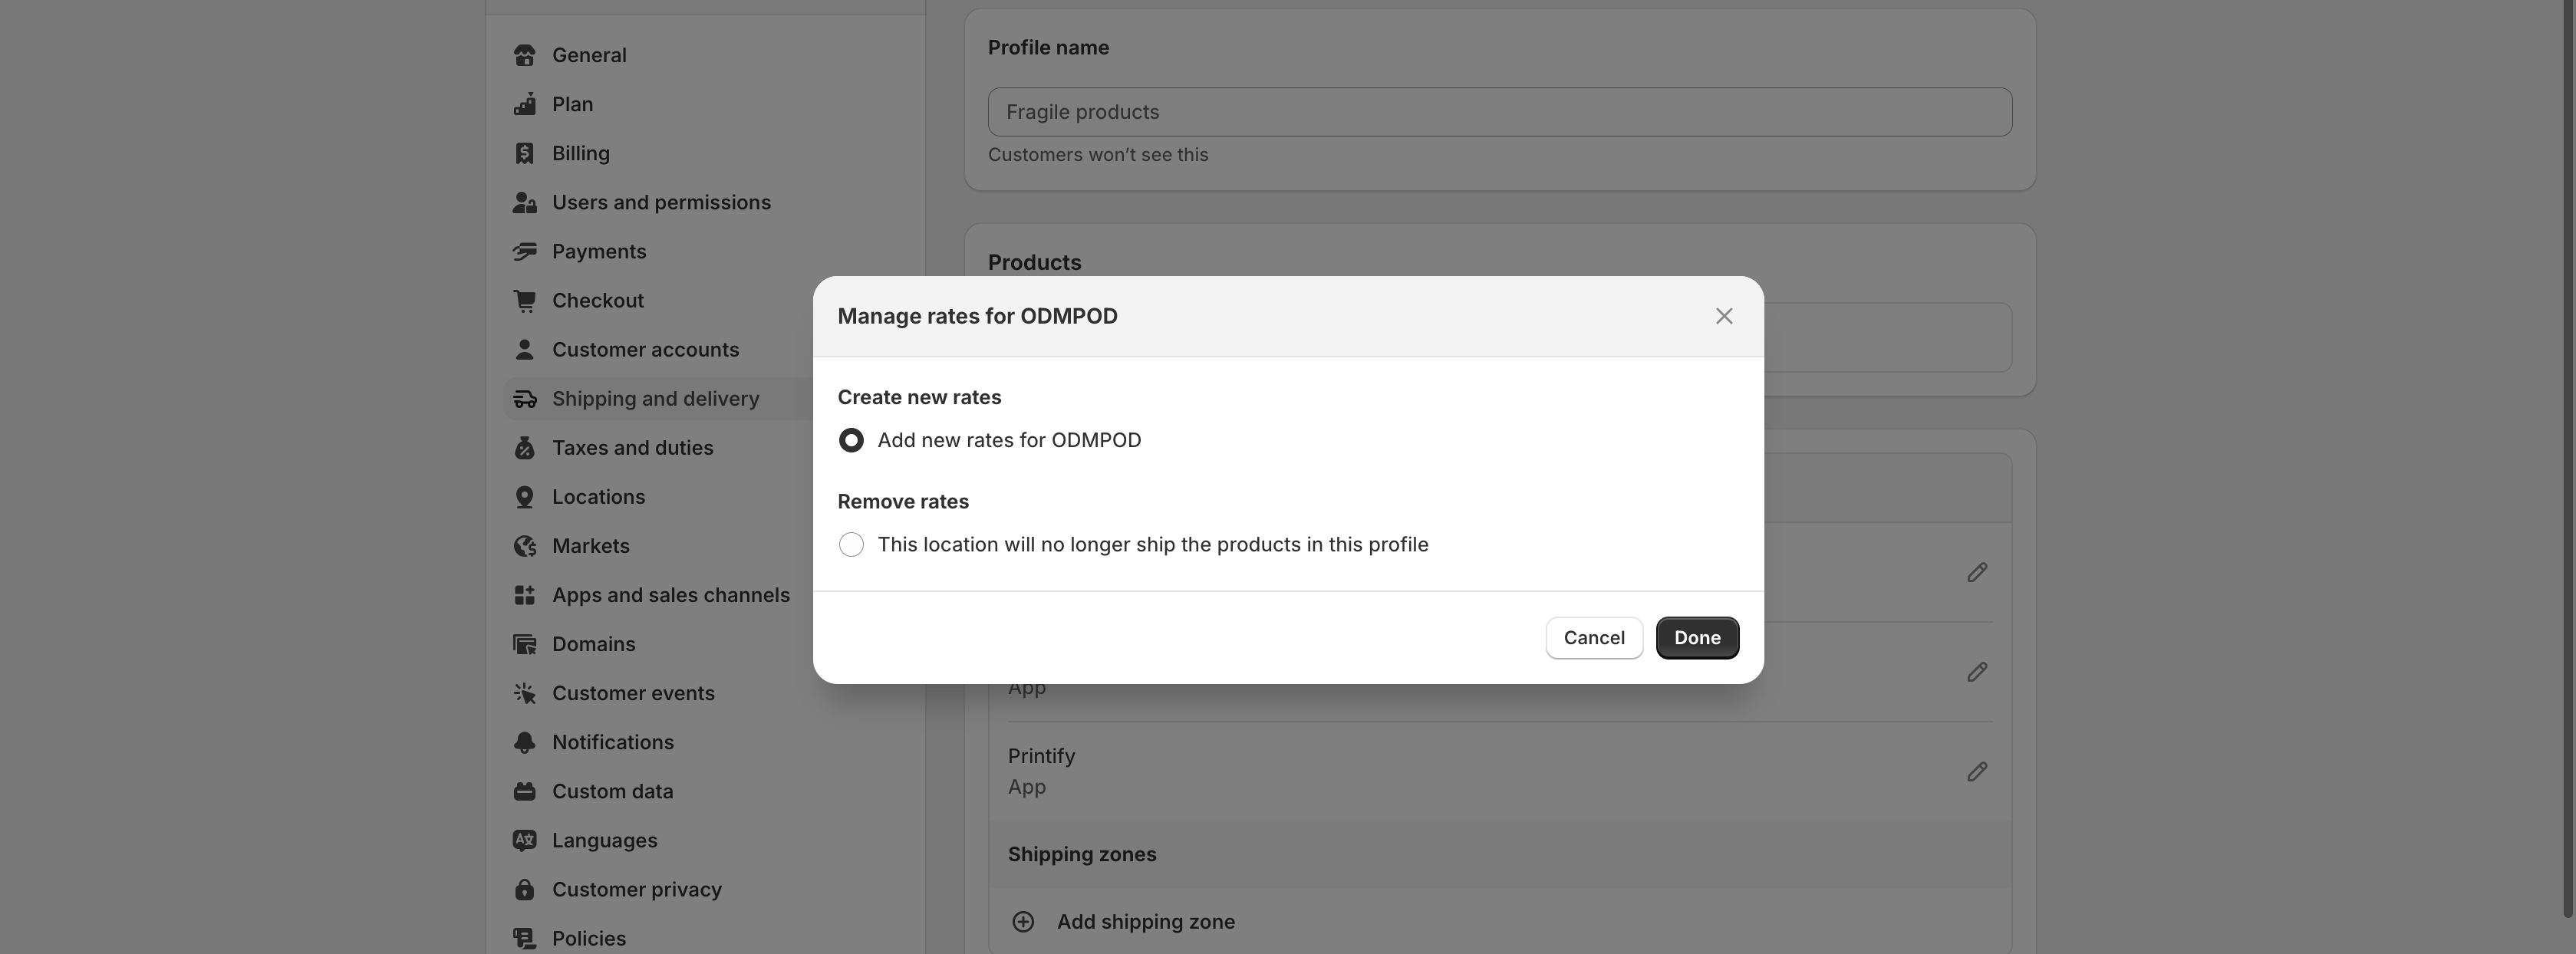
- Select the CREATE NEW RATES option, and then click Done.
🔧 Step 2: Add products
Ensure that Tapstitch-fulfilled products are included in the appropriate shipping profile if you are not using the automatic option.
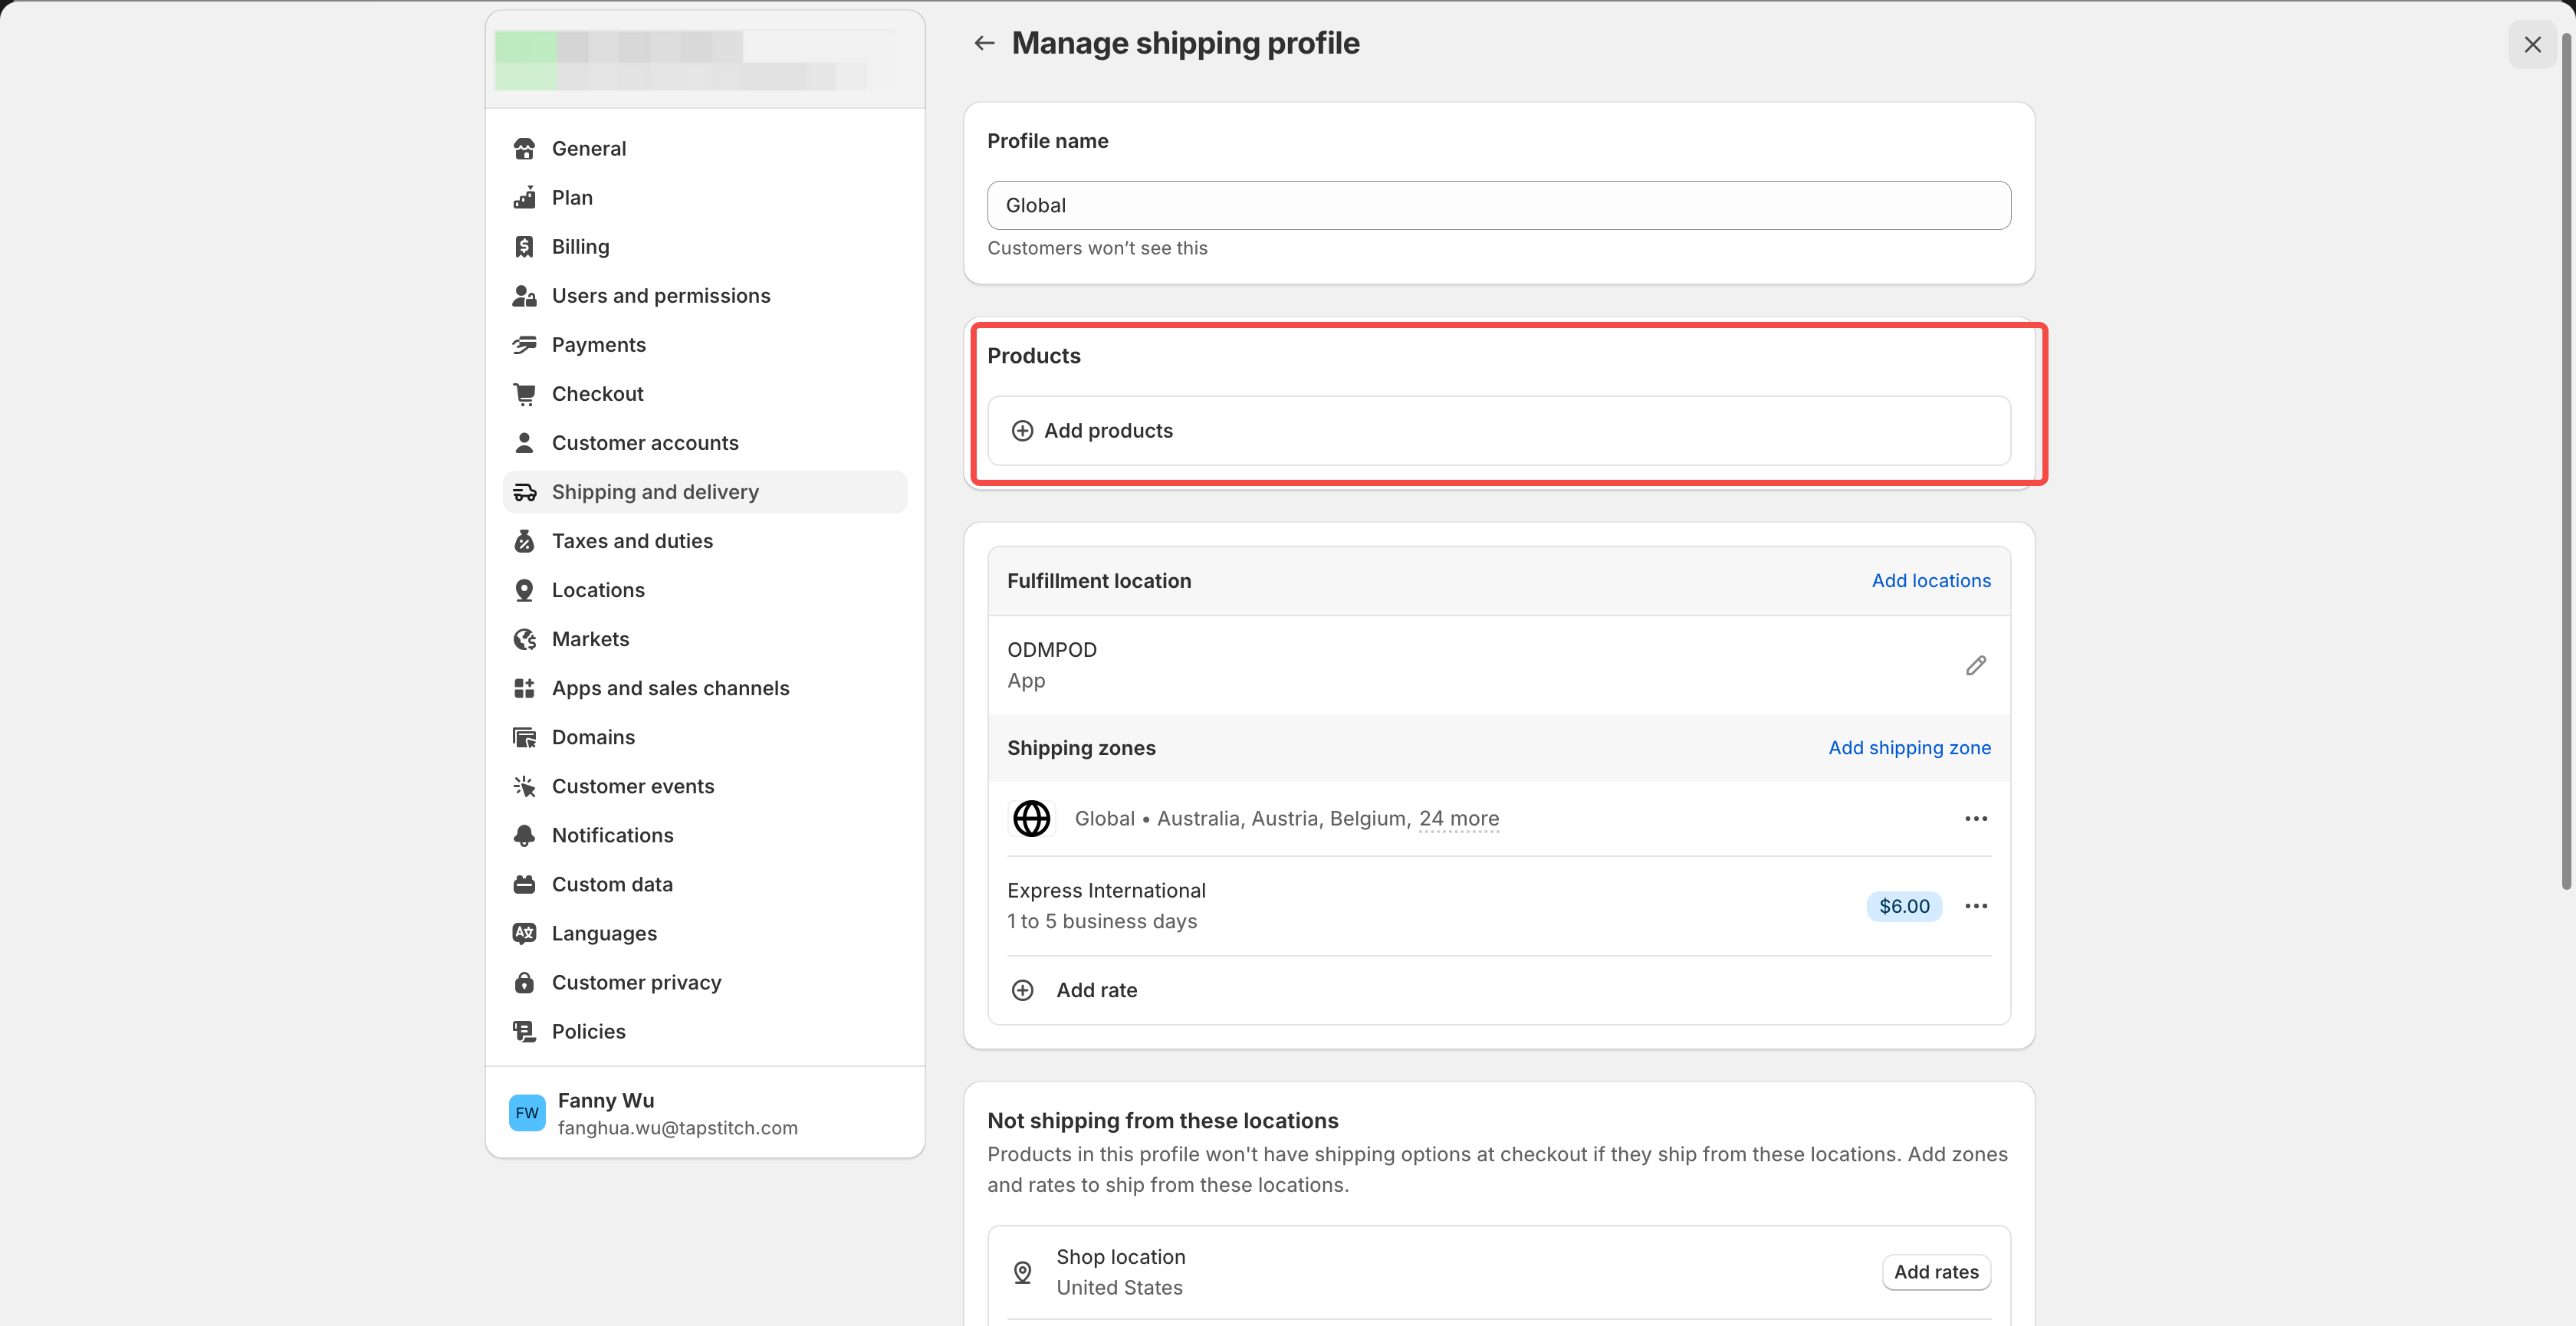
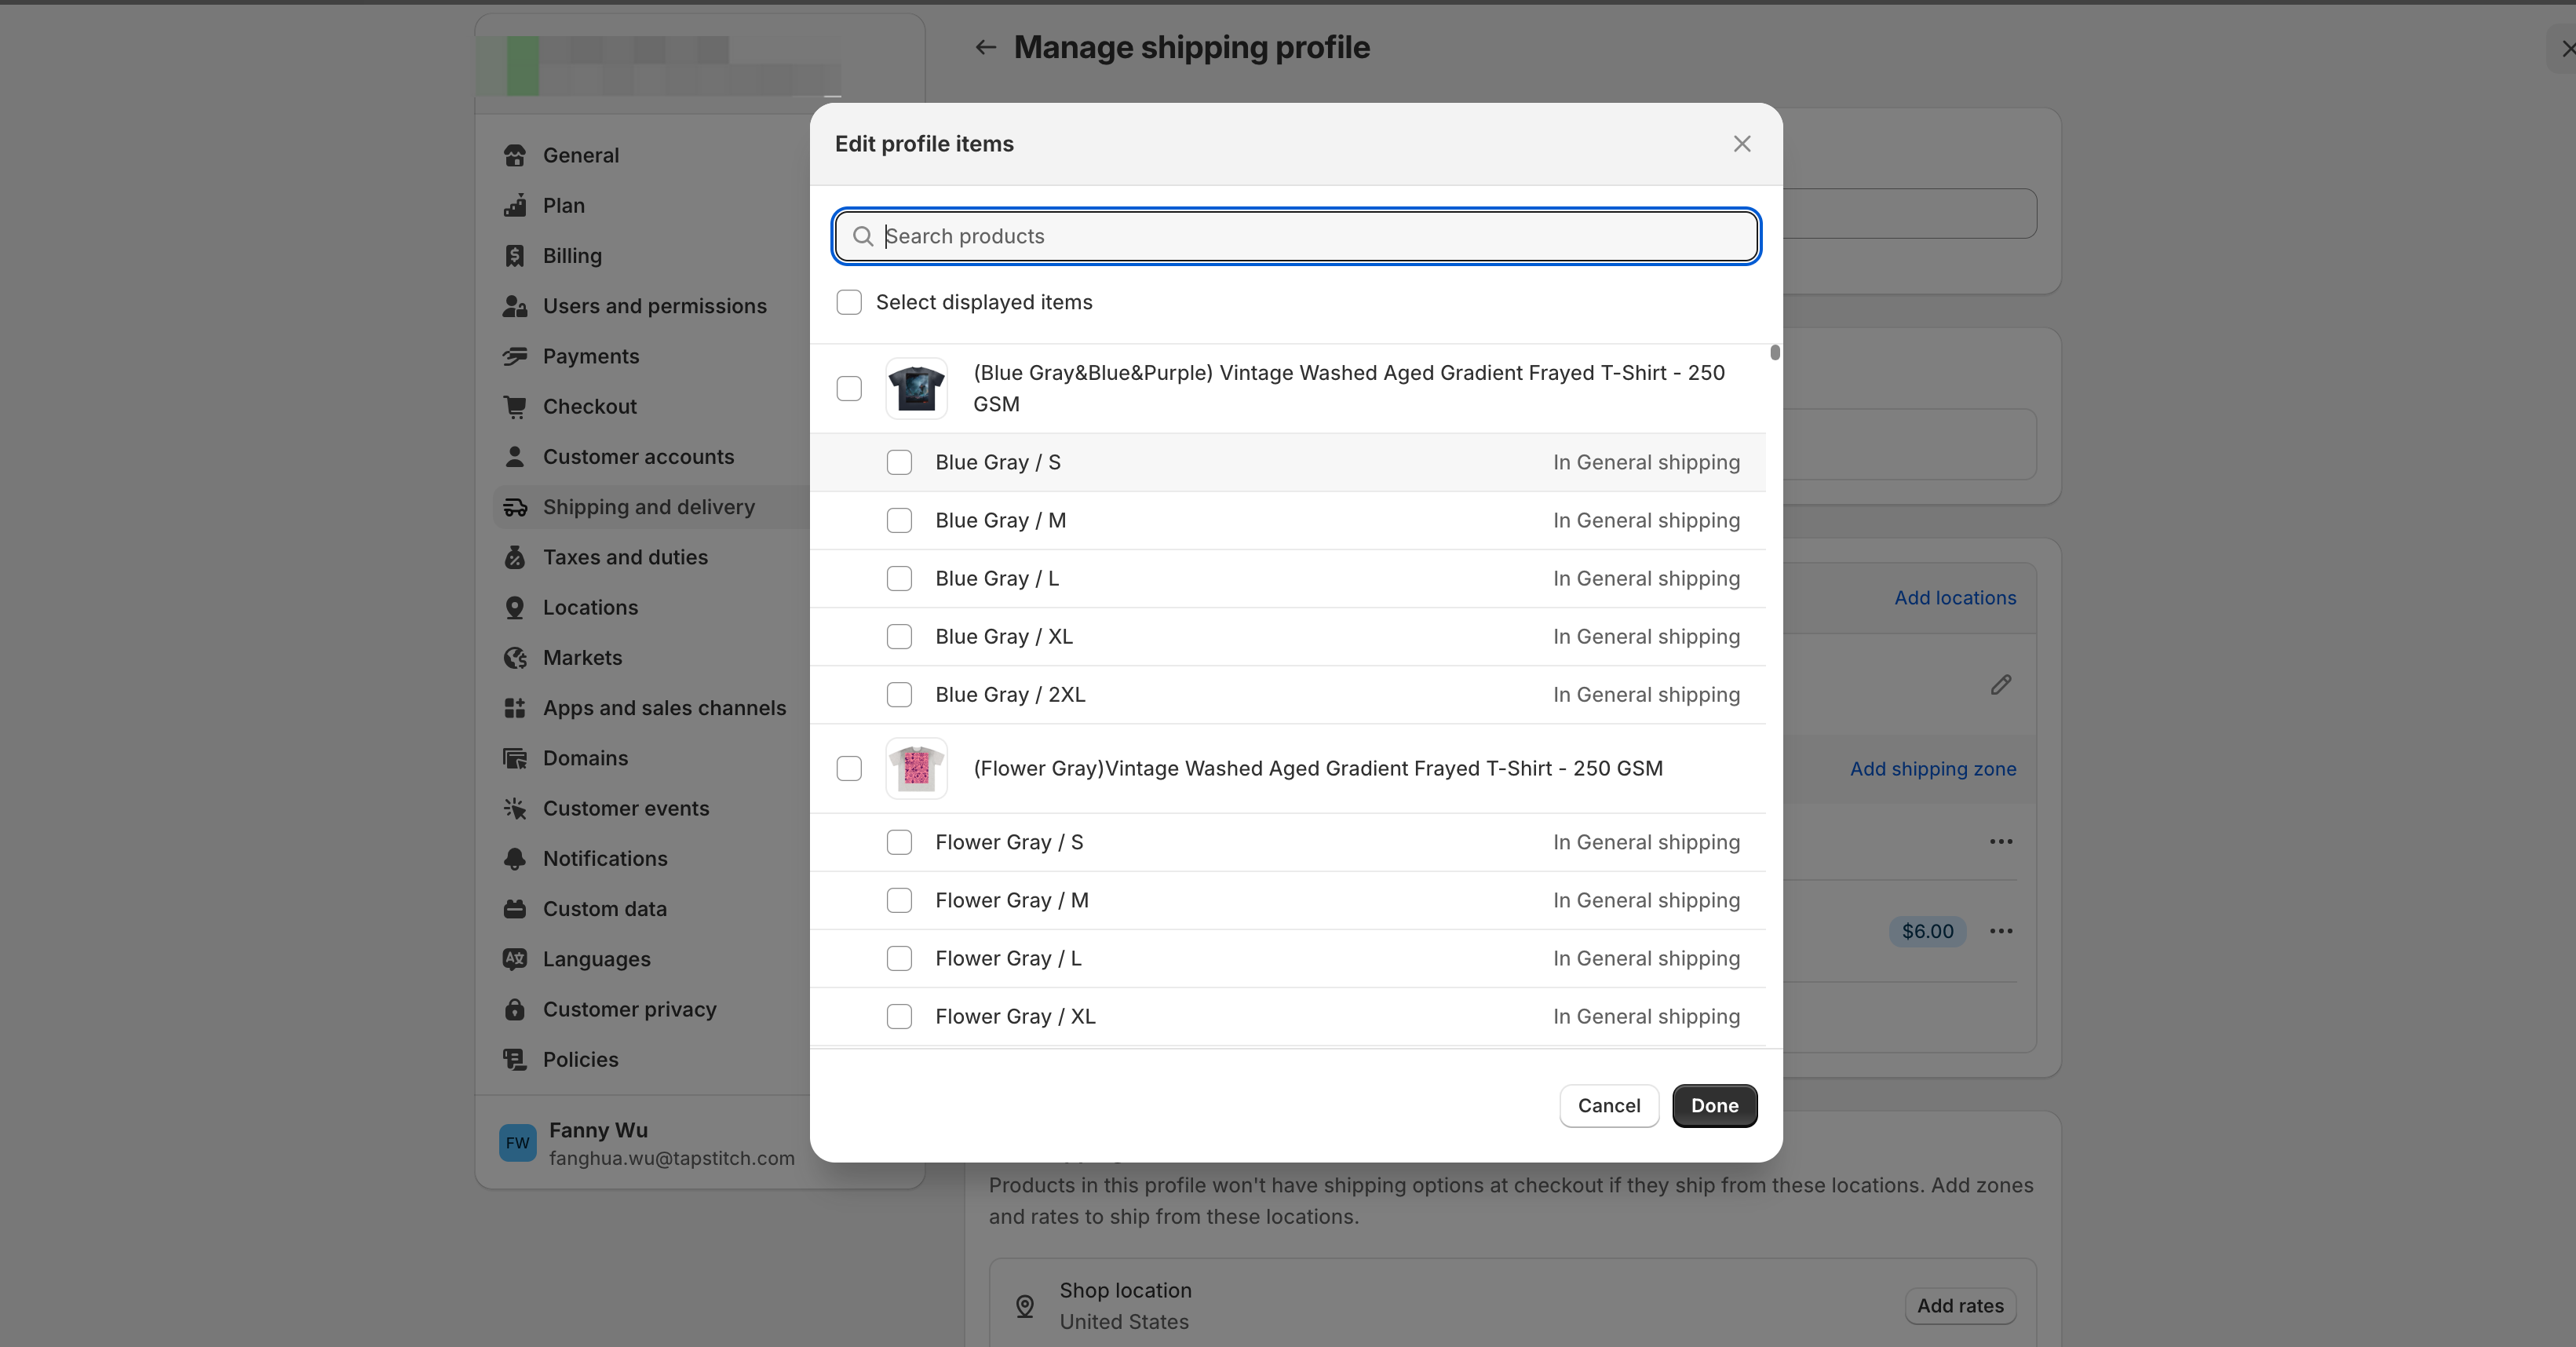
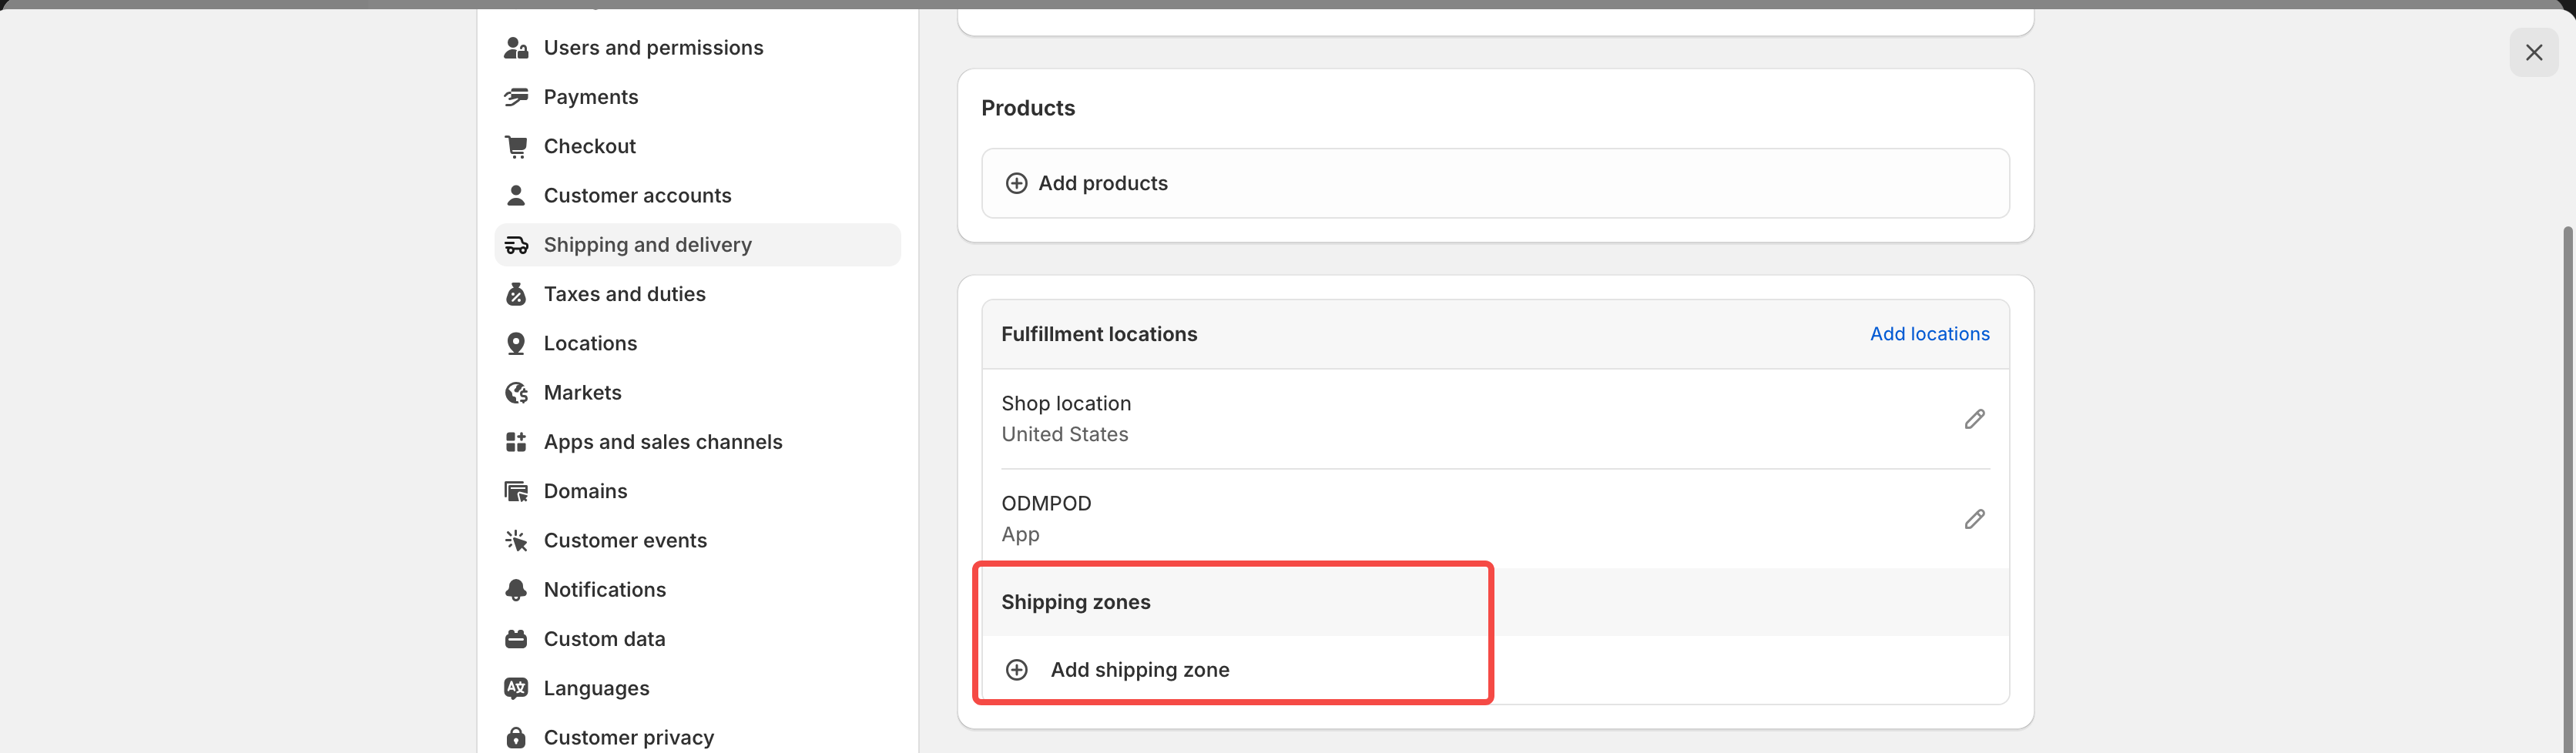
🔧 Step 3: Add a shipping zone
- Next to the group of locations, click Create shipping zone
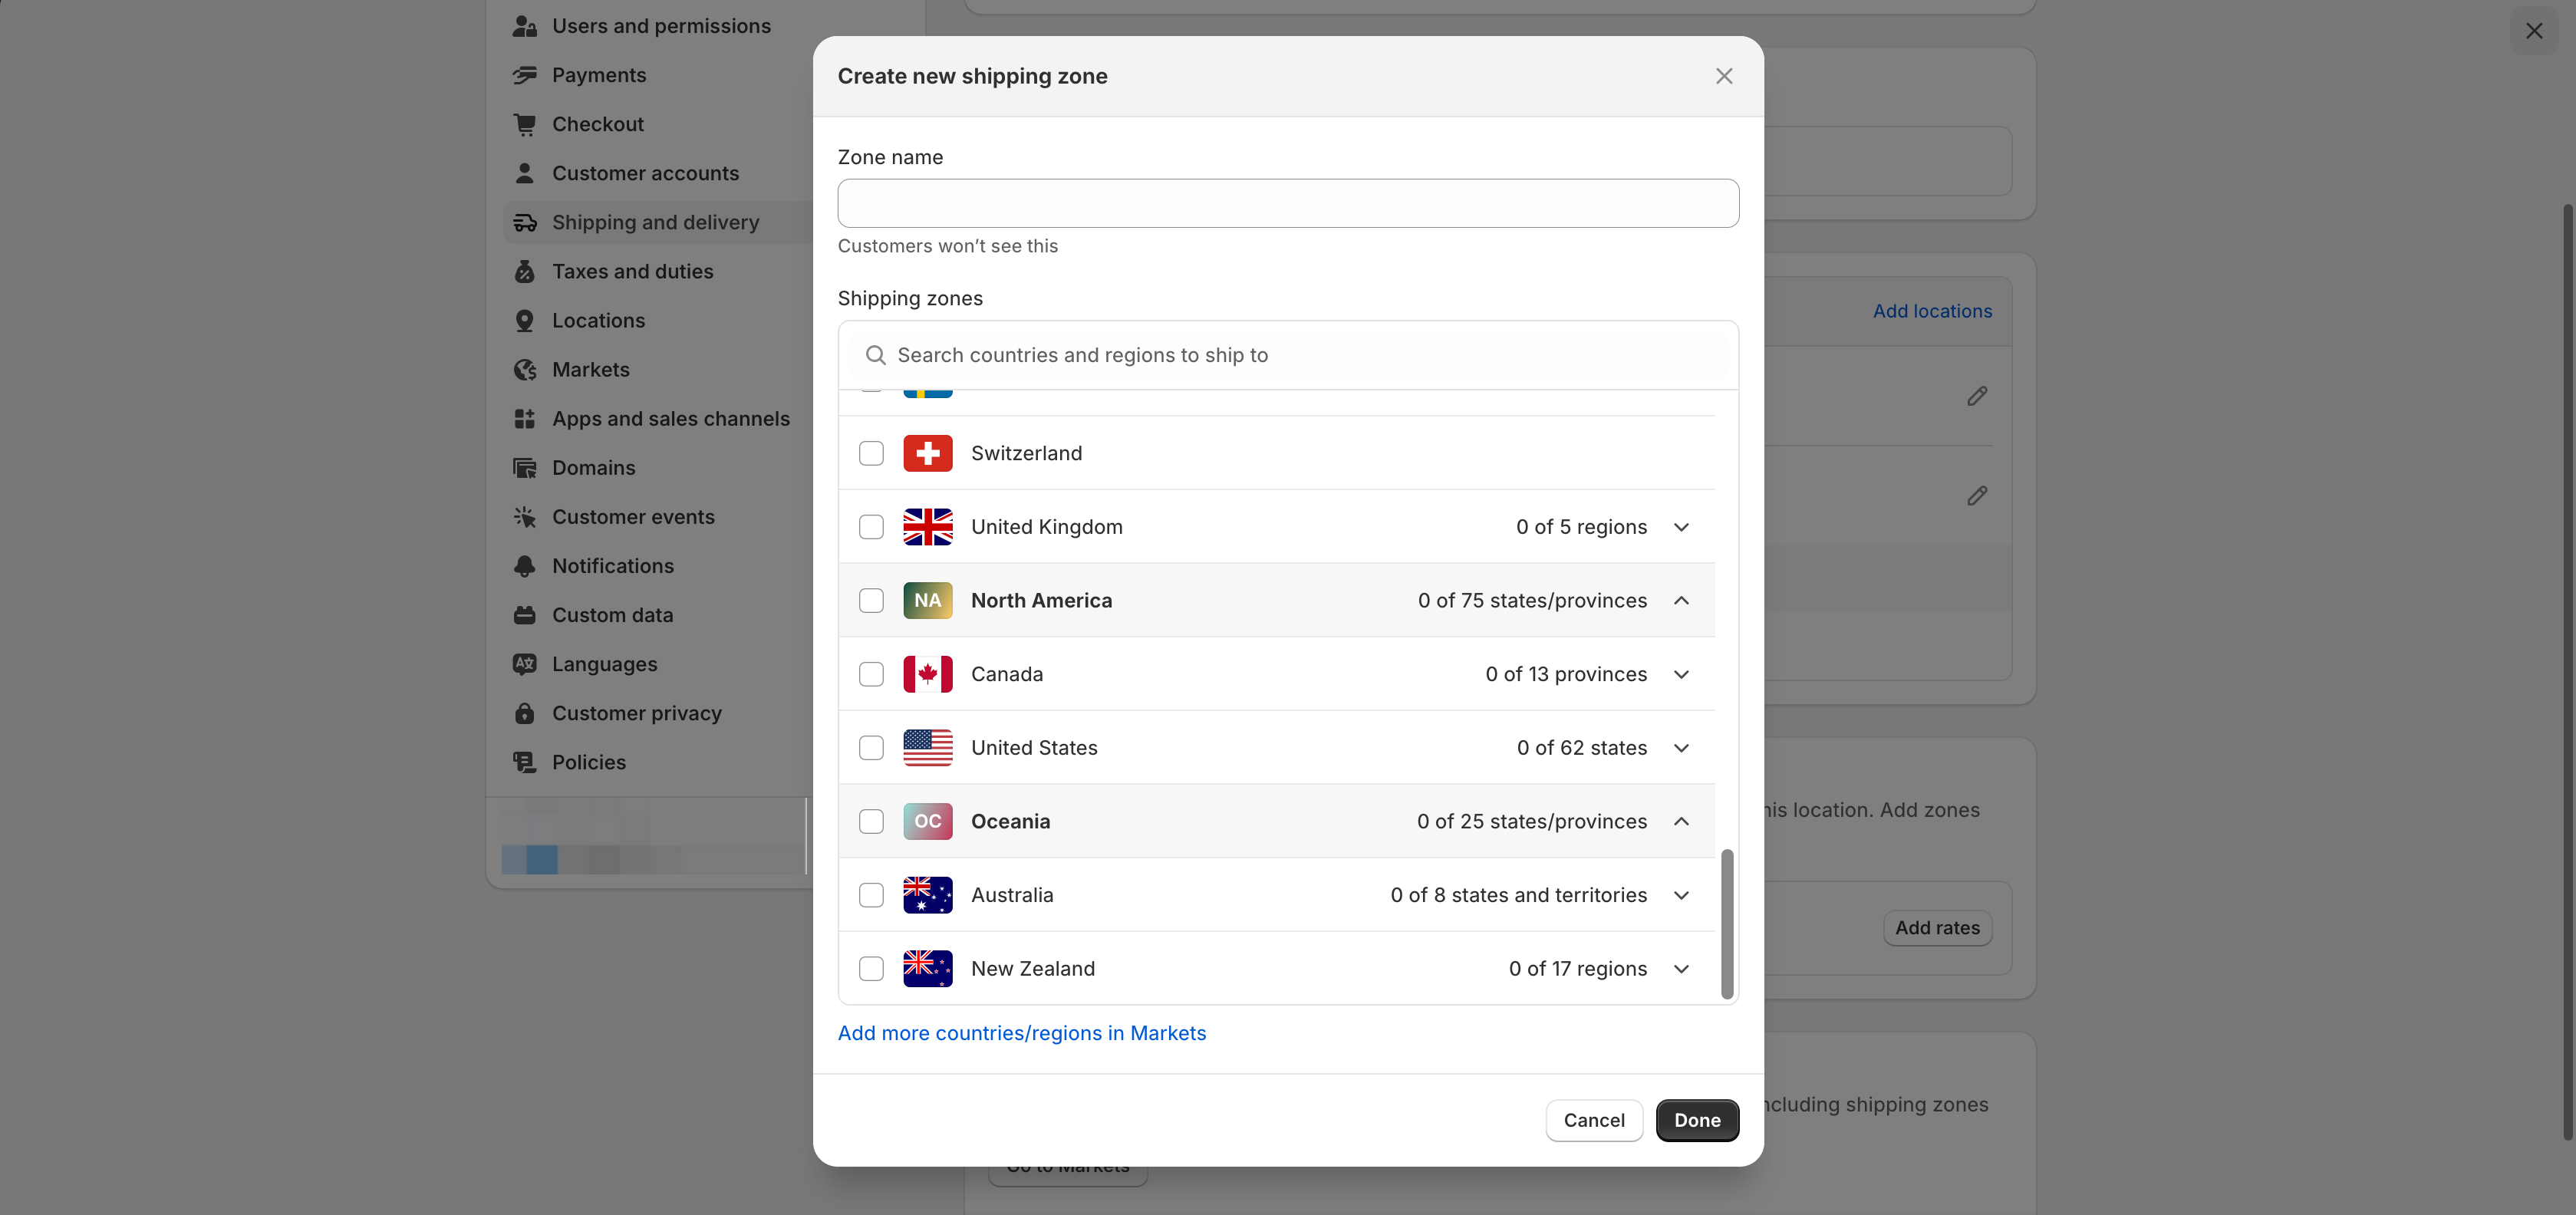
- Enter a name for the shipping zone. Select the countries and regions that you want to be in the zone. Click Done.
- Add any rates you want for the zone, then click Save.

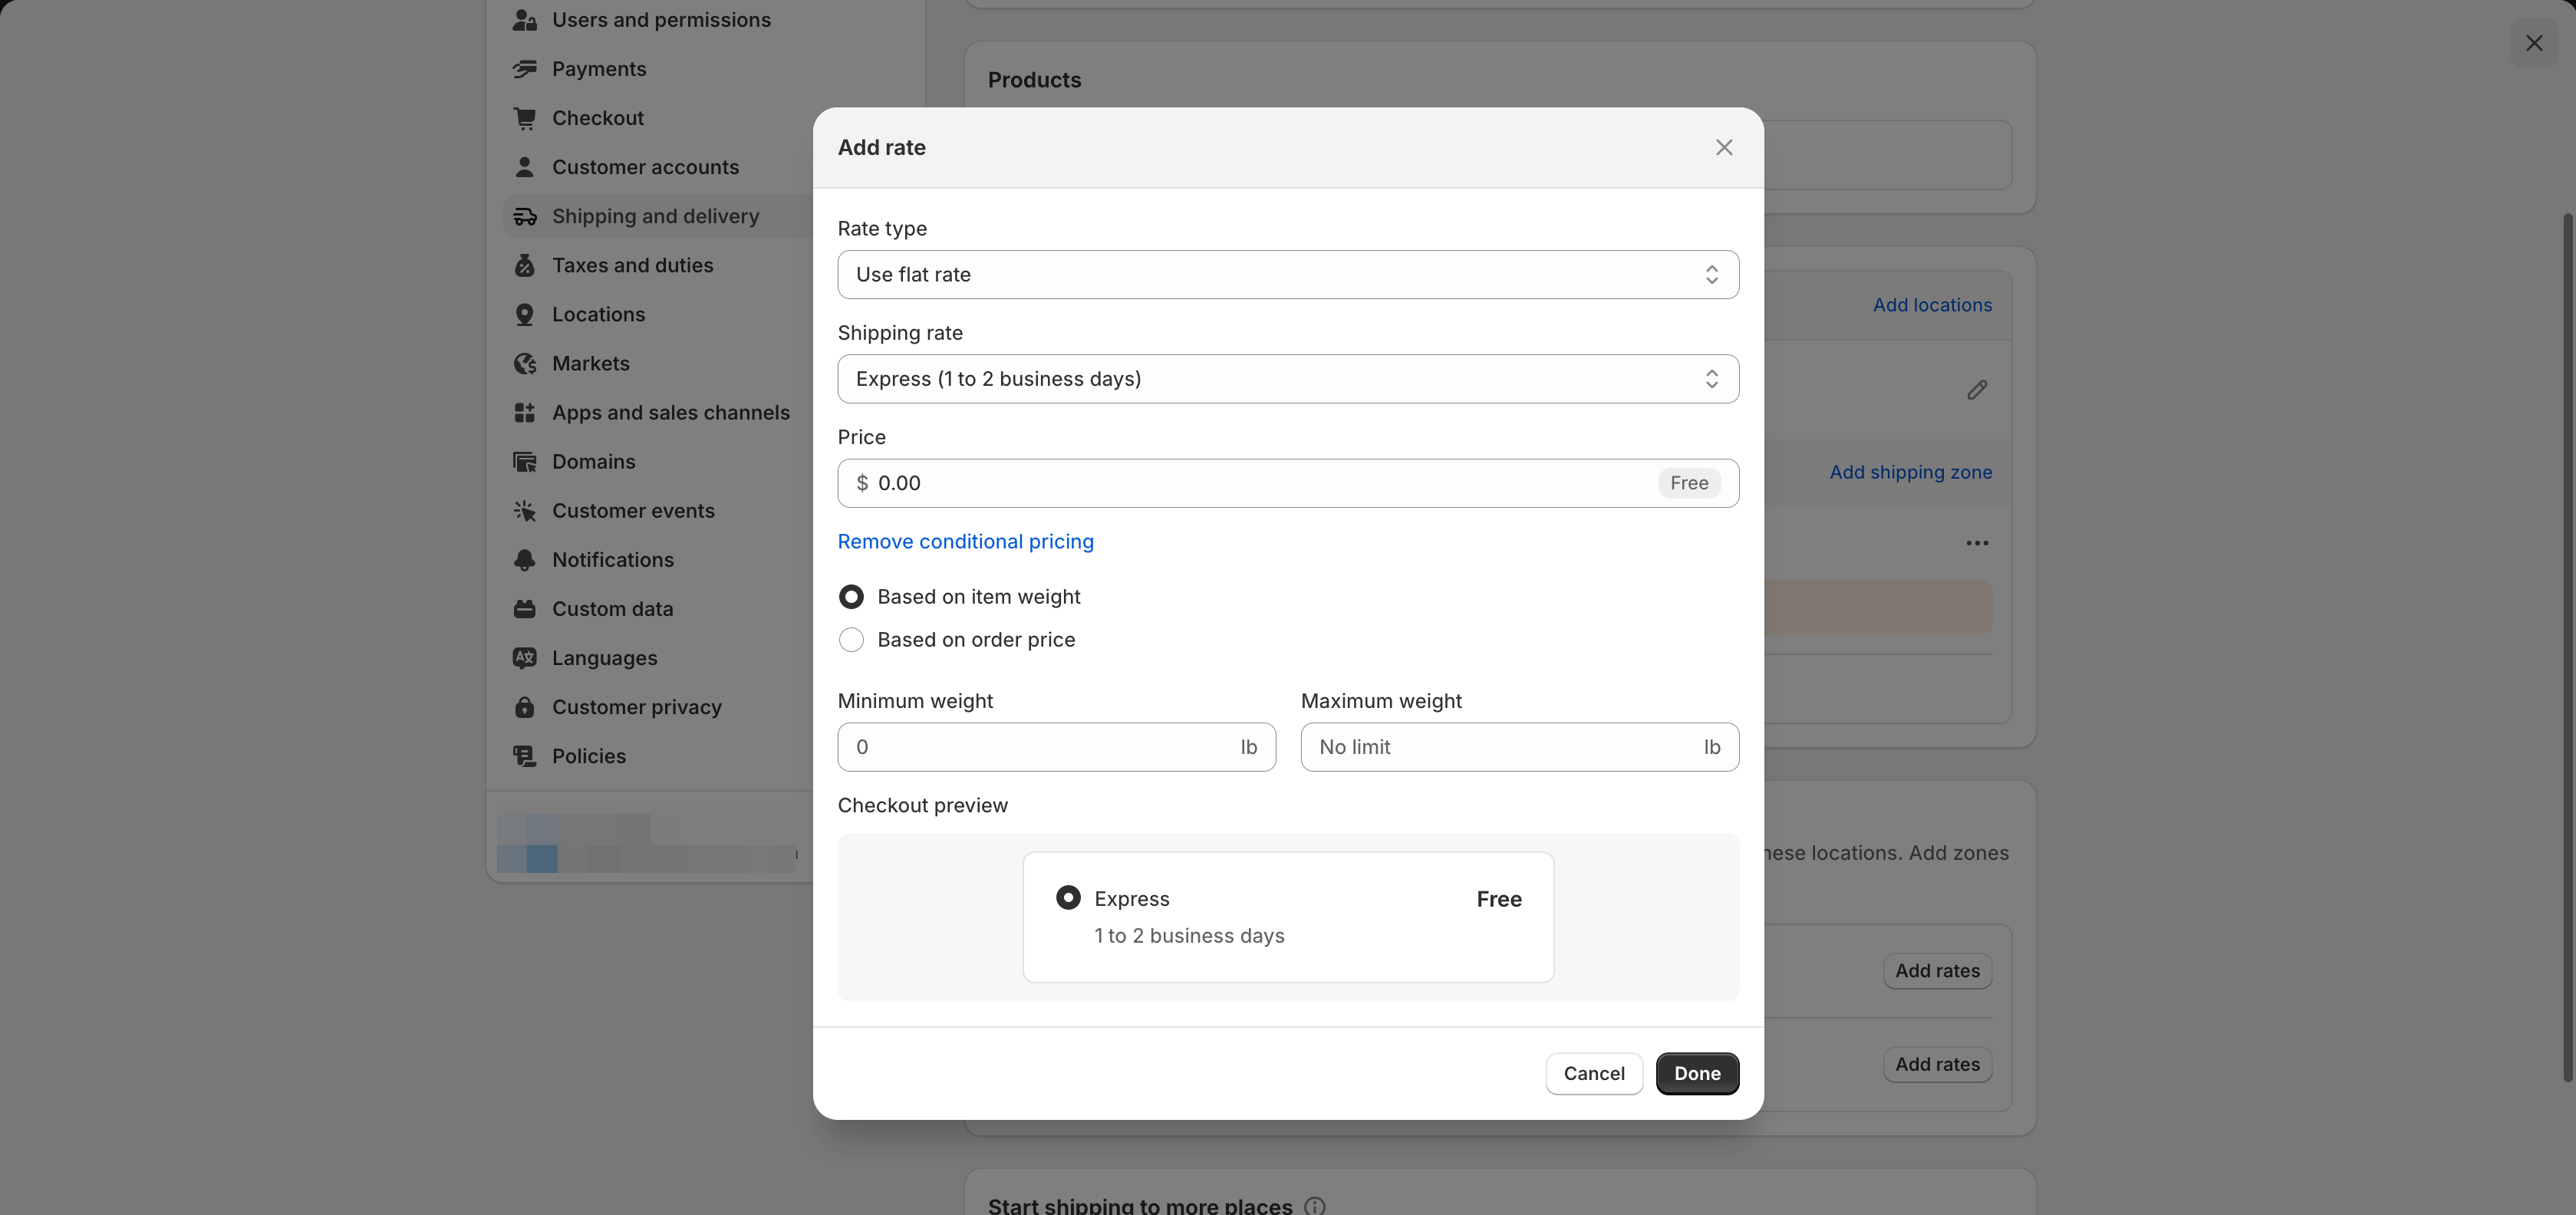
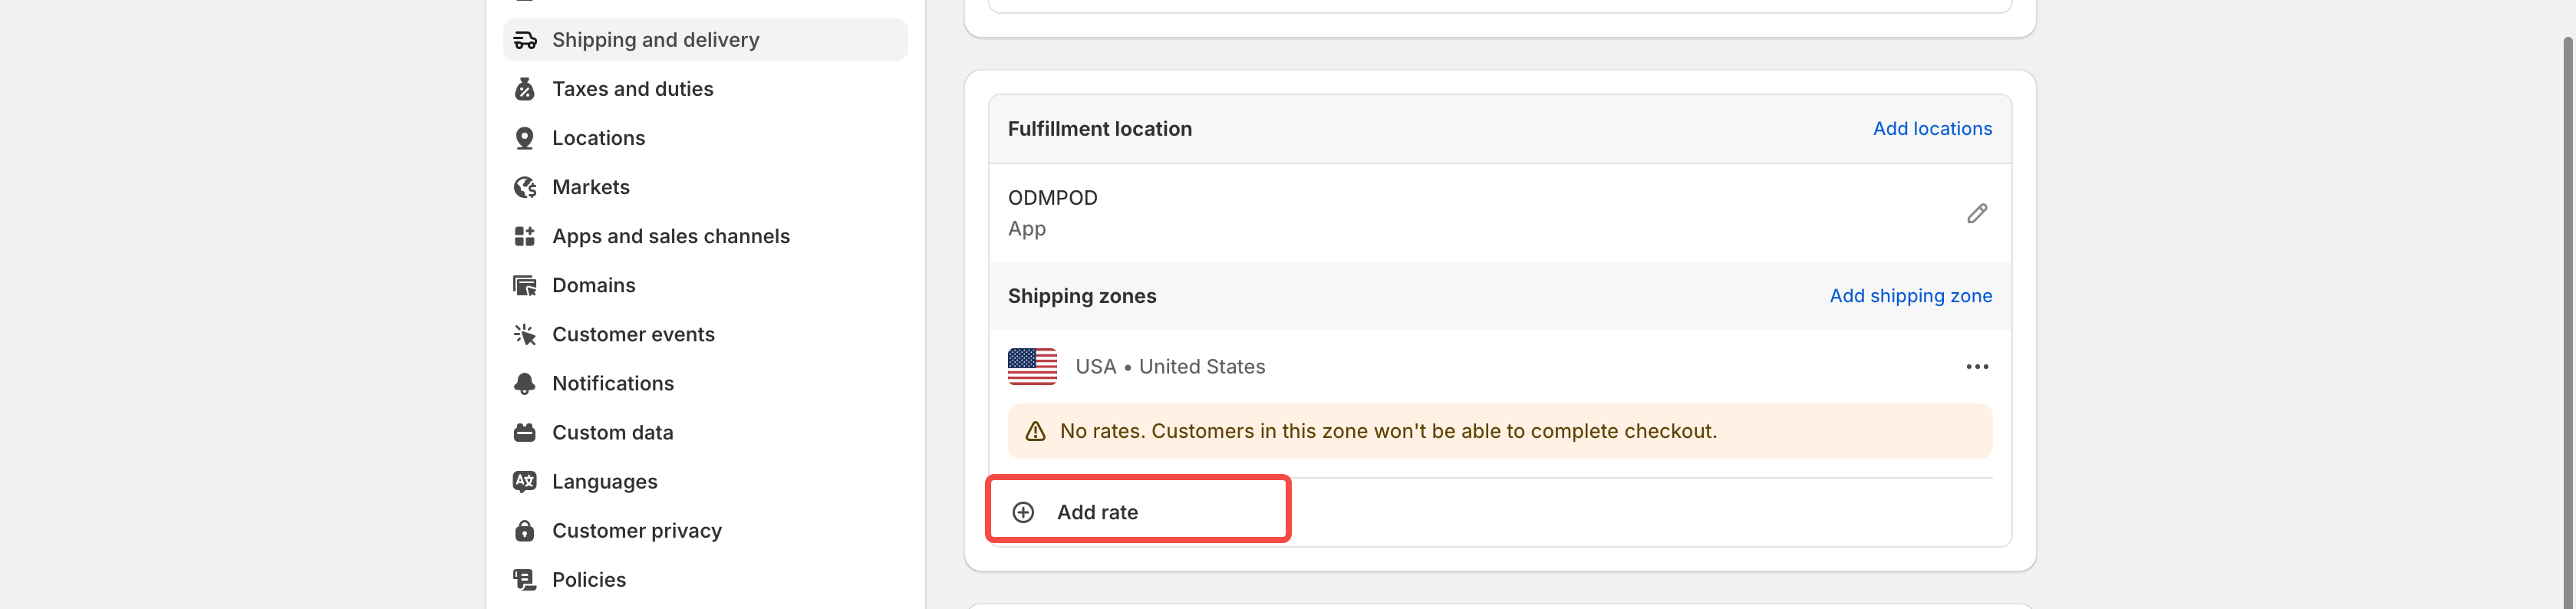
🔧 Step 4: Create flat shipping rates
- Click Add rate next to a shipping zone
- Enter the rate name and amount
- (Optional) Add weight or price-based conditions
- Click Done, then Save
💡 Example: Add a $10 rate for Europe, and a $5 rate for orders over $50.
🛑 Important
If your products are using Tapstitch’s automatic profiles, avoid editing those profiles manually in Shopify. Doing so may lead to incorrect rates or broken fulfillment connections.
Was this article helpful?
54 found this helpful