How to Publish and Update Products in Your Online Store with Tapstitch
September 22, 2026 · Updated
Tapstitch allows you to create a custom product, publish it to your connected online store, and update it later.
Publishing also links your store variants with the corresponding Tapstitch product and design, allowing Tapstitch to identify the correct item when an order is received.
Before You Begin
Make sure your online store is connected and active. If you have not connected a store, go to Stores in your Tapstitch dashboard and complete the connection first.
How to Publish a Product
Step 1: Choose a Product
Go to Catalog, browse the available products, and select the product you want to customize.
Step 2: Create Your Design
- Click Design Now to open the design tool.
- Upload or create your artwork, position it within the supported print area, and review the result. When finished, click Publish.
Step 3: Select Your Store
In the Select Store window, choose the store where you want to publish the product.
Step 4: Review the Product Details
On the Detail page, review or update:
- Product title and description
- Size guide
- Mockups
- Shipping profile
- Tags and collections
- Product visibility
When everything is ready, click Continue to Price.
Step 5: Set Your Retail Prices
- Enter a retail price for each variant or use the markup tool to update multiple variants.
- Review the product cost, shipping cost, and estimated profit, then click Publish.
- Keep the page open while the product is being published.
Step 6: Check the Publishing Result
Go to Products > My products and find the product.
- Published means the product has been sent to your store.
- Synced means the store variant is linked to the corresponding Tapstitch product and design.
- Not synced means the variant needs to be reviewed.
For example, this product has been published to the store:
- 6 variants synced
- 0 variants not synced
- 0 variants with fulfillment disabled
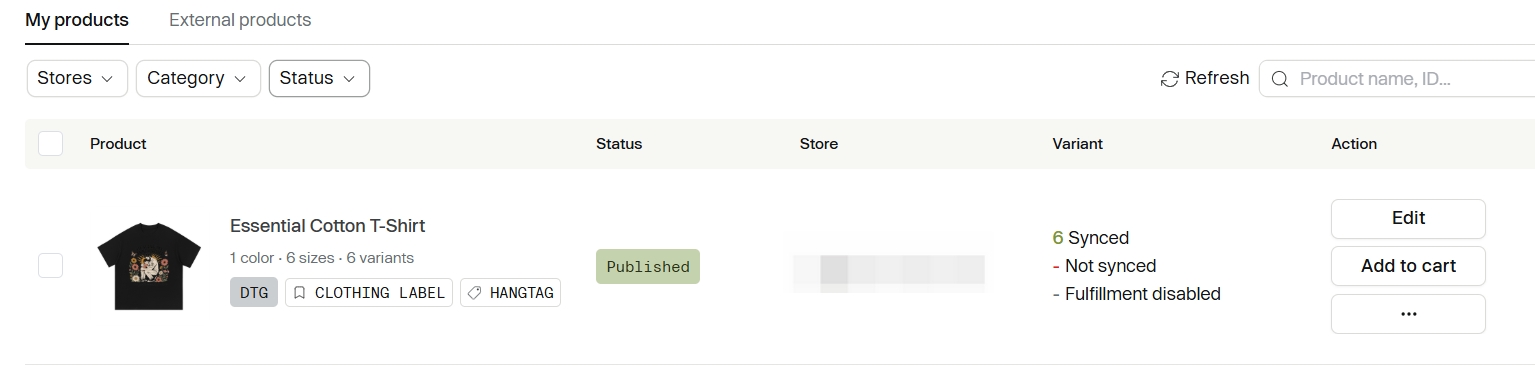
We recommend opening the product in your store to confirm that its information, images, variants, and prices are correct.
How to Edit a Published Product
You can edit products that were published through Tapstitch or linked to a Tapstitch product from the My products section.
Step 1: Open the Product
Go to Products > My products, find the product, and click Edit.
Step 2: Make Your Changes
- You can update the product description, price, mockups, shipping settings, design, options, or variant connections.
- If you edit the design, save it before returning to the product page.
Step 3: Submit the Update
- After reviewing your changes, click Submit to store to update the existing store product.
- Click Save as New only when you want to create a separate Tapstitch product instead of updating the existing one.
Step 4: Confirm the Update
- Return to Products > My products and confirm that the product shows Published. You can also open the product in your store to check the latest changes.
- Some platforms may take a few minutes to display updated information or images.
Important Information
- Product and design updates generally apply to new orders placed after the update.
- Existing orders that have entered production normally keep their original design.
- Changes made directly in your store may not automatically appear in Tapstitch.
How to Sync Orders Manually
Orders usually sync to Tapstitch automatically. If an eligible order is missing from your Tapstitch order list, you can start a manual sync.
Before you begin
Please note:
- Only paid and unfulfilled orders can be synced to Tapstitch.
- Orders placed after the product was linked to Tapstitch will normally sync automatically.
- Manual sync can also be used for orders that previously failed to sync.
Steps
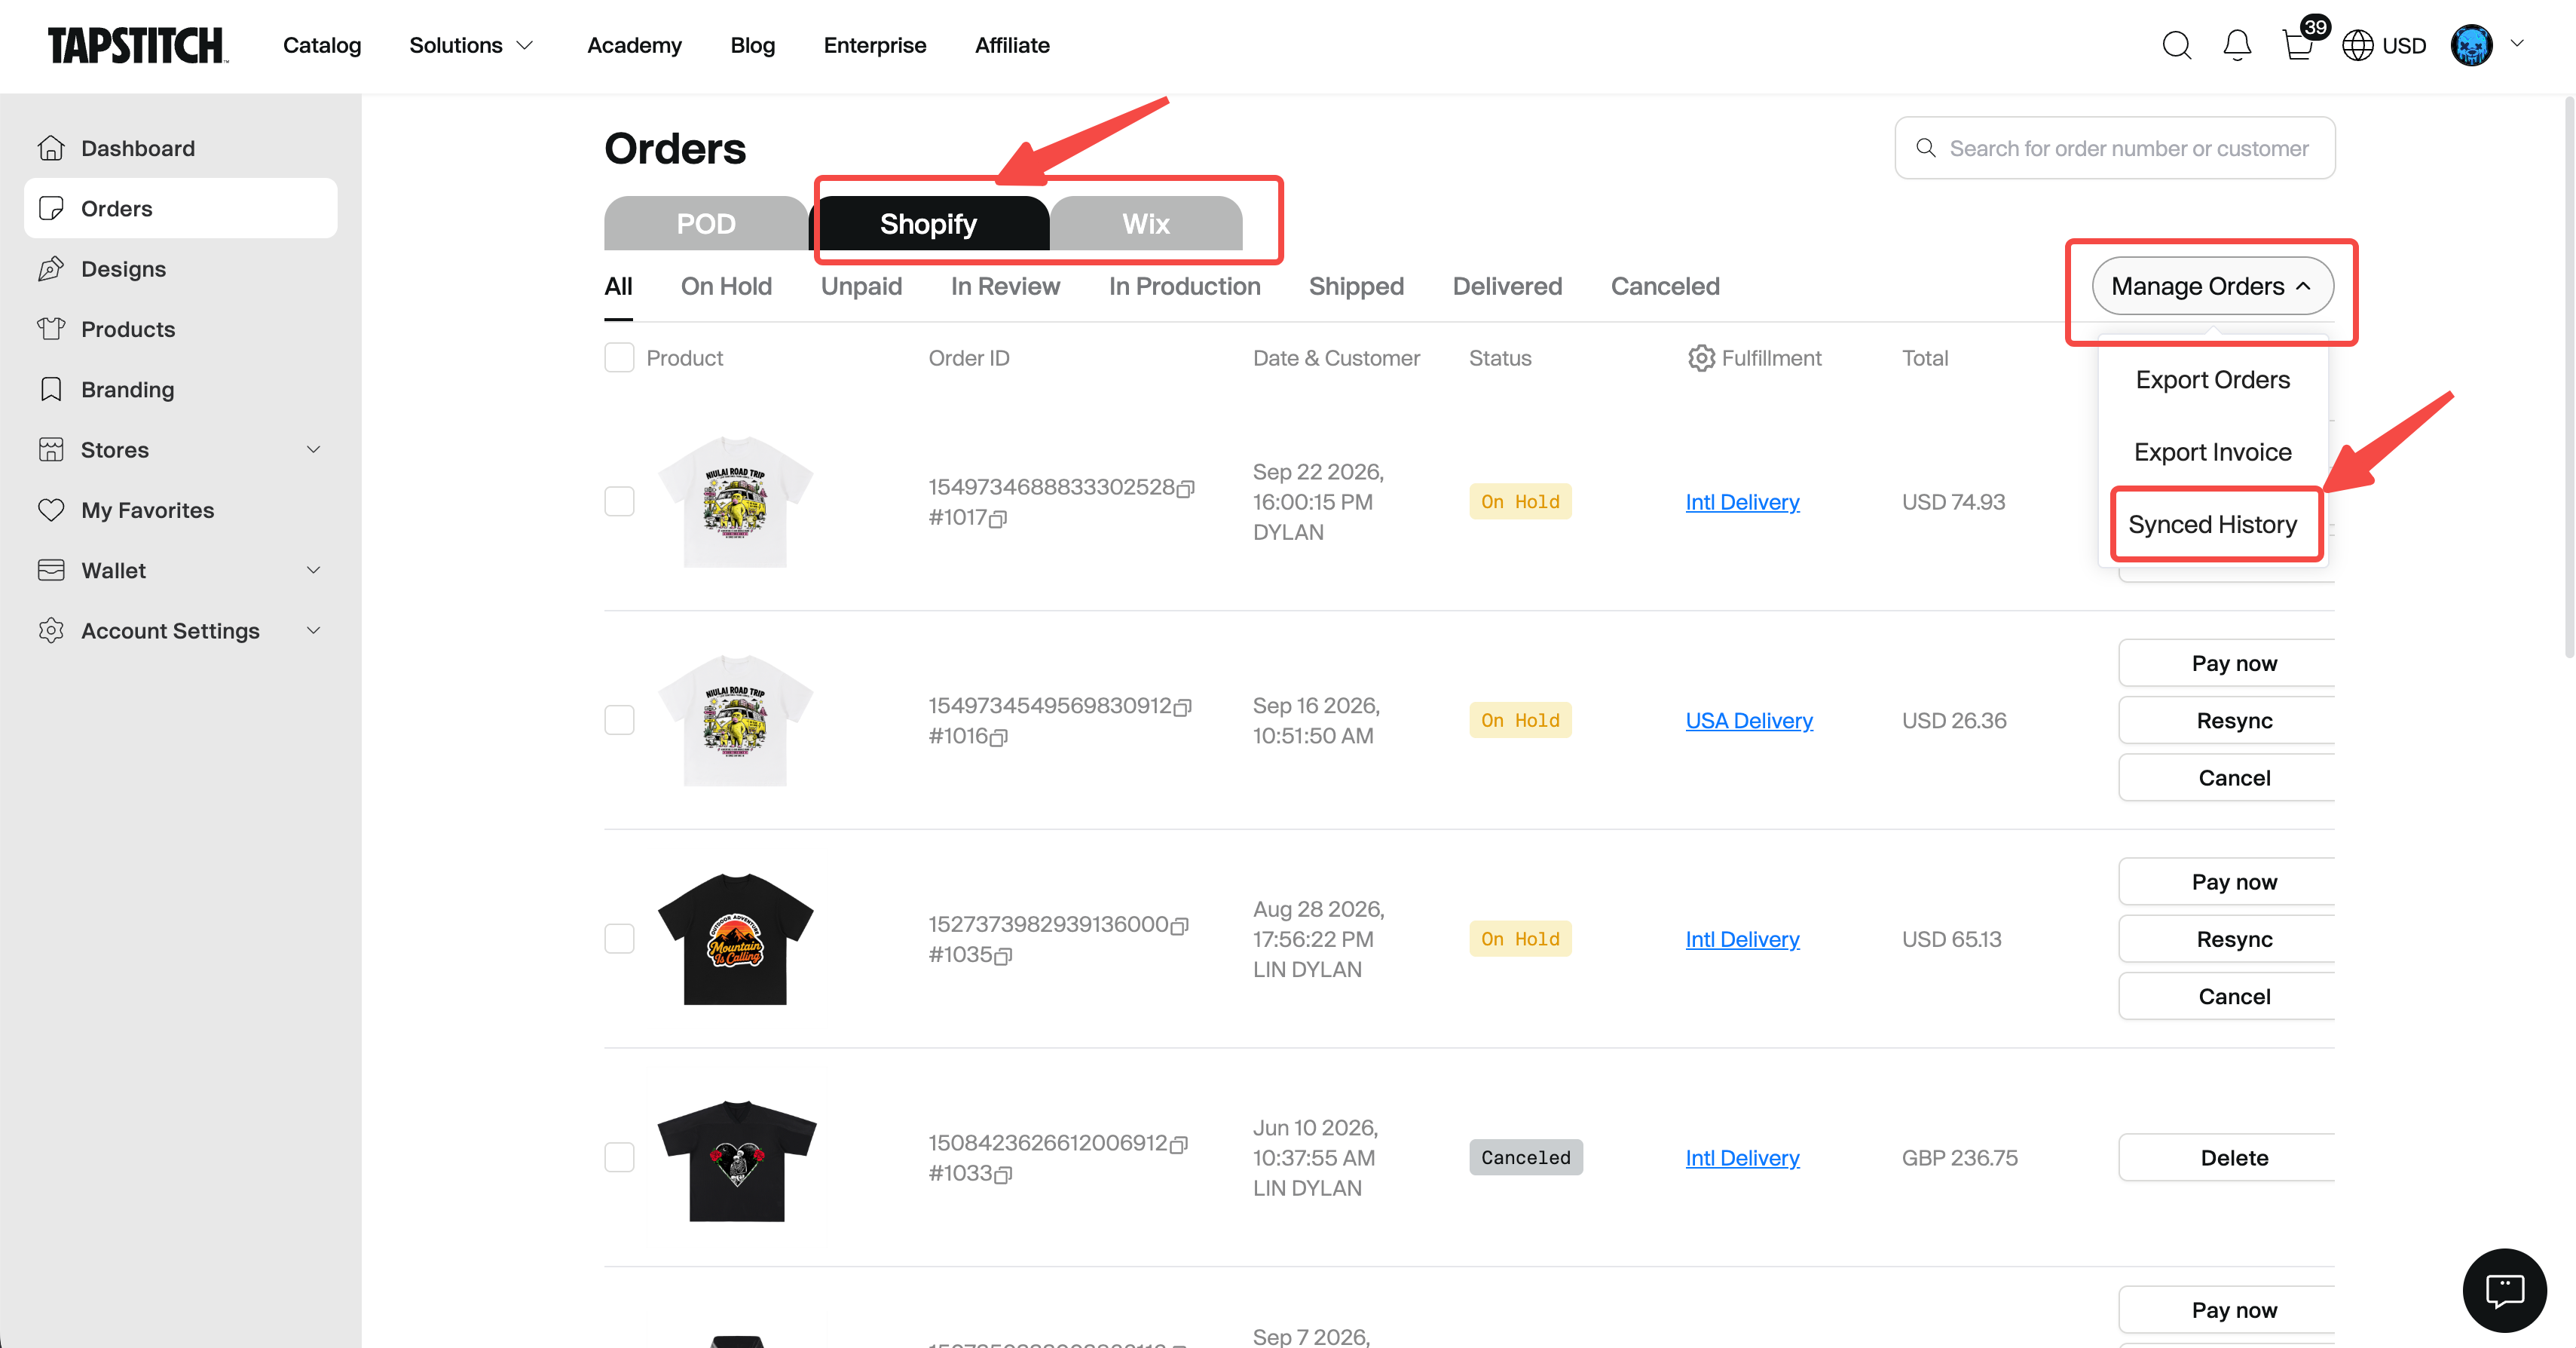
- Go to Orders from the left menu.
- Select the tab for your connected store platform, such as Shopify or Wix.
- Click Manage Orders, then select Synced History.
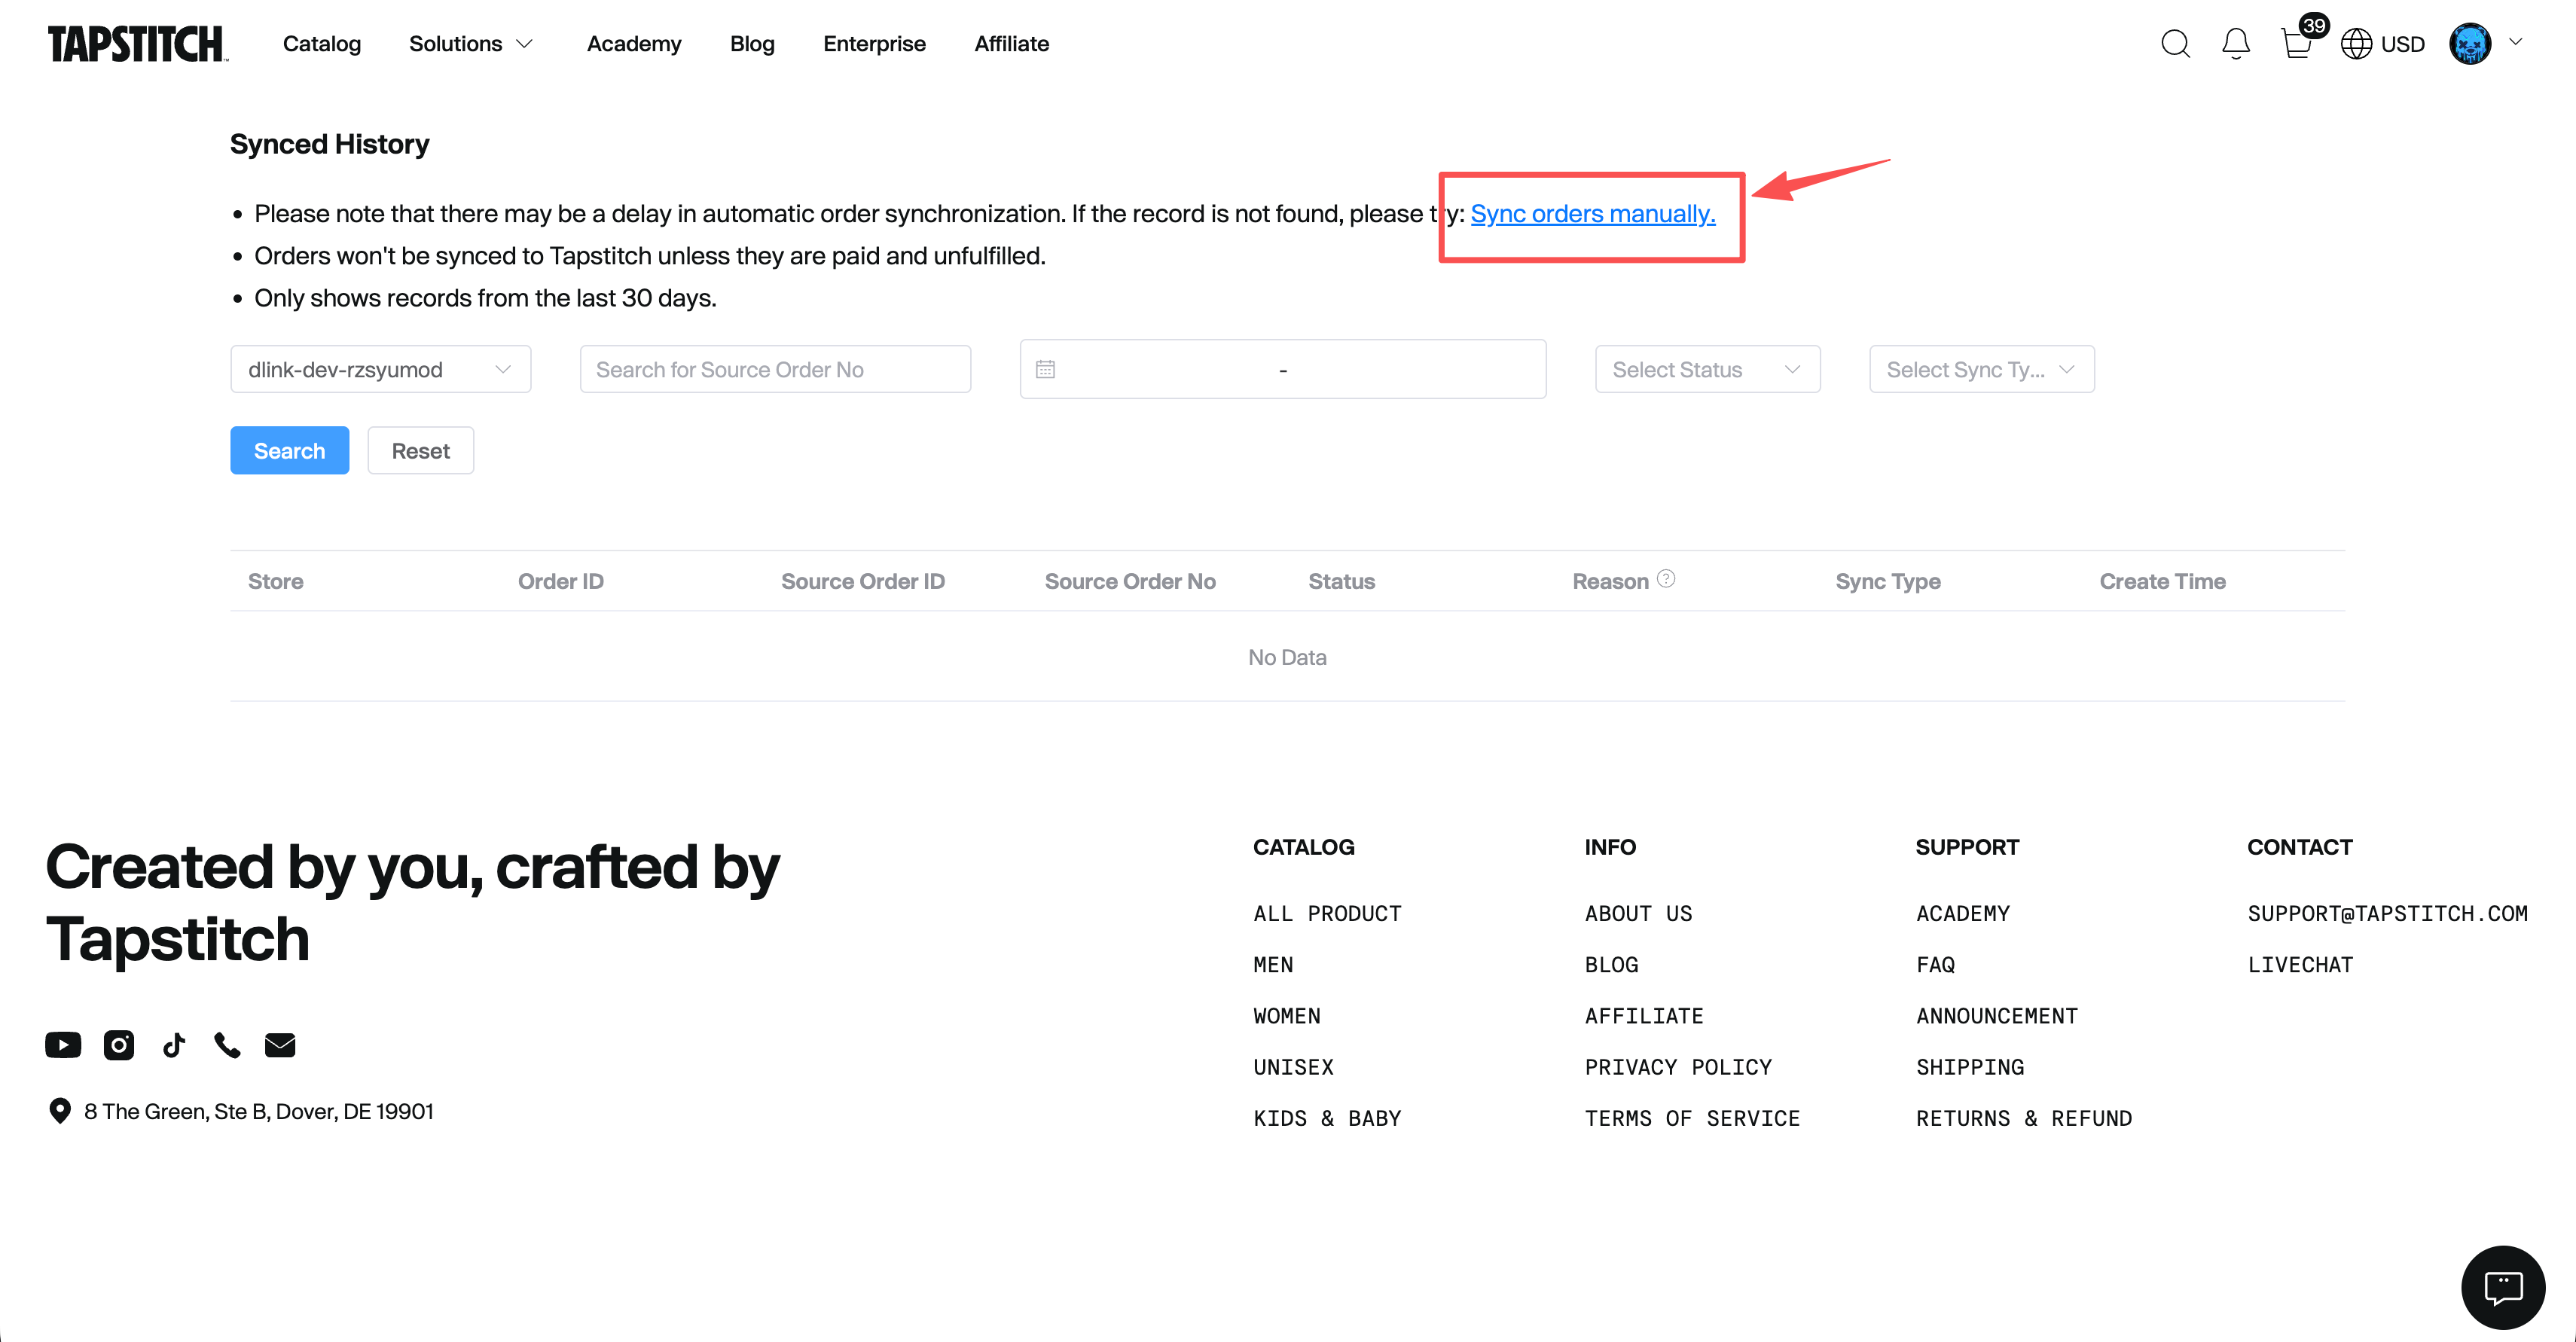
 4. On the Synced History page, click Sync orders manually.
 5. Select the store and date range containing the missing orders, then click Sync Now.
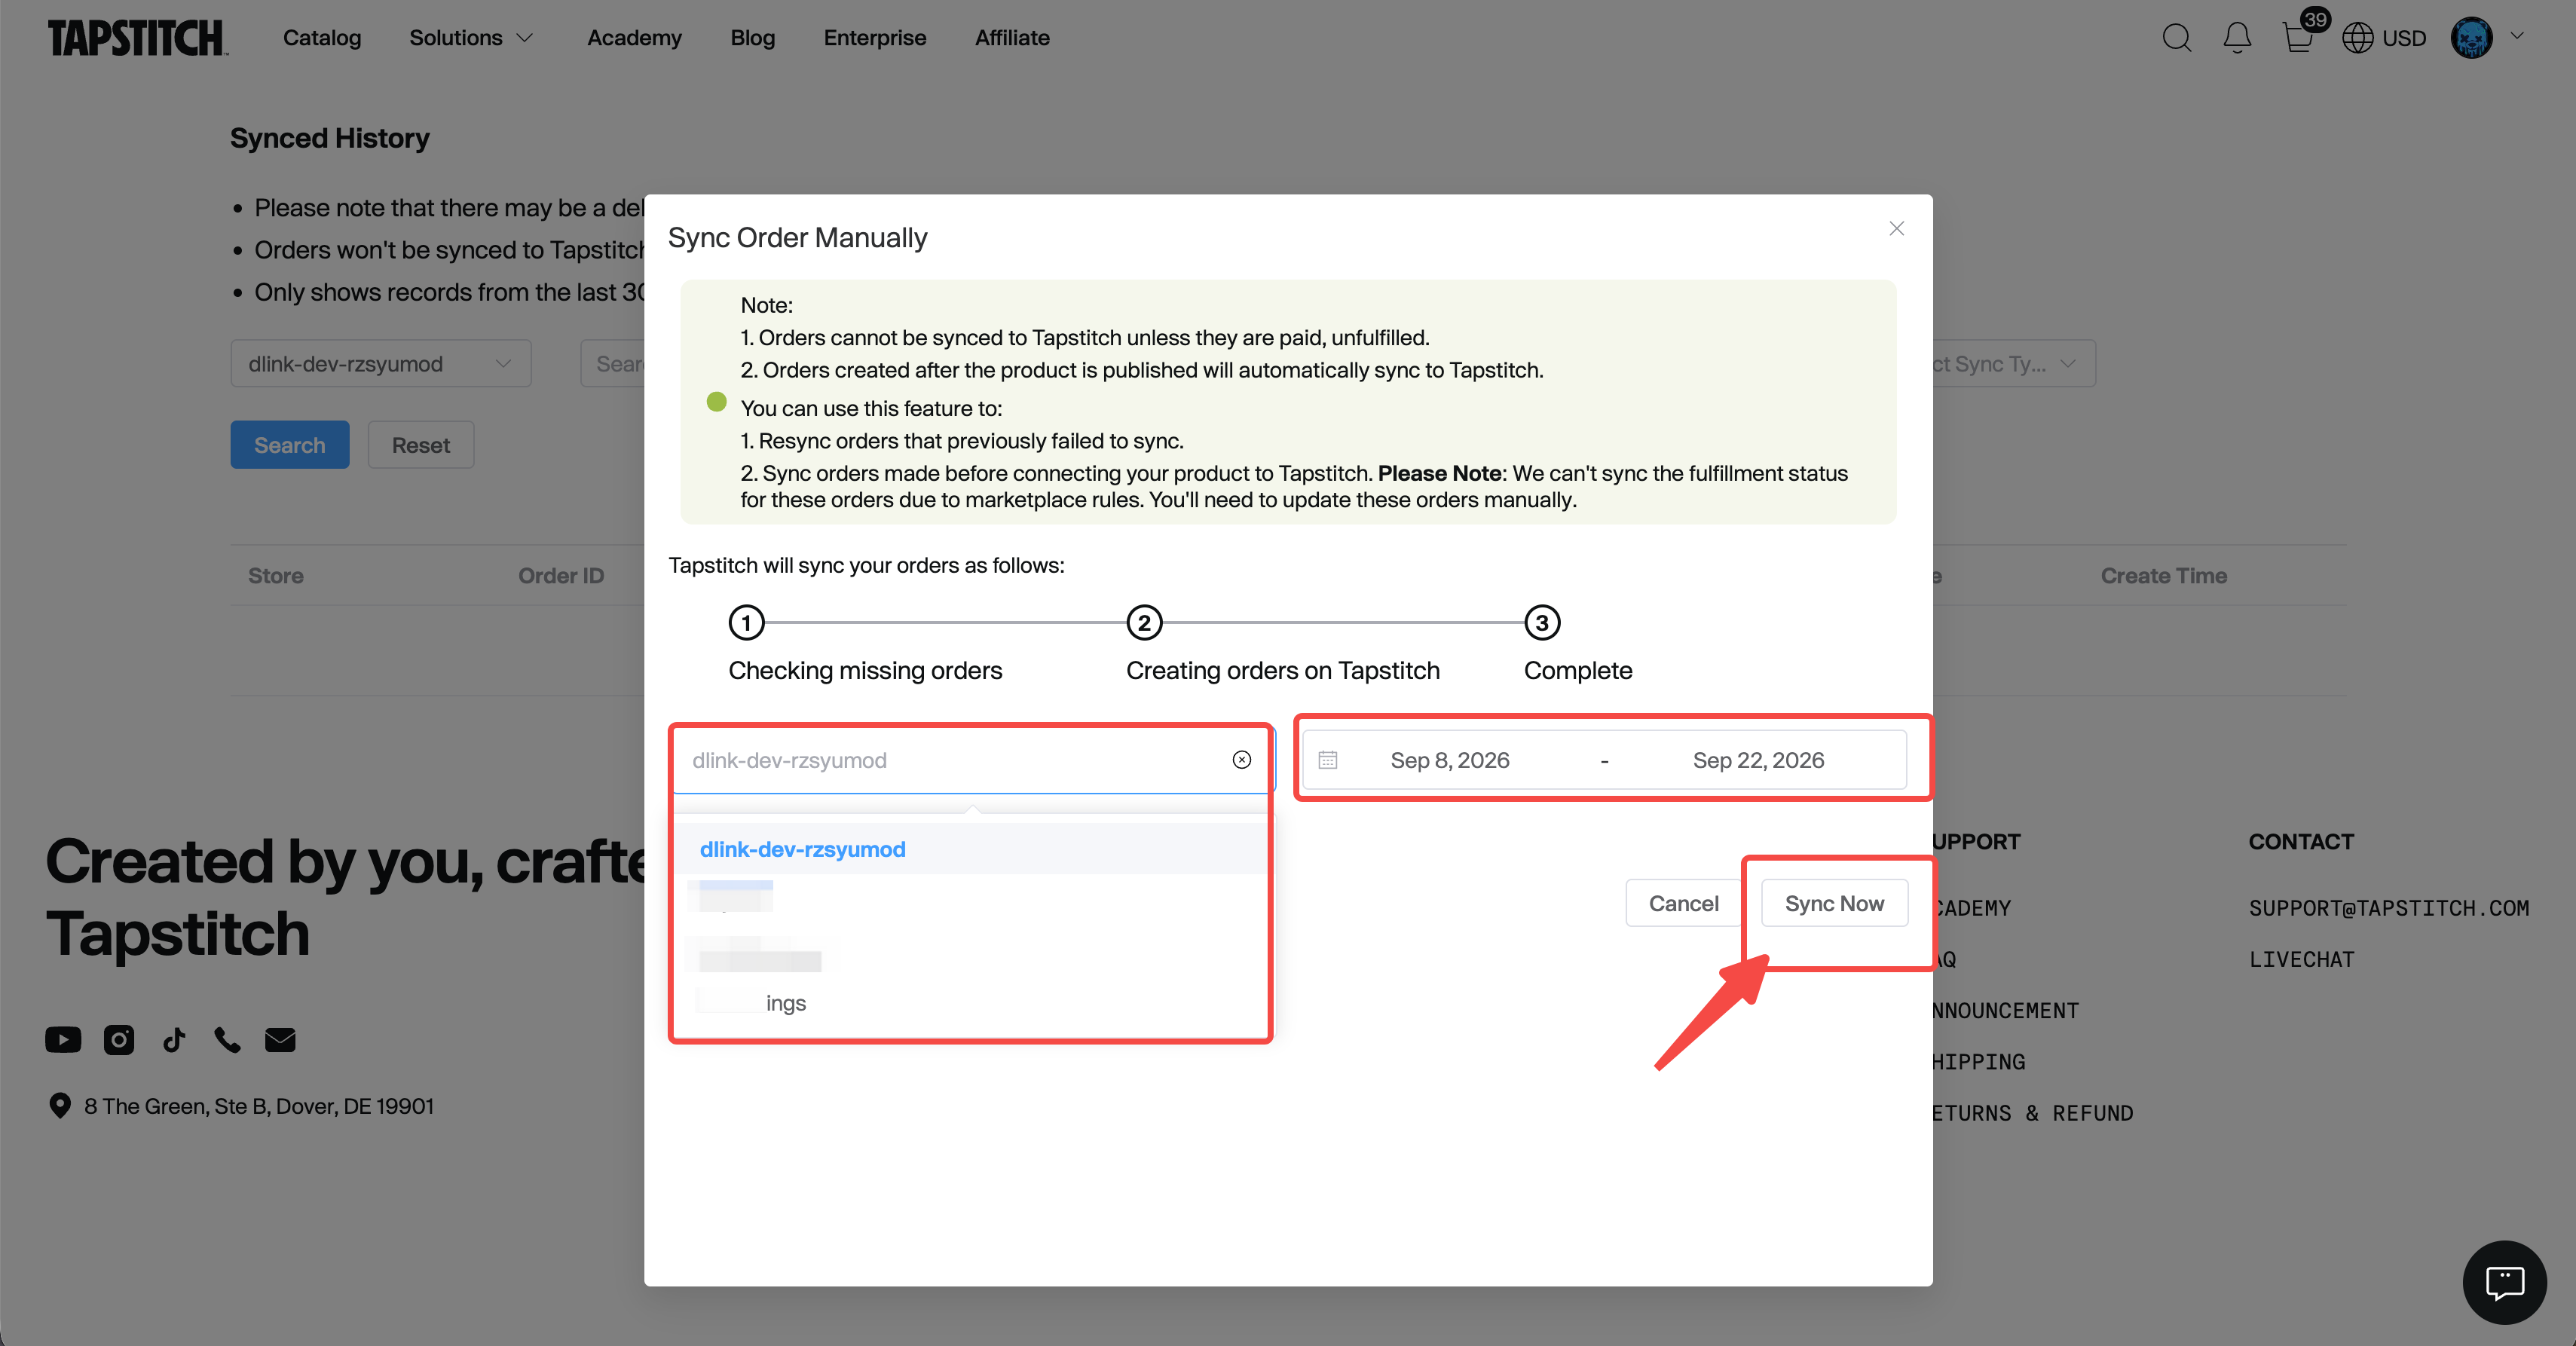 Tapstitch will check for missing orders and create eligible orders in your order list. You can leave the page while the sync is running; this will not interrupt the process.
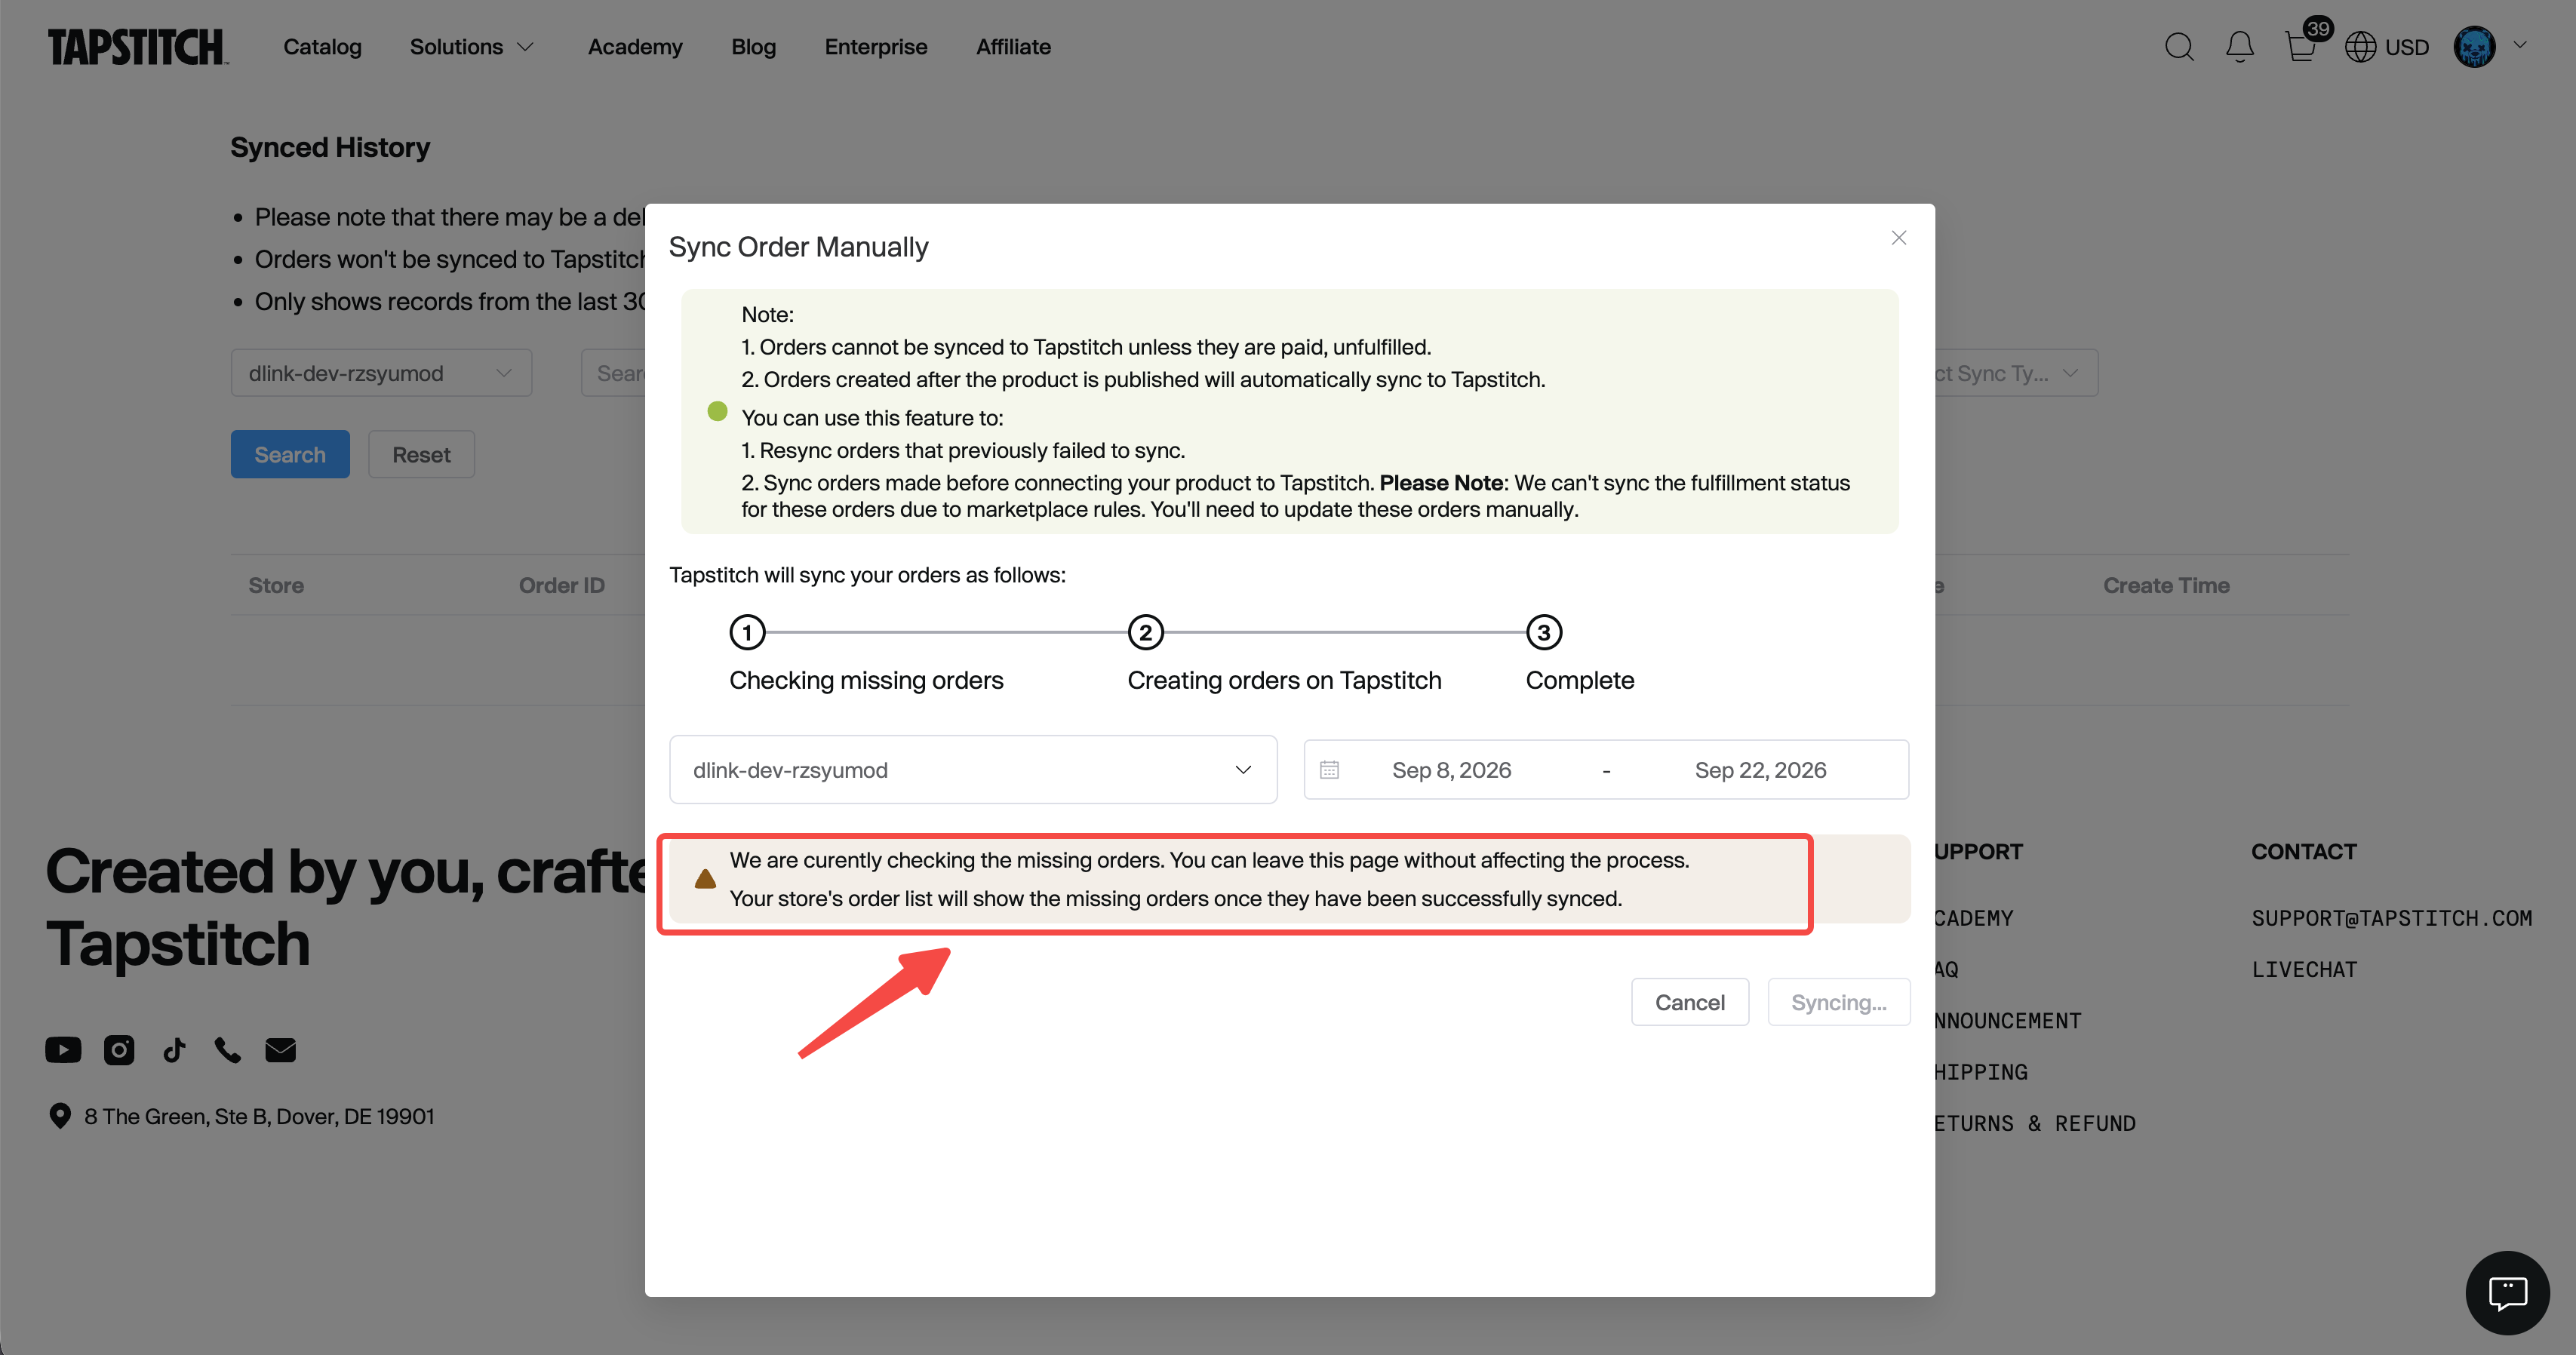
Check the sync result
- Return to Orders and select the relevant store platform to find the synced orders.
- You can also return to Manage Orders > Synced History to review synchronization records from the last 30 days.
Was this article helpful?
29 found this helpful