How to Use Batch Design
September 15, 2026 · Updated
Batch Design allows you to select and design up to 10 products at the same time, making it faster and easier to create multiple styles with a consistent look. You can apply the same artwork across different products, create matching sets, build collections, or customize each item individually within one design session.
What is Batch Design?
Batch Design lets you add up to 10 products from the Catalog or a product detail page and load them into the same Design Tool. Instead of opening and designing each product separately, you can manage multiple styles in one place. Batch Design is especially useful when you want to:
- Apply the same artwork to multiple products
- Create matching tops and bottoms
- Build a themed product collection
- Keep logos and brand elements consistent
- Compare how one design looks across different styles
When Should I Use Batch Design?
Apply the same artwork across multiple styles
Use Batch Design when you want to place the same logo, graphic, or slogan on products such as T-shirts, hoodies, tank tops, and sweatshirts.
Create matching sets
Design coordinated products such as:
- Tops and bottoms
- Couple outfits
- Family looks
- Team uniforms
- Sports sets
Build a collection
Quickly create multiple products under the same theme, such as:
- Holiday collections
- Event merchandise
- School merchandise
- Team merchandise
- Branded product collections
Keep branding consistent
Design Binding helps keep logos, slogans, and other brand elements consistent in size and placement across multiple garments.
Compare different styles
Preview the same artwork on several products and compare which styles work best for your design.
How to Use Batch Design
Step 1: Select Products
Go to the Catalog and select the products you want to design together.
You can add up to 10 products to one batch.
After selecting the products, click Design Batch to open them in the Design Tool.
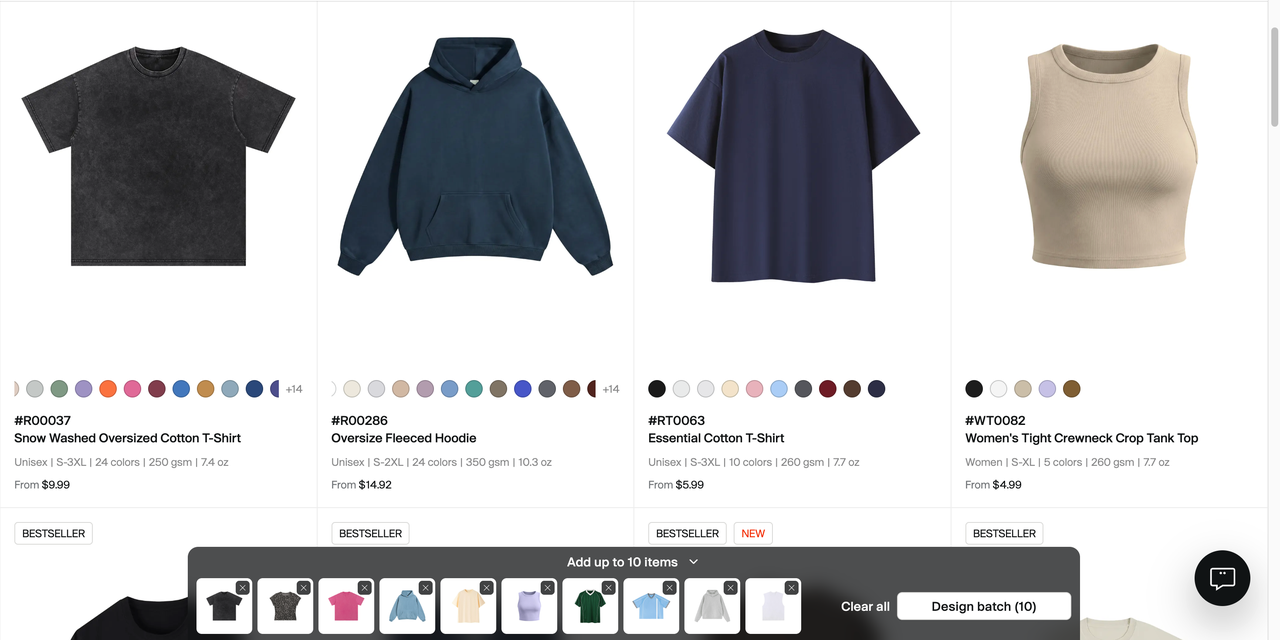
You can also add supported products to a batch from their product detail pages.
Step 2: Enter the Design Tool
All selected products will be loaded into the same Design Tool. You can switch between products in the product list and choose whether to:
- Apply the same design across multiple products
- Customize each product separately
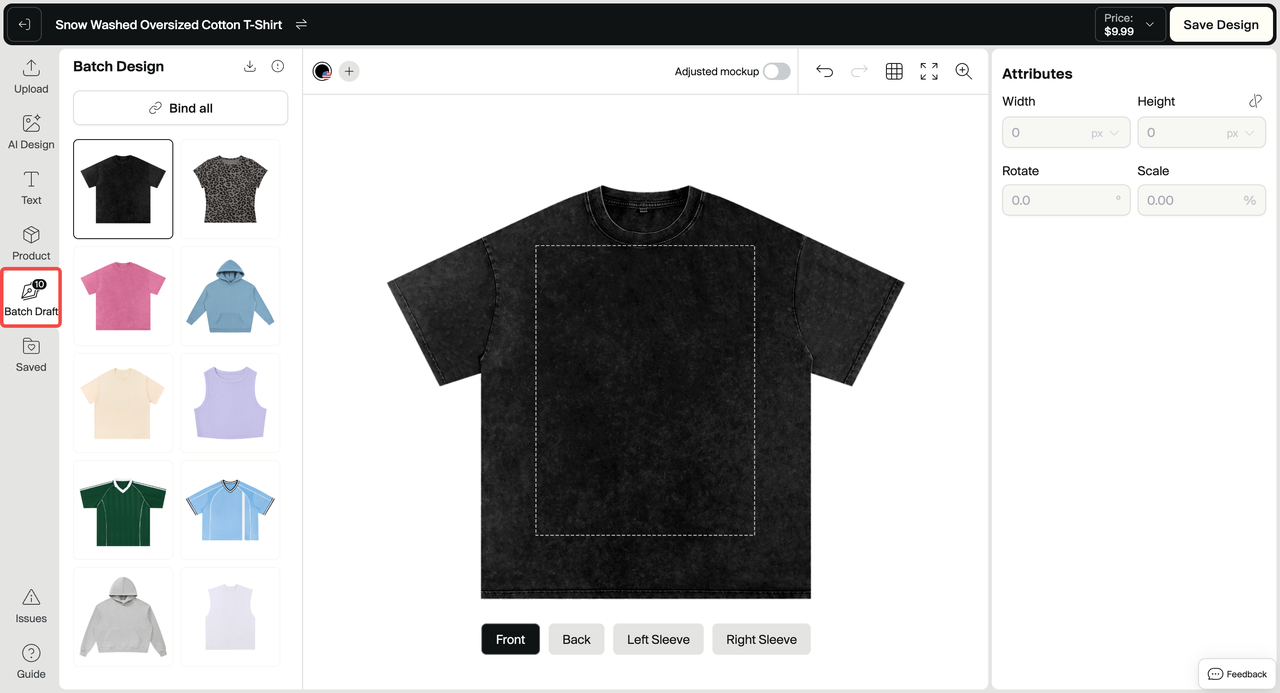
Step 3: Add Your Design
Select one of the products and add your artwork as usual. You can adjust the design's:
- Size
- Position
- Placement
- Other available design settings
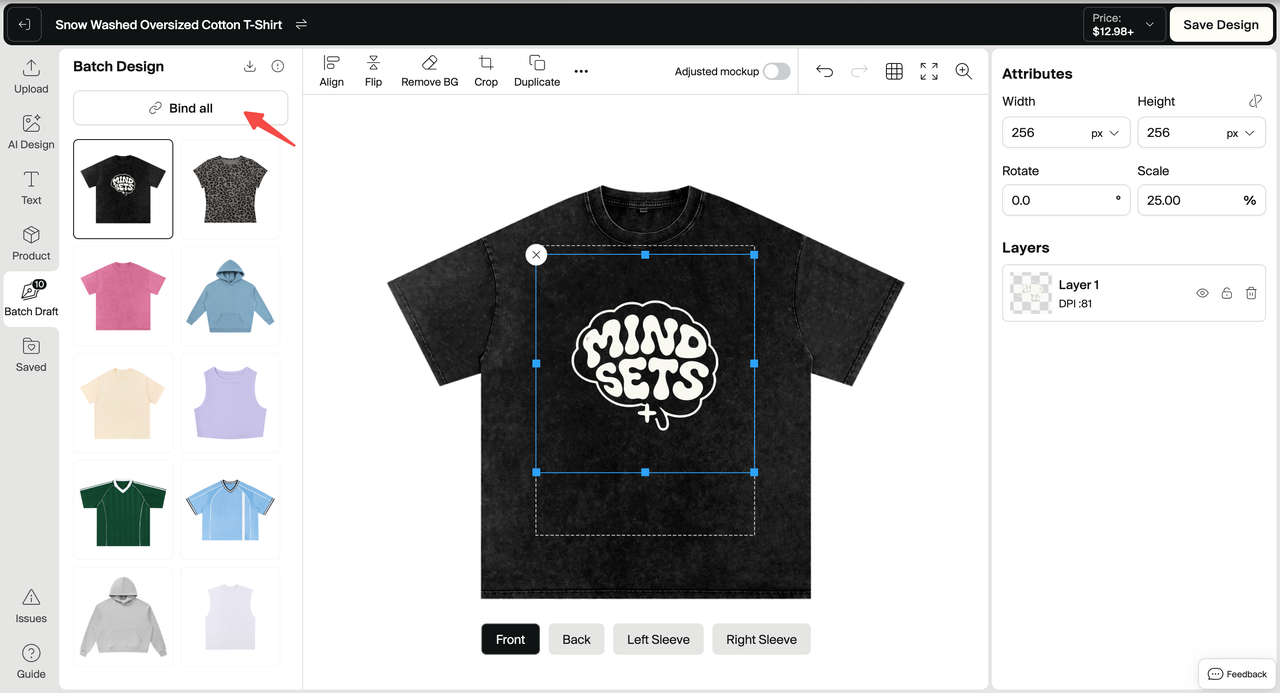
After completing the design on one product, you can use Design Binding to apply it to other products in the batch.
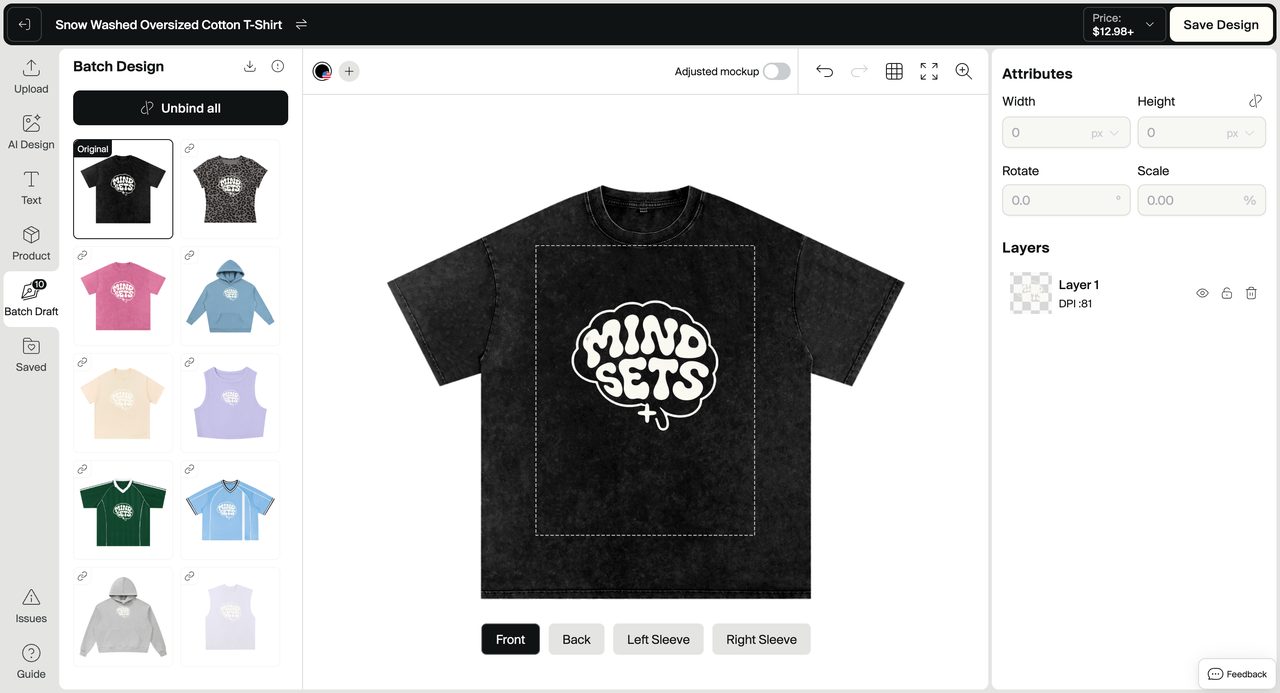
Step 4: Bind Products
Click Bind to enable Design Binding. When products are bound, supported design actions made on the current product will be synchronized across all bound products. Design Binding is useful for:
- Adding the same logo to multiple products
- Applying one design image across several styles
- Keeping the design size and placement consistent
- Duplicating a completed design onto other products
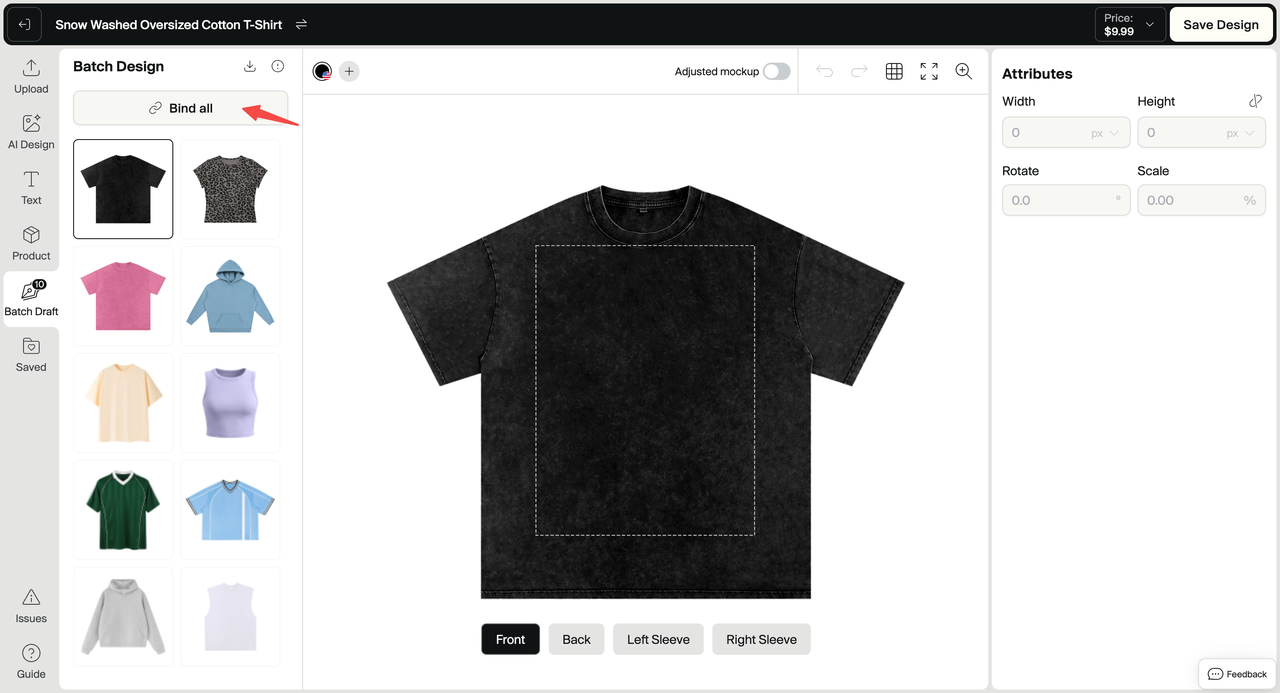
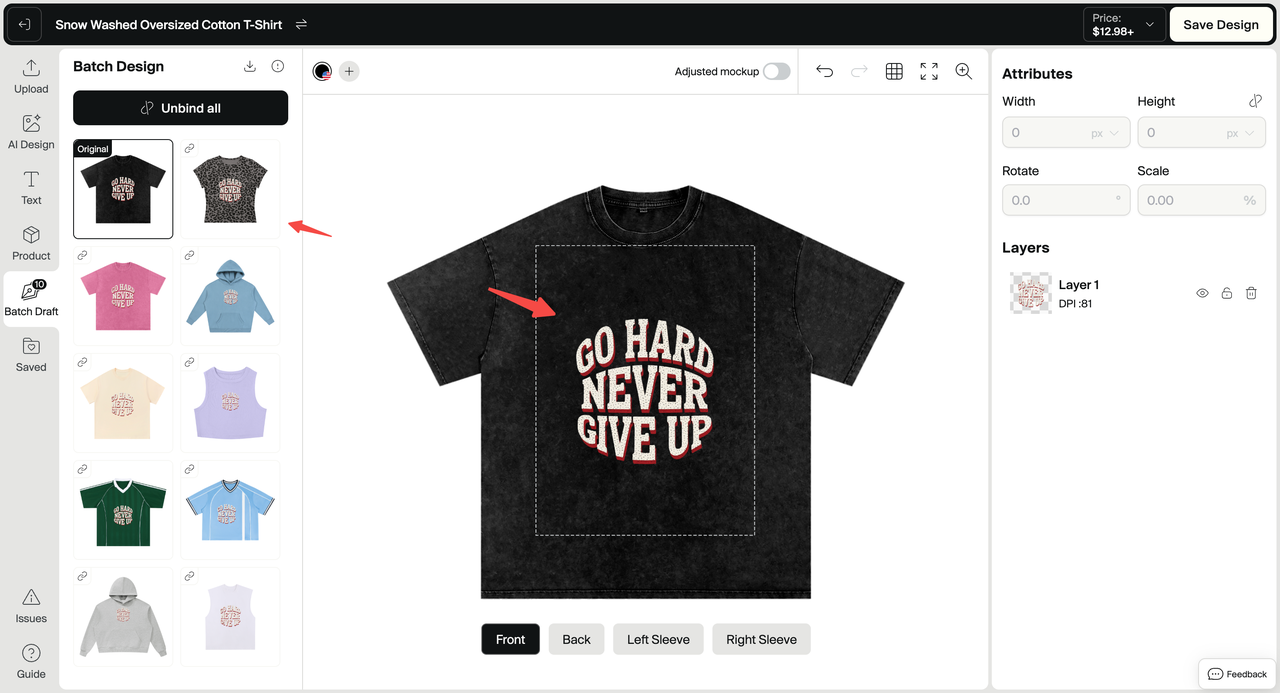
Review each product after binding. Product shapes and printable areas may differ, so the design may need additional adjustments on some styles.
Step 5: Duplicate a Design Across Products
You can complete the design on one product first and then bind the remaining products. The design will automatically be applied to the other bound products, helping you avoid recreating the same layout repeatedly. After duplication, switch between the products to review how the design appears on each one.
Step 6: Unbind Products for Individual Editing
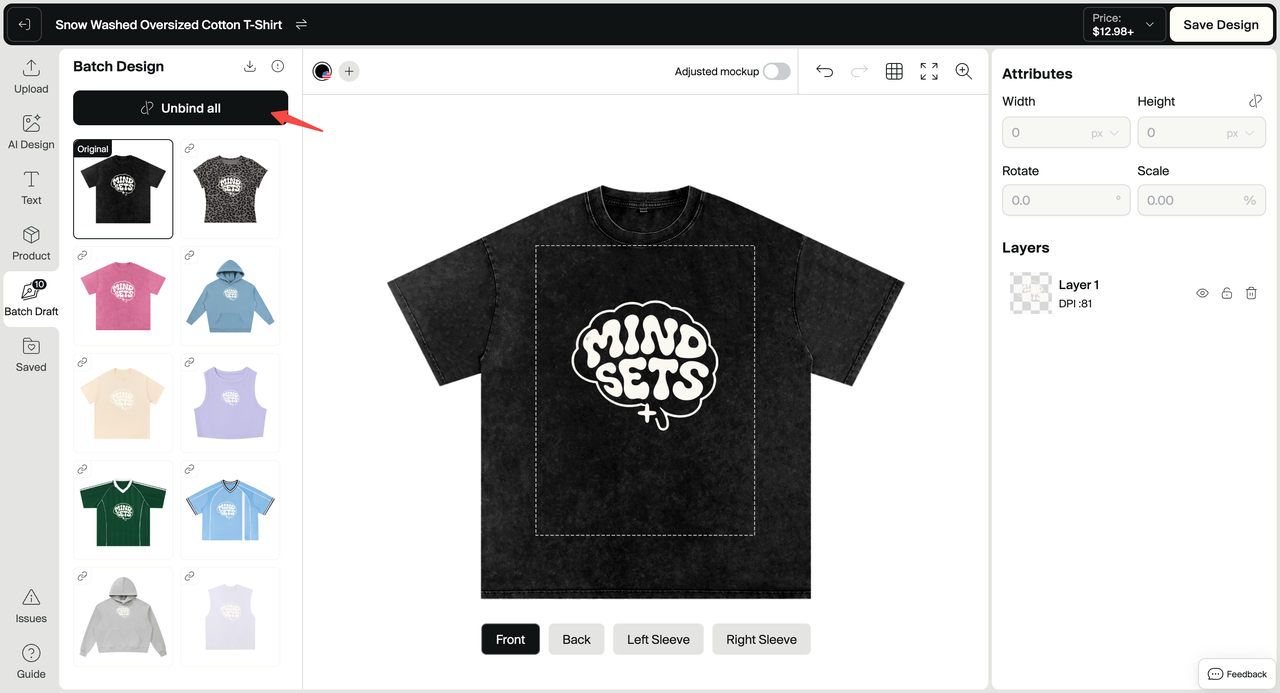
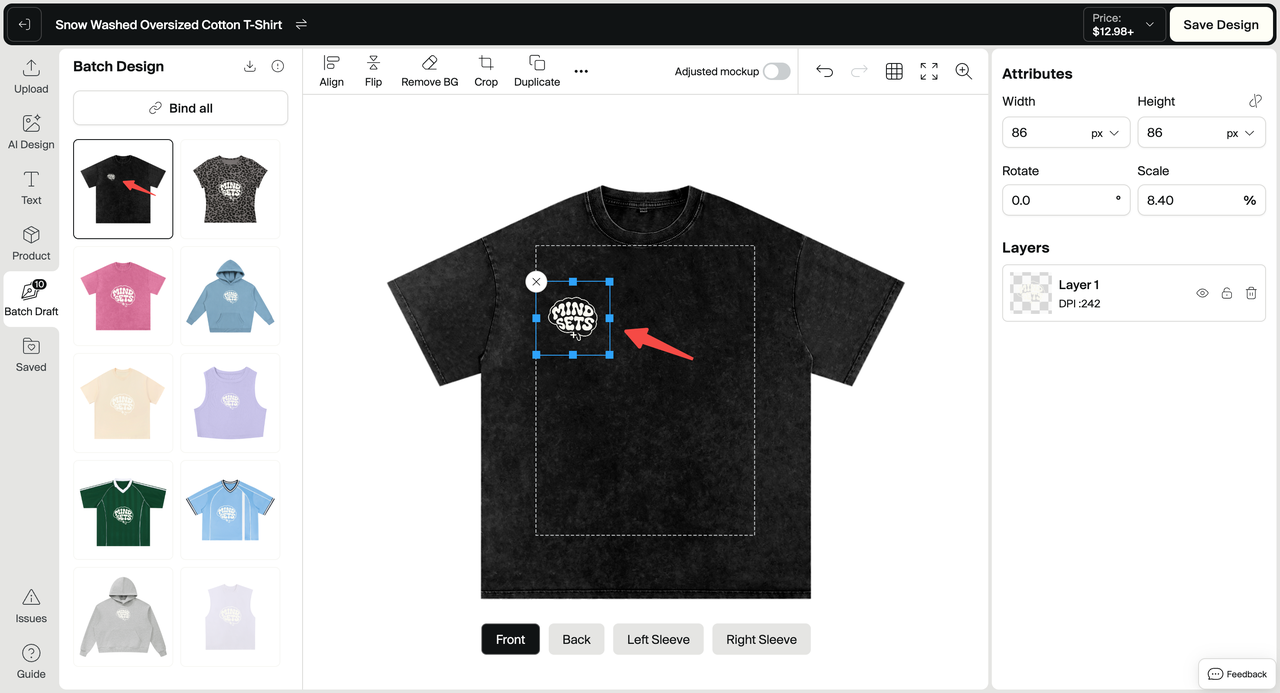
When you need to customize a specific product separately, click Unbind or Unbind All. After unbinding, changes made to one product will no longer affect the other products. You can then adjust each product's:
- Artwork
- Size
- Position
- Placement
- Design details
Important Notes
- You can add up to 10 products to one Batch Design session.
- Bound products share supported design changes.
- Changes made after unbinding will only apply to the selected product.
- Printable areas and garment proportions may vary between products.
- Always review each product mockup before saving your designs.
Frequently Asked Questions
1.How many products can I design at once?
You can select up to 10 products in one Batch Design session.
2.Can I use different designs on each product?
Yes. Unbind the products, then edit each one individually.
3.What happens when products are bound?
Supported design changes made on the current product are synchronized to all other bound products.
4.Can I bind products after finishing one design?
Yes. You can design one product first and then bind other products to apply the same design to them.
5.Why does the design look slightly different on each product?
Different products may have different shapes, proportions, and printable areas. Review each product and unbind it if individual adjustments are needed.
6.Can I unbind only one product?
Where supported, you can unbind an individual item or use Unbind All to separate all products in the batch.
Need More Help?
If you have questions about Batch Design, contact Tapstitch Customer Support through Live Chat or submit a support ticket.
Was this article helpful?
37 found this helpful